Chute Side Vaccine Cooler
Vaccine Storage
Respiratory disease in cattle also known as BRD (Bovine Respiratory Disease), shipping fever or pneumonia, and costs the U.S. cattle industry over $2 billion annually (Powell 2013). Management techniques can be applied to calves before leaving the ranch of origin to reduce the incidence and industry cost of BRD. Having a good vaccination program is one step in maintaining the health of a calf all the way through the production system. A vaccine can cost more than $3.00 per head and can be rendered ineffective if not stored, handled and administered properly. Therefore, producers need to have a system in place to properly store and handle vaccines prior to administration.
Biological products should be stored with refrigeration at 35 to 45 F unless the nature of the product makes storing at a different temperature advisable (APHIS 2007). If vaccines are not stored within this temperature range, efficacy to the calf can and will be reduced.
Chute side vaccine storage is often overlooked, but with a little time and engineering, an easy, cost-effective solution is readily available. Building a vaccine/syringe cooler to use while processing livestock may not only help maintain vaccine temperature, but also keep vaccine and syringes out of direct sunlight. All of the materials to assemble a vaccine cooler can be purchased at a local hardware store for around $25.
Materials and Tools
- 9-quart cooler
- Three 12-inch PVC Sink Drain Tailpieces (syringe holsters)
- Caulk (optional)
- Drill
- Tape measure or rules
- Marker
- 1 1/2-inch Hole Saw
- Hole Saw Extension
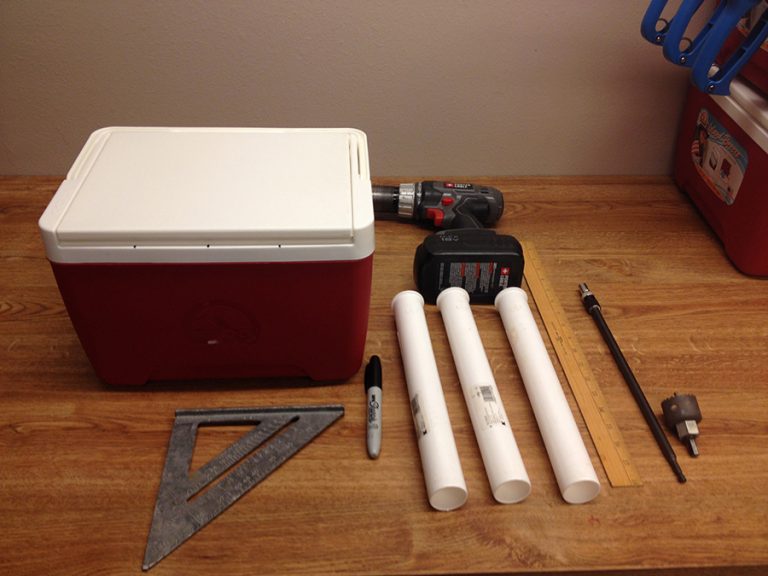
Materials needed.
Construction
The example shown in Figure 1 is a design that was developed by the Animal Science Department at Oklahoma State University. This unit is designed so syringes and needles are never exposed to the inside of the cooler. This provides a storage area that is chilled, protected from sunlight and easily cleanable without exposing needles to damage or contamination by ice or other contents of the cooler. The size of the cooler and configuration of syringe holsters can be modified to meet a producer’s specific needs.
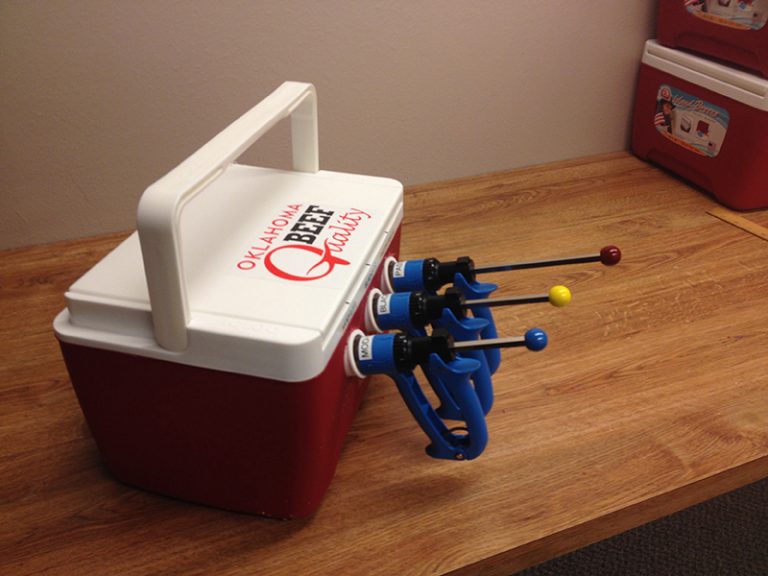
Figure 1.
Using the front of the cooler, begin by determining the middle point and make a mark 2 inches down from the top. This will be the location of the middle syringe holster. Equally space the left and right syringe holsters by making a mark at 2 ¾ inches from the center mark and 2 inches from the top (Figure 2).
On the back of the cooler, repeat the process of identifying the middle point; make a mark 2 inches from the bottom of the cooler for the middle syringe holster. Equally space the left and right syringe holsters by making a mark at 2 ¾ inches from the center mark and 2 inches from the bottom (Figure 2).
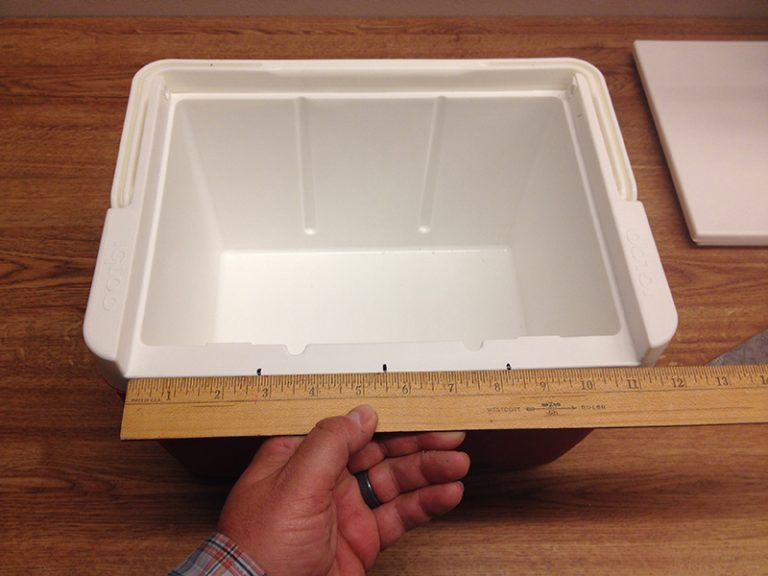
Figure 2.
Using the drill and hole saw, begin making the first cut on the outside front of the cooler. The challenge is to estimate the angle of the cut (about 45 degrees) so the front and back holes line up. This will allow the syringe holster to easily slide through the cooler (Figures 3 and 4).
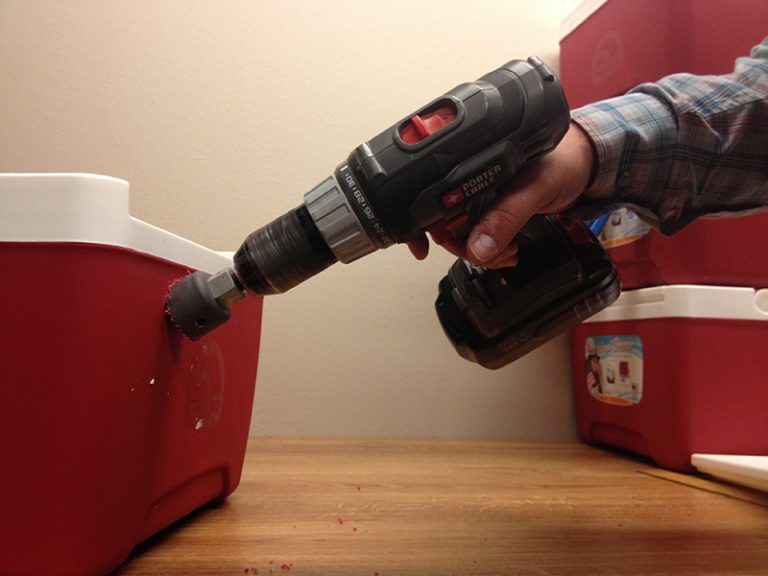
Figure 3.
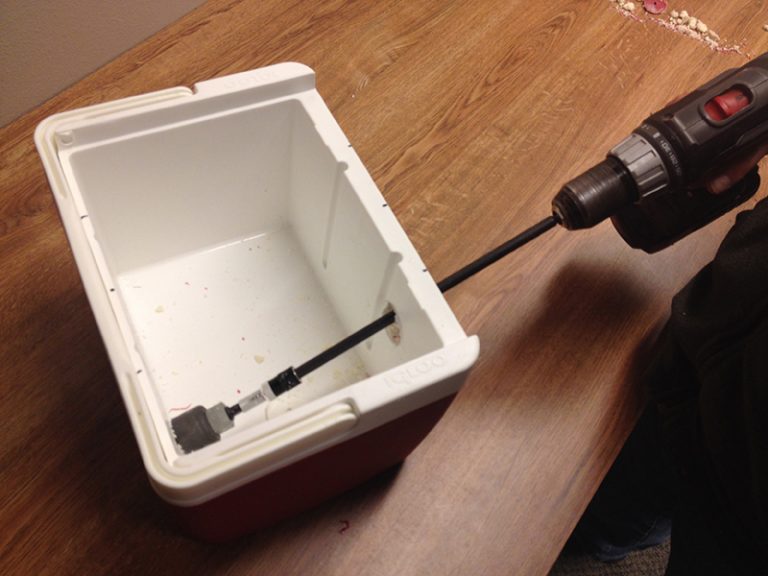
Figure 4.
Once the three front holes are cut, use the hole saw extension to cut the remaining three holes in the back of the cooler (Figure 4). After the holes are cut slide the syringe holsters through. The tail of the syringe tubes can be covered with a cap or plugged at a depth that does not contact the needle, preventing needle contamination, aid in temperature retention and prevention of dust or debris from contacting needles. Once filled with ice, this cooler will aid in keeping vaccine out of sunlight and cool for several hours during cattle processing. If so desired, caulk can be used to seal around the syringe holsters to prevent water leakage following ice melt. Also, labels can be applied to both the cooler and syringes to help prevent vaccine mix up (Figure 5).
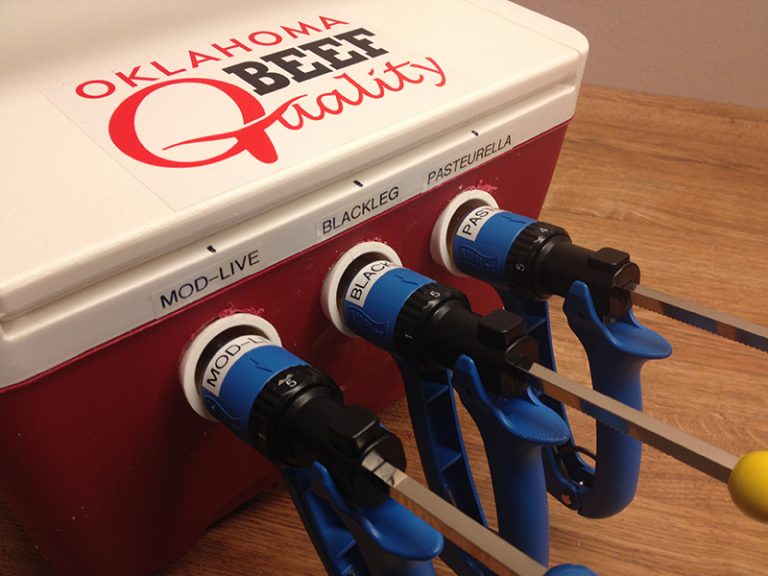
Figure 5.
Gant Mourer
Beef Value Extension Specialist
Chris Richards
Extension Beef Specialist
