Training Pecan Trees
Perhaps the most important growth made by a pecan tree is during the first five years. Just as the habits and lifestyle of a person may be strongly influenced by events during childhood, the training of young pecan trees largely influences their performance in later years.
Pruning during the early formative years is a form of training. One major objective of training is to guide and encourage the development of a strong framework. A strong framework is necessary to withstand the demands from large croploads, extreme weather, harvest operations and to aid with cultural and pest control practices.
The beginning of nut production is generally thought to be a function of growth (size) rather than age. Therefore, vigorous growth to achieve early tree size should be encouraged. Small training cuts made early during the tree’s life reduces the need to make larger cuts later. Early training cuts are also less work for the operator and less stressful to the tree. Such well-planned training cuts encourage precocity (early production) by minimizing the removal of wood when compared to making large corrective pruning cuts during later years.
Trees that are native or have not been grafted grow naturally in a more upright, central leader structure. This juvenile phase of growth lasts for several years without any fruiting. Once the trees reach maturity or after they have been grafted, they begin to grow with more branching and begin to produce fruiting wood. Newly planted trees that have been grafted take on this characteristic after grafting and lose the apical dominance of the upright growth. The rootstock may be juvenile, but mature wood has been grafted on and can produce fruit quickly, but require training from the start. When training young trees, keep in mind an ideally structured tree and always strive to shape each tree to this pattern. No two trees are alike and few, if any, will conform exactly to a picture-perfect tree, but it will serve as a standard to work toward.
The central leader system is the preferred pecan tree structure for most pecan trees conventionally spaced and managed in Oklahoma. The central leader structure consists of one straight trunk developed vertically throughout the tree with uniformly spaced, wide angled (45° to 90°) lateral (scaffold) branches arising from the trunk (Figure 2). The central leader (trunk) should be of significantly larger diameter than the scaffold branches that arise from it.
To develop pecan trees with a strong, dominant central leader, consider the following training procedures.
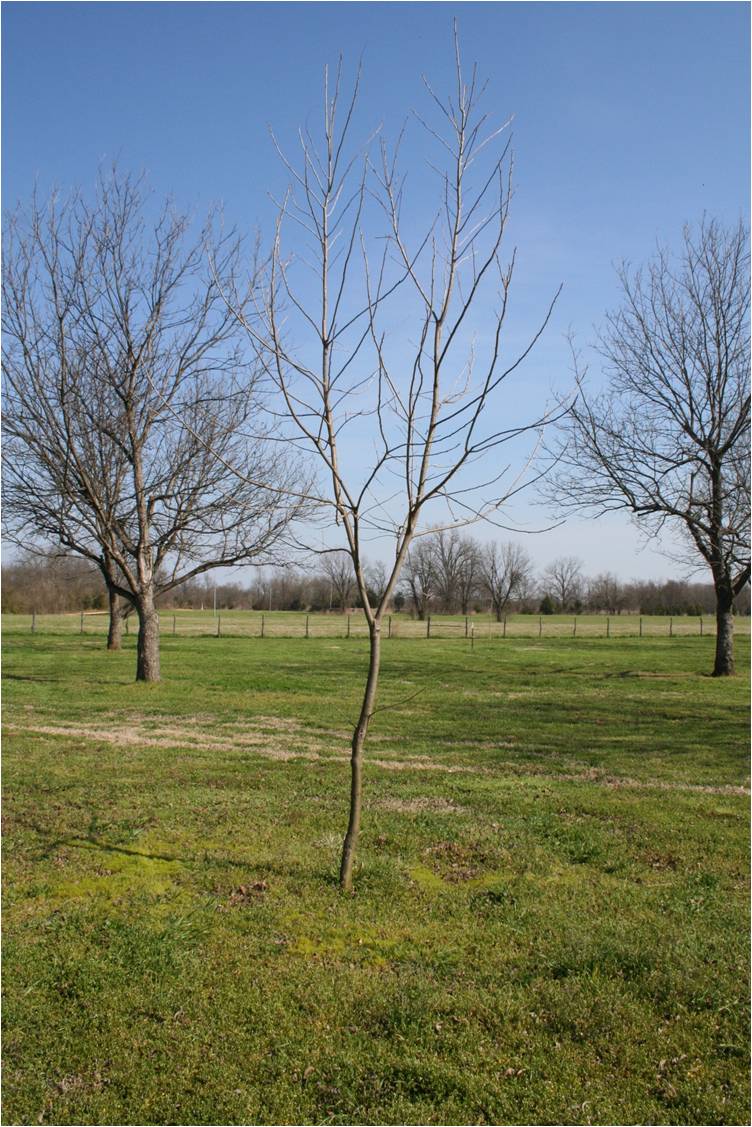
Figure 1. Pecan tree with a trunk terminating into 2 branches (leaders), weakening the tree structurally. This tree is susceptible to splitting and destruction of the entire tree.
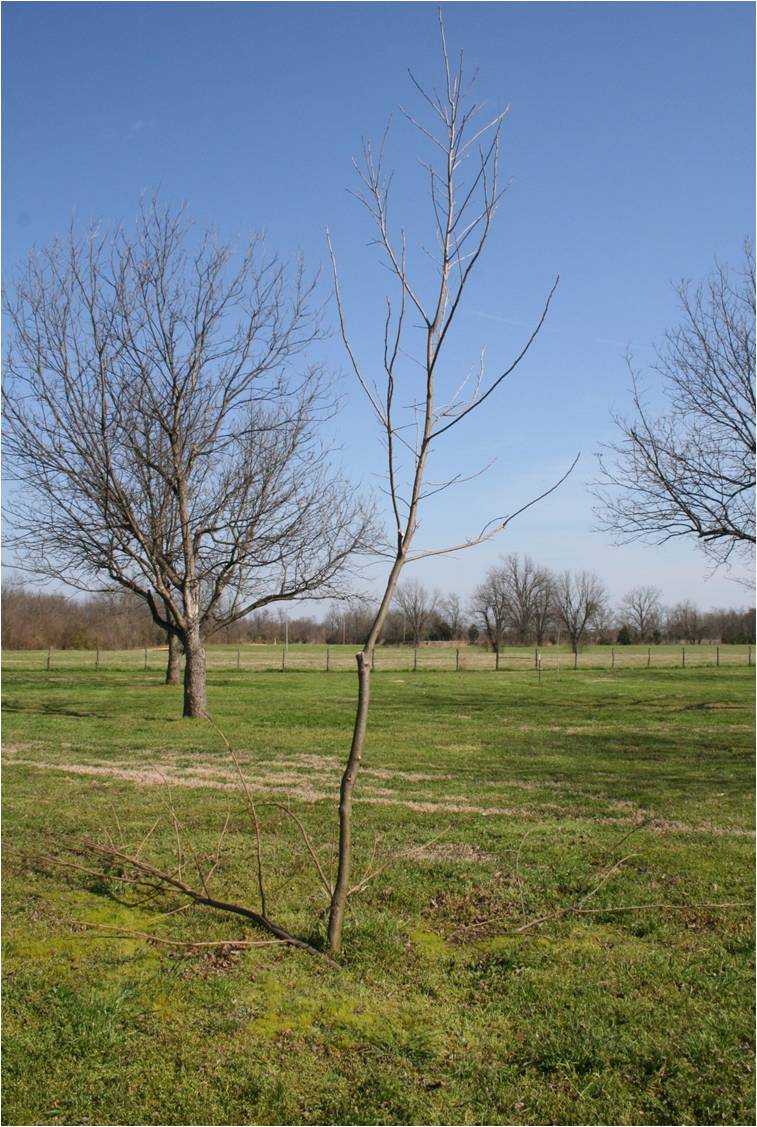
Figure 2. Pecan tree in figure 1 after pruning to a central leader. The tree consists of a straight central trunk with scaffold limbs spaced up and around the trunk.
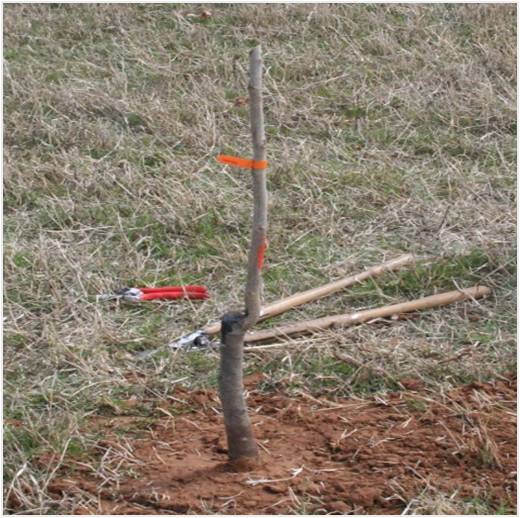
Figure 3. Removing 1/3 to ½ of the bareroot tree at the time of planting increases livability and subsequent total growth.
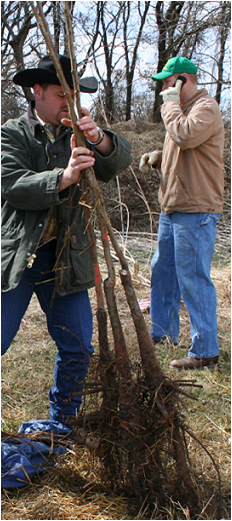
Figure 4. Vigorous, healthy dug trees ready for planting. These are approaching 8 feet in height. Most field grown bareroot trees of this grade are a 3 year-old root system and a 1 year-old grafted or budded top.
At Transplanting
Training begins at planting. Encourage strong vigorous early growth of the tree. Tops of bareroot trees (4- to 8-foot grade) should be cut back 1/3 to 1/2 at the time of planting. Buds will push near the cut and a new central leader will be chosen.
First Growing Season
When new shoots are 4 inches to 6 inches long, select the uppermost vigorous shoot to be the central leader (trunk). Pinch out the growing point of the remaining (temporary) shoots leaving them 6 inches to 10 inches long. Retention of these temporary shoots creates an unkempt trunk which aids in the development of a stout, large caliper central leader (trunk)(see Figure 5.) Repinching of the temporary shoots may be necessary if the tree makes vigorous growth.
Growth on the original trunk may be eliminated or maintained at a length of 6 inches to 8 inches by pinching.
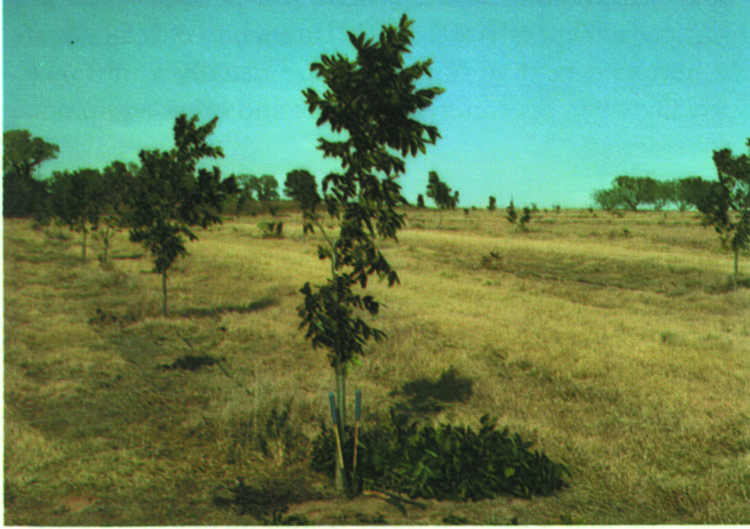
Figure 5. A ‘trashy’ trunk tree. Temporary growth is allowed to grow on the central leader (trunk) below the height of the first scaffold limb during the first three or four years. This ‘trashy’ temporary growth is restricted to 6 to 10 inches by pinching. Each shoot is removed in lieu of new growth when the shoot exceeds 1 inch in diameter.
First Dormant Season
Side limbs on the original trunk should be treated as temporary, keep them pinched to 6 inches to 10 inches, while totally removing them during the next two or three years.
Encourage the development of the selected central leader by removing or pinching all secondary branches that may have developed on the central leader during the first summer.
Begin thinking of the height planned, to allow the lowest permanent lateral (scaffold) branch to develop. Scaffold limbs lower than 5 feet or 6 feet are usually a nuisance, especially when operation of tractors and other equipment is considered.
All lateral growth present on the original trunk and central leader shoot below the desired height of the first scaffold are temporary and should be removed during the next three years to five years. Allowing some of this lateral growth to remain during these early years maintains tree vigor and increases the strength and caliper of the trunk.
To properly develop the central leader, always allow it to be at least 12 inches to 15 inches taller than any side limb.
If the selected central leader made vigorous growth during the first season and is weak, remove one third of its growth to encourage uniform bud break throughout the length of the central leader (Figure 6). This will encourage a high percent of these buds to grow into shoots with fairly uniform length during the upcoming growing season.
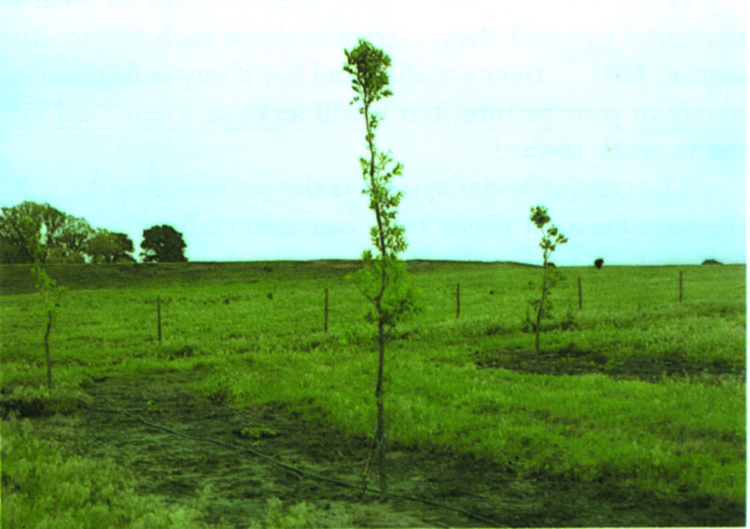
Figure 6. One-third of this vigorously growing central leader was removed during the first growing season, which can encourage more uniform bud break along the leader.
Second Growing Season
Maintain continued growth of the central leader by allowing it to be 12 inches to 15 inches taller than any side limb.
Continue to maintain (limit) temporary lateral shoot growth at 6 inches to 10 inches.
Second Dormant Season
Lateral branches that are 1 inch or more in diameter and located below the height of the first permanent scaffold branch should be removed.
Side limbs selected to become permanent scaffold branches are not headed back unless they are taller than the central leader or are considerably longer than other scaffold branches.
Secondary shoots arising on the central leader during the past growing season usually have narrow angled shoots that may develop near the same locations during the upcoming growing season. Remove any shoots along the central leader with narrow crotch angles.
Extremely vigorous central leaders may be cut back by about one third to encourage buds to break and develop new shoots.
Subsequent Years
Continue the process of selecting scaffold branches and training procedures described for the second dormant season until the desired tree height is obtained or the tree height becomes prohibitive to continue training.
By judicious annual training, even those cultivars that tend to form weak crotches can usually be made amply strong. Trees of the ‘Wichita’ cultivar are notorious for production of weak, narrow angled branches. In contrast ‘Maramec’ cultivar trees are easier to train, since they tend to produce stronger, wide angled branching.
An important simple training rule is to correct forks or bad crotch angles early. A narrow crotch angle is a weak point in the tree. As the two limbs grow in diameter, they push against each other and can split. The area where the two limbs grow together form a bark inclusion. Because the bark doesn’t join or bond with the other limb, water and debris can get between the two limbs and begin to rot and make a weak spot where the tree can split. To try to correct this, when two branches are similar in size, remove one or cut it back 1/3 or more in length (Figure 7). A fork in which more than two shoots or branches come together at a common point is commonly called a crows-foot. This can be corrected by removing all but one. It is usually necessary to force side branches to grow more horizontal. For example, when it is necessary to choose between two side shoots, remove the more upright (vertical) growing shoot in favor of the one growing more horizontal. If given a choice, choose shoots facing south. Because of Oklahoma’s prevailing south winds, they will be pushed to the north.
As a shoot continues to grow, it separates itself from the parent branch or trunk by hard woody tissue. This woody tissue becomes obvious at the shoot base as a slightly raised ridge. This is the branch bark ridge or collar. With age, the branch collar increases in size, as a protective chemical barrier is formed within.
This protective barrier inhibits tree-inhabiting microorganisms from entering the wood above or below the branch collar. The branch collar can be a guide to proper pruning. Place the shears or saw in front of the branch collar and cut downward and slightly outward (Figure 9). Then remove the branch, leaving the branch collar containing the protective barrier intact to continue protection of the tree. Instead of removing branches flush with the trunk or another branch, remove them by leaving the raised branch collar intact with the tree.
It is not necessary to use wound dressing. It can seal in moisture or cause more rot problems in the long run. If properly removed with the collar intact and the growth is vigorous, the wound will heal within a few years depending on the size of the cut.
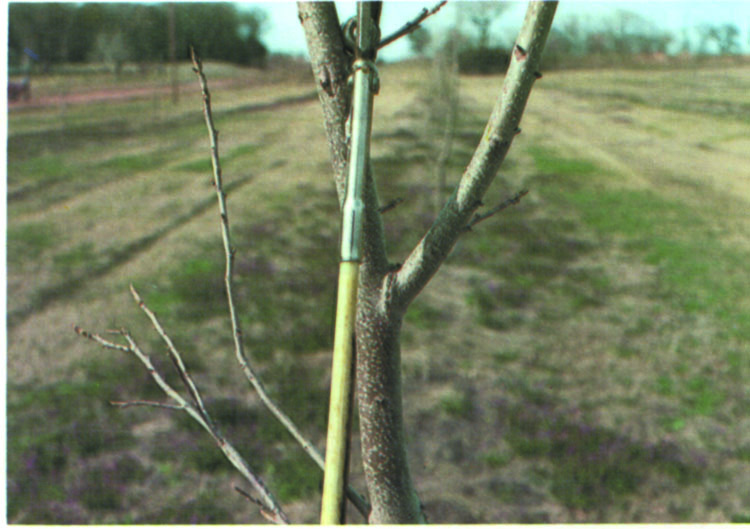
Figure 7. The side branch to the right is approaching the diameter of the trunk and should be removed. Otherwise, this tree will grow to become structurally weak, like the tree in Figure 8.
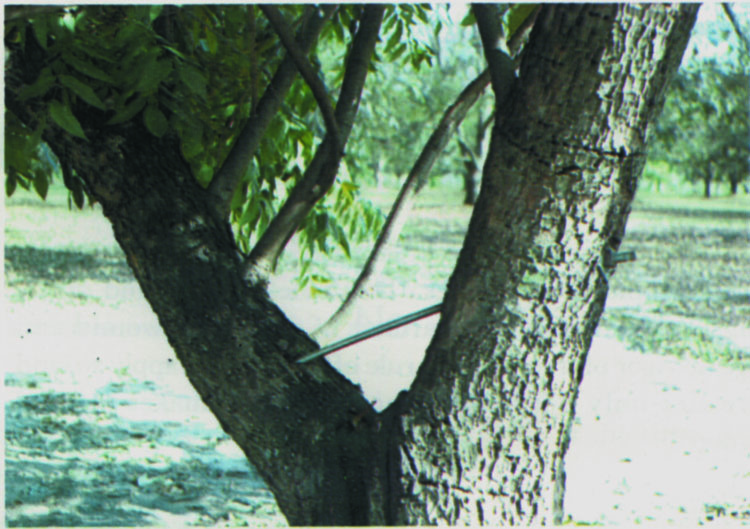
Figure 8. This weak crotch subjects the tree to total destruction by splitting the trunk to the ground. One limb (preferably the one on the left) should have been removed during the early training years of the tree’s life. Use of the threaded rod for support is questionable
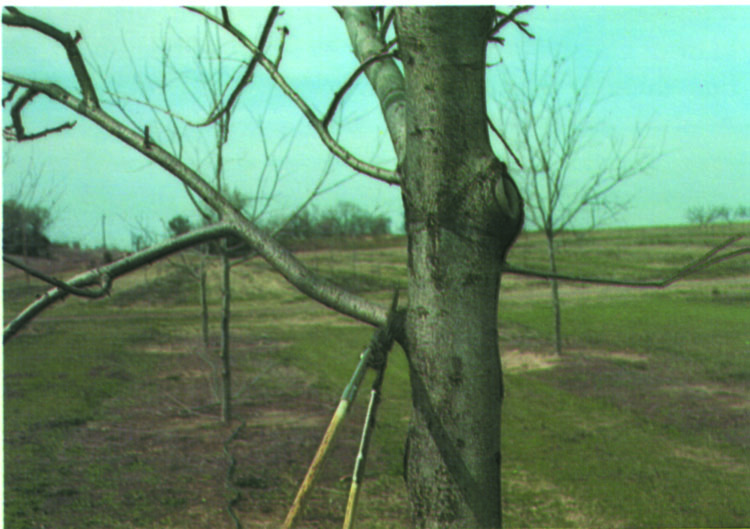
Figure 9. This branch is being removed while leaving the protective branch collar intact with the trunk.
Becky Carroll
Sr. Agriculturist
Extension Fruit & Pecan
