A Pictorial Guide to Back Plaiting a Lead Rope
Begin with approximately 10 feet of three stranded cotton rope of 5/8 to 1/2 inch in diameter.
Back Plaiting the Handler’s End of the Lead Rope
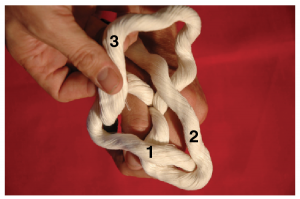
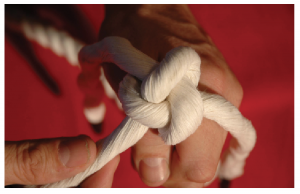
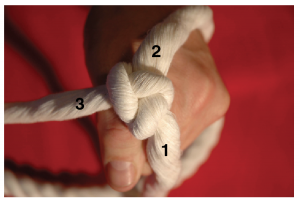
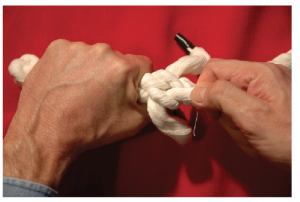
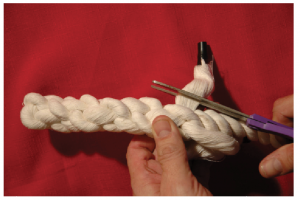
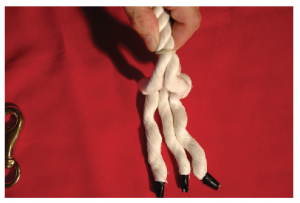
There are two parts to this process. The first part (pictures 1 through 7) involves a crown knot. This keeps the three strands from unraveling further. Once a crown knot is tied, the three strands are woven back through the underlying, unraveled rope (pictures 8 through 17).
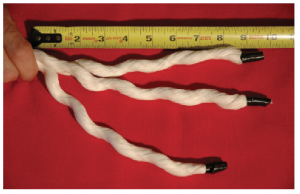
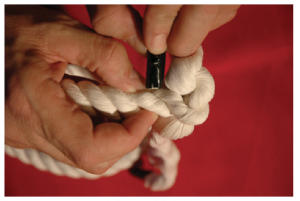
1. Unravel about 8 to 10 inches of rope, and tape off ends to keep the strands from
fraying.
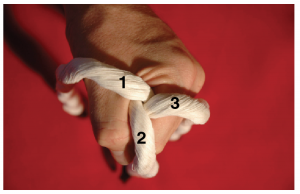
2. Grasp the rope so the beginning point of the unraveled strands is at the top of
your fist. Position the strands apart from one another.
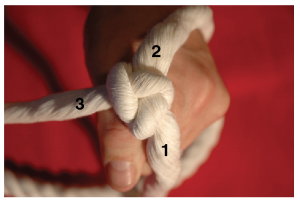
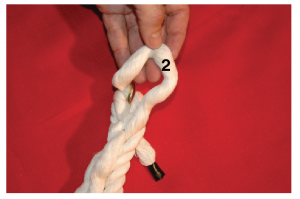
3. Place one (1) of the strands over the adjacent strand to the right.
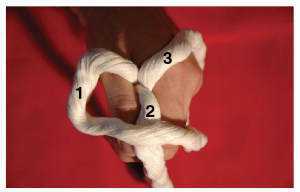
4. Place the adjacent strand (2) over the tail of the first strand and third strands.
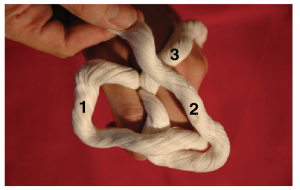
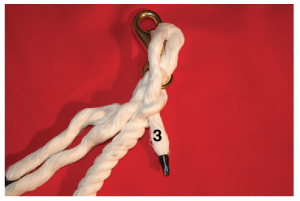
5. Place the tail of the third strand (3) over the tail of the second strand, and
into the loop formed from the first strand.
6. Tighten the knot by alternating pulling pressure to each of the strands. This forms
a crown knot.
7. Pull the crown knot tight. Back braiding relies on this knot to be even and secure.
The following steps involve braiding the loose strands (tails) into the unraveled
portion of the rope beneath the crown knot.
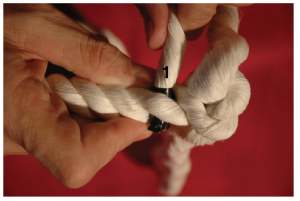
8. (The crown knot is on the right of the picture, the unraveled rope held by the
hand located on the left of the picture.) One of the unraveled strands will be braided
though the underlying rope by moving it over the first underlying strand and then
under the next strand.
9. Place the tail under the second underlying strand.
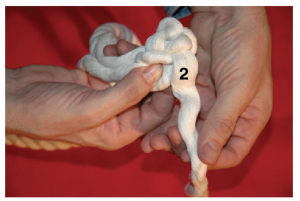
10. Pull the tail completely through the unraveled strand.
11. Moving to the right, grasp the next unraveled strand from the crown knot and repeat
the process.
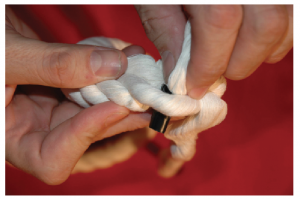
12. Place the tail over one, then under the next unraveled strand. Pull it tight,
and complete the same process with the remaining (third) strand.
13. This is what the rope should look like after each of the three tails has been
back plaited through the rope once. Repeat the process until the strands have been
back plaited completely. Do not back plait a strand more than once before rotating
to the next strand.
14. The process of rotating each time, and back plaiting over one and then under an
underlying stand is repeated until the ends have been back plaited entirely through
the underlying, unraveled rope.
15. Once you have plaited most of the rope, tighten the plaits by pulling on the ends.
16. The ends can then be cut off. If the plaits are not tight, you may want to tape
around the rope in line with the ends of the strands.
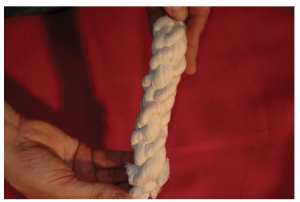
17. When complete, the handler’s end of the rope should appear similar to this picture.
The process of securing a snap on the other end is next.
Plaiting a Snap to a Lead Rope
It is recommended to back plait the handler’s end of the rope before the snap end
so you can learn the back plaiting process. The snap end does not use a crown knot,
so it can be more difficult to begin the back plaiting.
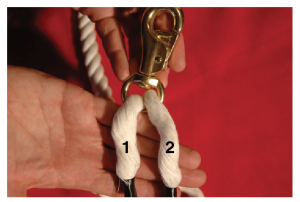
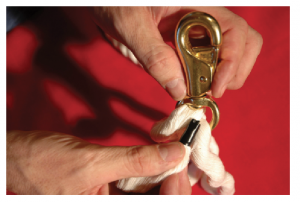
1. Similar to the beginning of back plaiting the handler’s end of a lead rope, begin
by unraveling about 8 to 10 inches of rope. A helpful aide is to use a rubber band
to secure the rope from unraveling more than wanted.
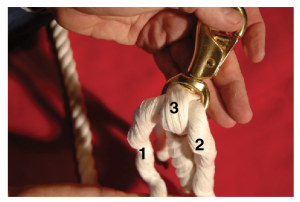
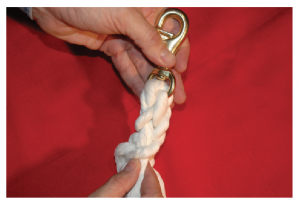
2. Place two of the unbraided strands through the eye of the snap.
3. Run the remaining strand through the eye in the opposite direction of the first
two strands.
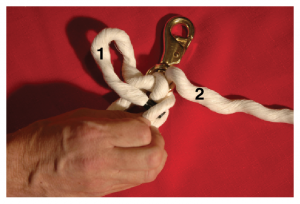
4. The third strand will run over the initial two strands. Pull the strands tight.
You will then begin the back plaiting process.
5. Begin with one of the two initial tails. Move over one strand to its right and
then under the next strand.
6. Complete the same procedure with the second strand. Retighten the plaits and then
move the third strand.
7. The third tail is the strand that was run through the eye the opposite direction
of the first two strands. Repeat the same process of plaiting by moving over one
strand then under the strand to the right. It may appear that you need to move over
two strands before moving under a strand in order for this strand to be aligned evenly
with the first two strands.
8. Alternate the process with each of the three strands, working down the braided
rope. Do the back plaiting process once on each strand, rotating from strand to strand.
Do not back plait a strand more than once before moving to the next strand.
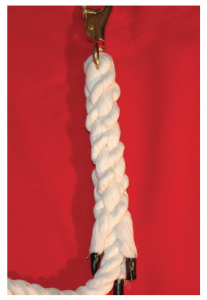
9. When completed, the snap is secured in place with 8 to 10 inches of back plaiting. Similar to the handler’s end of the rope, the loose tails can be cut even with the plaits. If the plaits are not tight, tape can be used to encircle the rope in the location of the cut tails.
Kris Hiney
Extension Equine Specialist

