

Plants in the Classroom: Growing from Food Scraps
Growing plants in the classroom is a fun way to explore reproduction in the plant kingdom. There are two types of reproduction: sexual and asexual. Sexual reproduction produces genetic diversity — offspring are not clones of the parent plants. This diversity starts in the seeds, which develop when ovules in the female structure of a flower (the ovary) are fertilized by pollen produced by anthers, the male structures of the flower. Genetic diversity allows plants to adapt to new or changing environments. Diversity also ensures that at least some individuals will survive a widespread disease. Seeds take time to germinate, and young students may be eager to see new growth sooner.
While students wait for seeds to germinate (which may take a week or more), they can also explore vegetative reproduction by planting food scraps, an inexpensive way to introduce another method of plant propagation. Growth from these scraps can be seen in just a few days. Because this asexual method grows from a vegetative part of the plant rather than a seed, it produces clones — all plants grown from vegetative propagation share the same genes as the parent plant. This saves the plants from expending a lot of energy to produce flowers but makes the species less able to adapt to changing environments. The necessary supplies for vegetative propagation are simple — water, cups or bowls, a knife, toothpicks and some potting soil. Below are some foods you can try regrowing vegetatively.
Celery
If you buy whole bunches of celery still attached at the base, simply chop off the bottom couple of inches and place the base in some water, with the cut surface facing up. Before long, roots will begin to grow, and you can transplant it into a pot of soil, or start it directly in soil from the beginning. The base already has tiny roots that help new stalks regrow, so be sure to keep the soil moist. If you will be gone over a weekend, you can cover the pot with plastic wrap to keep it moist. Over the course of a few months, the stalks will grow big enough to eat.
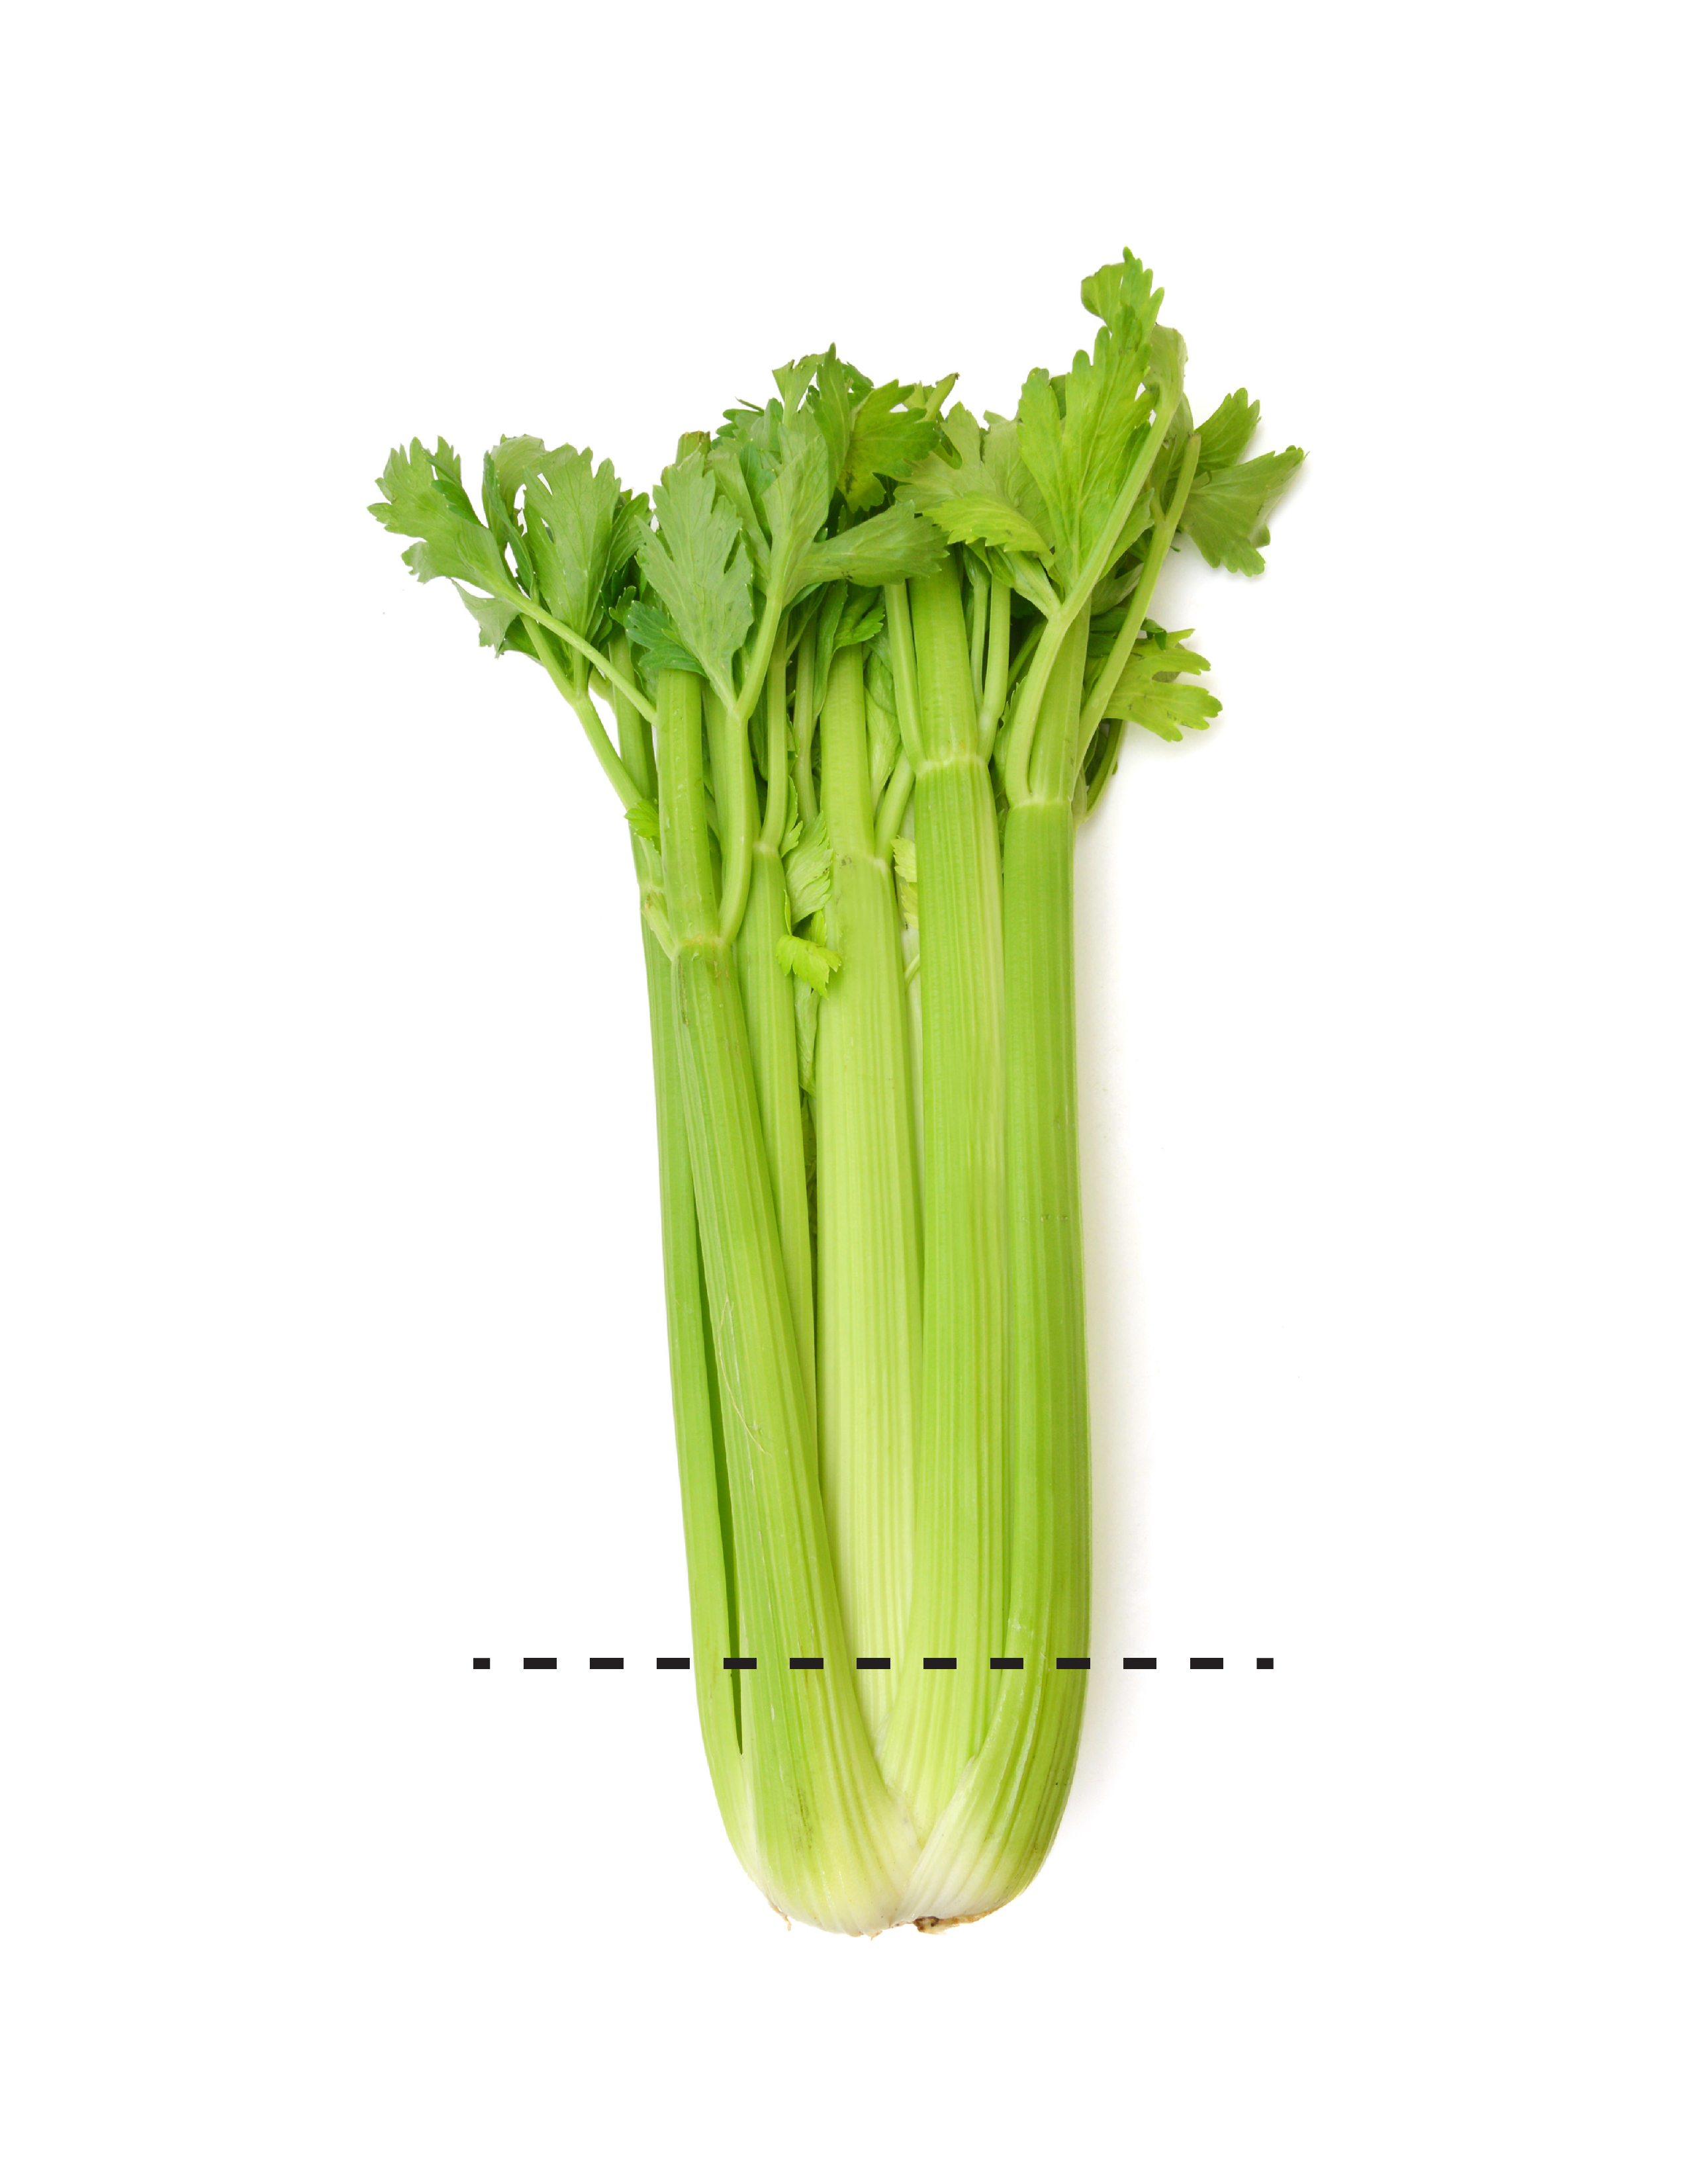 Figure 1. Where to cut celery.
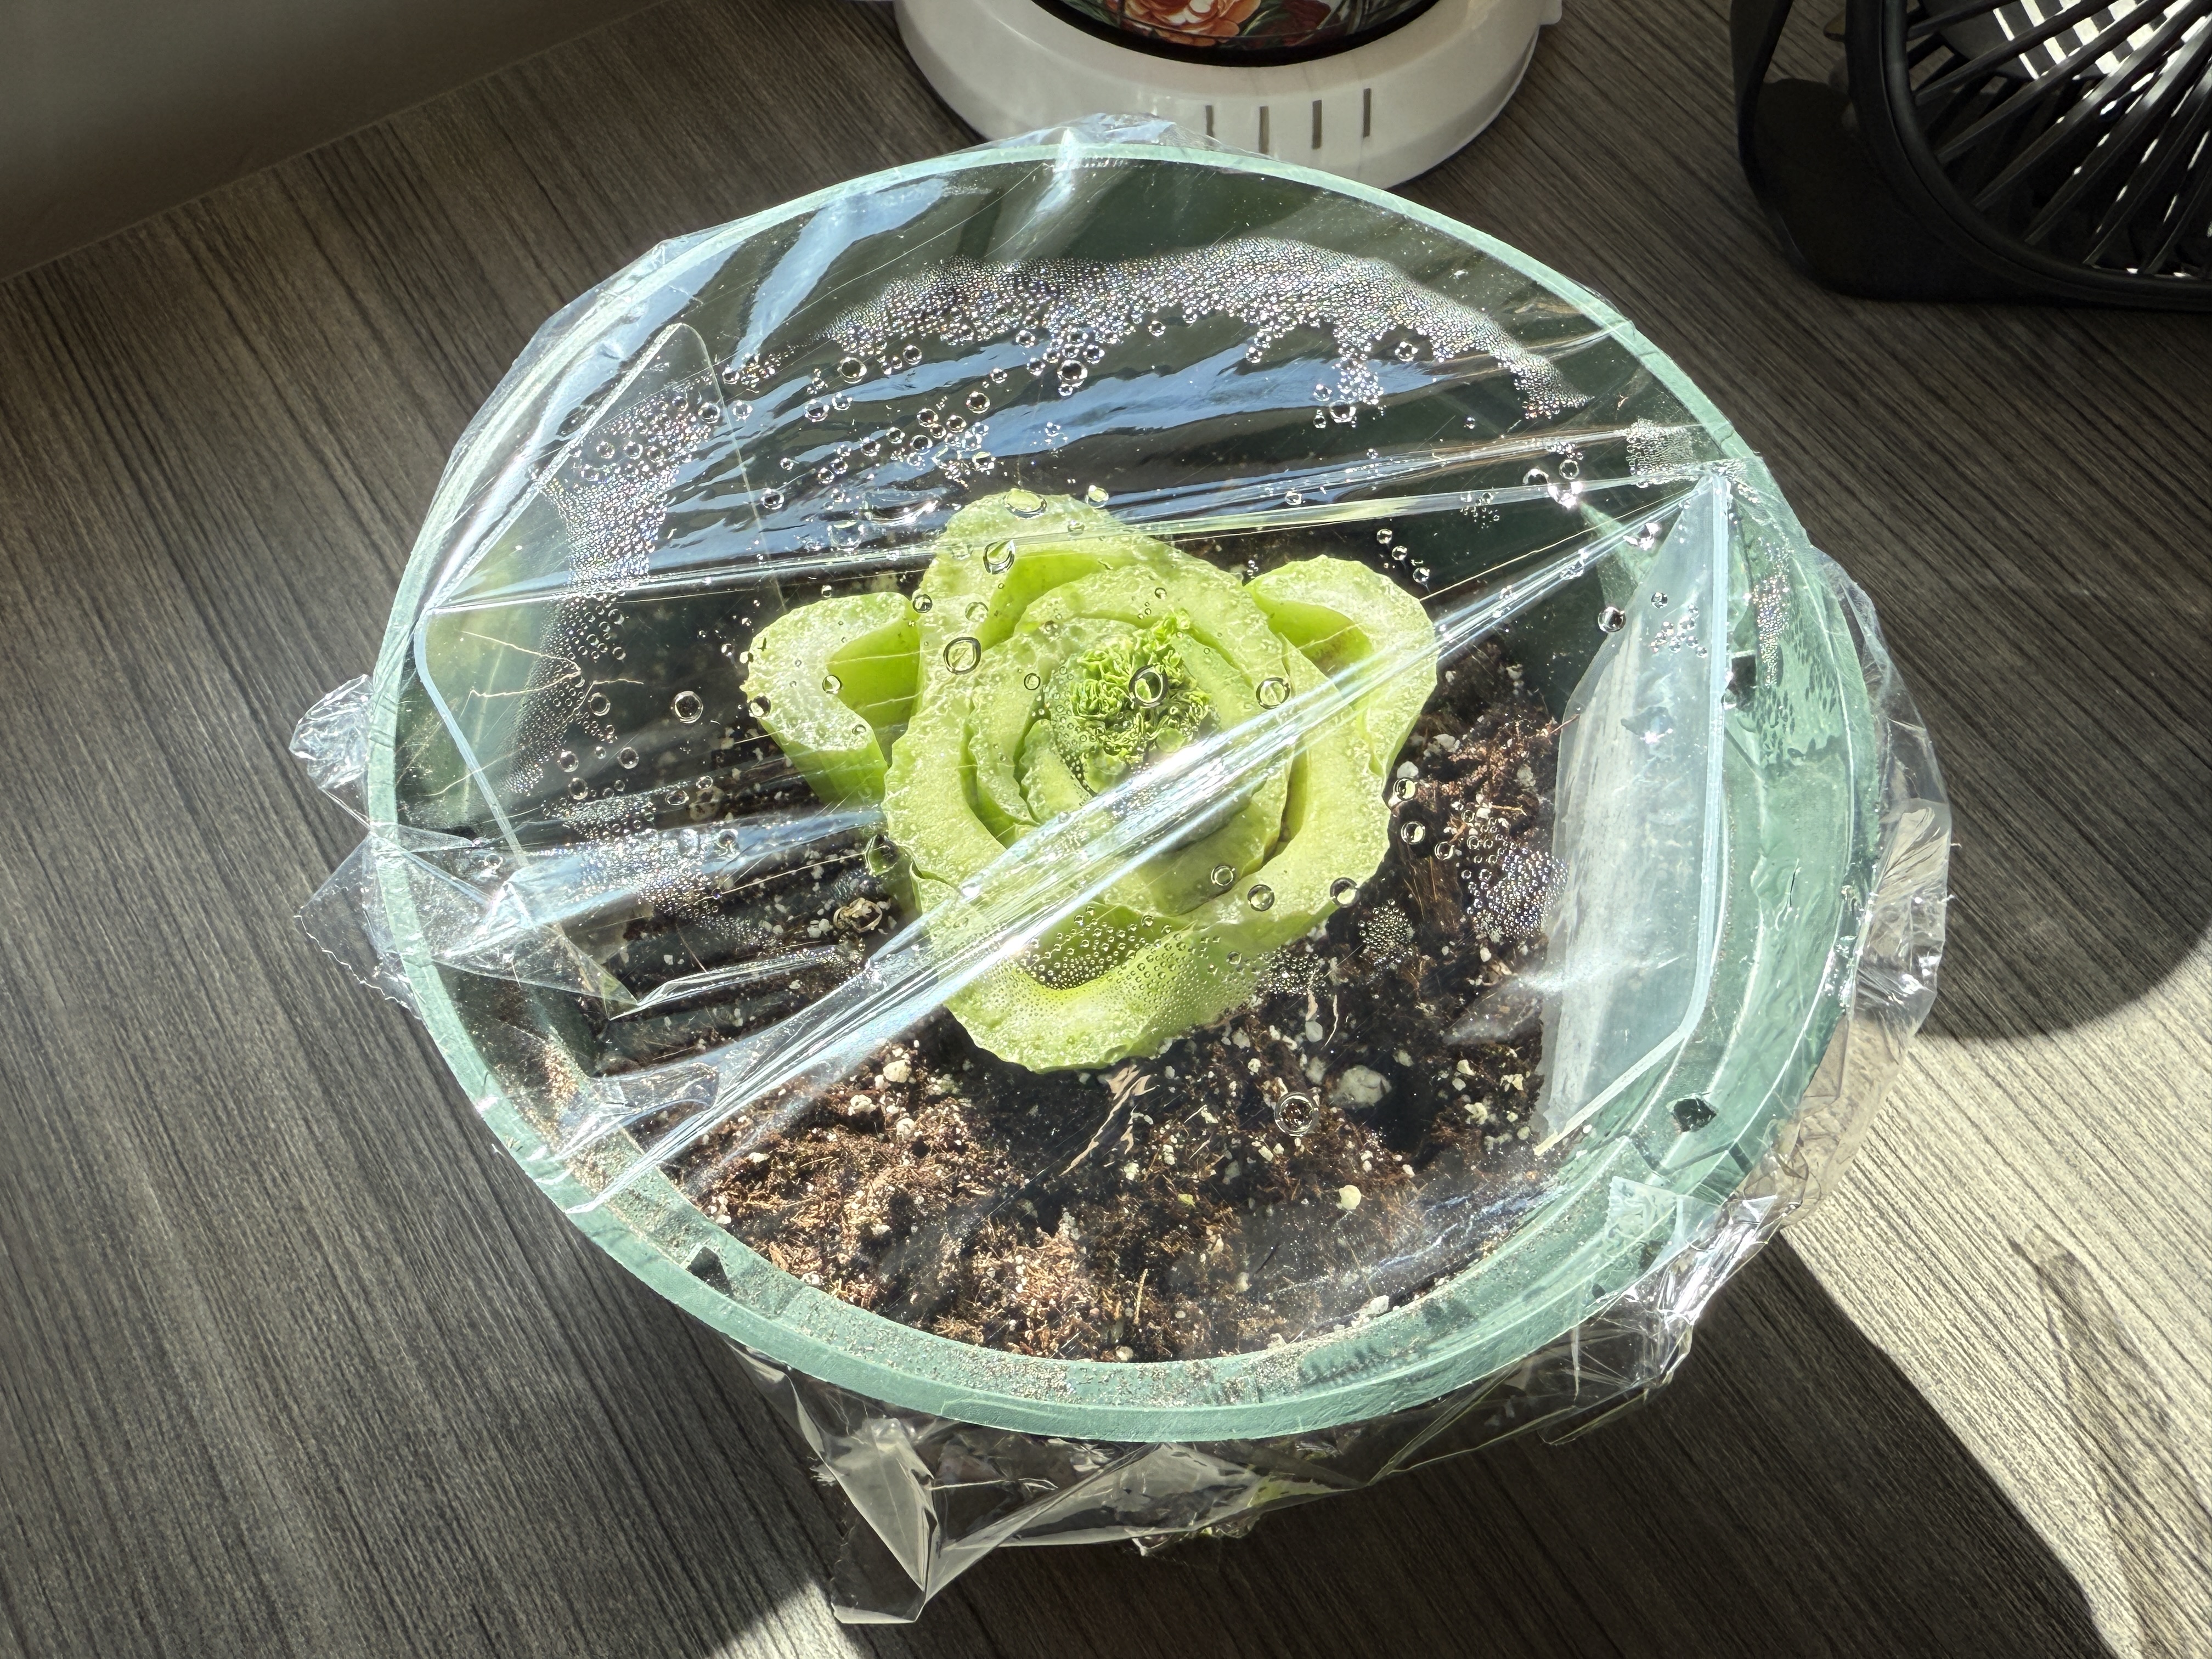 Figure 2. Plastic wrap over the pot to retain moisture.
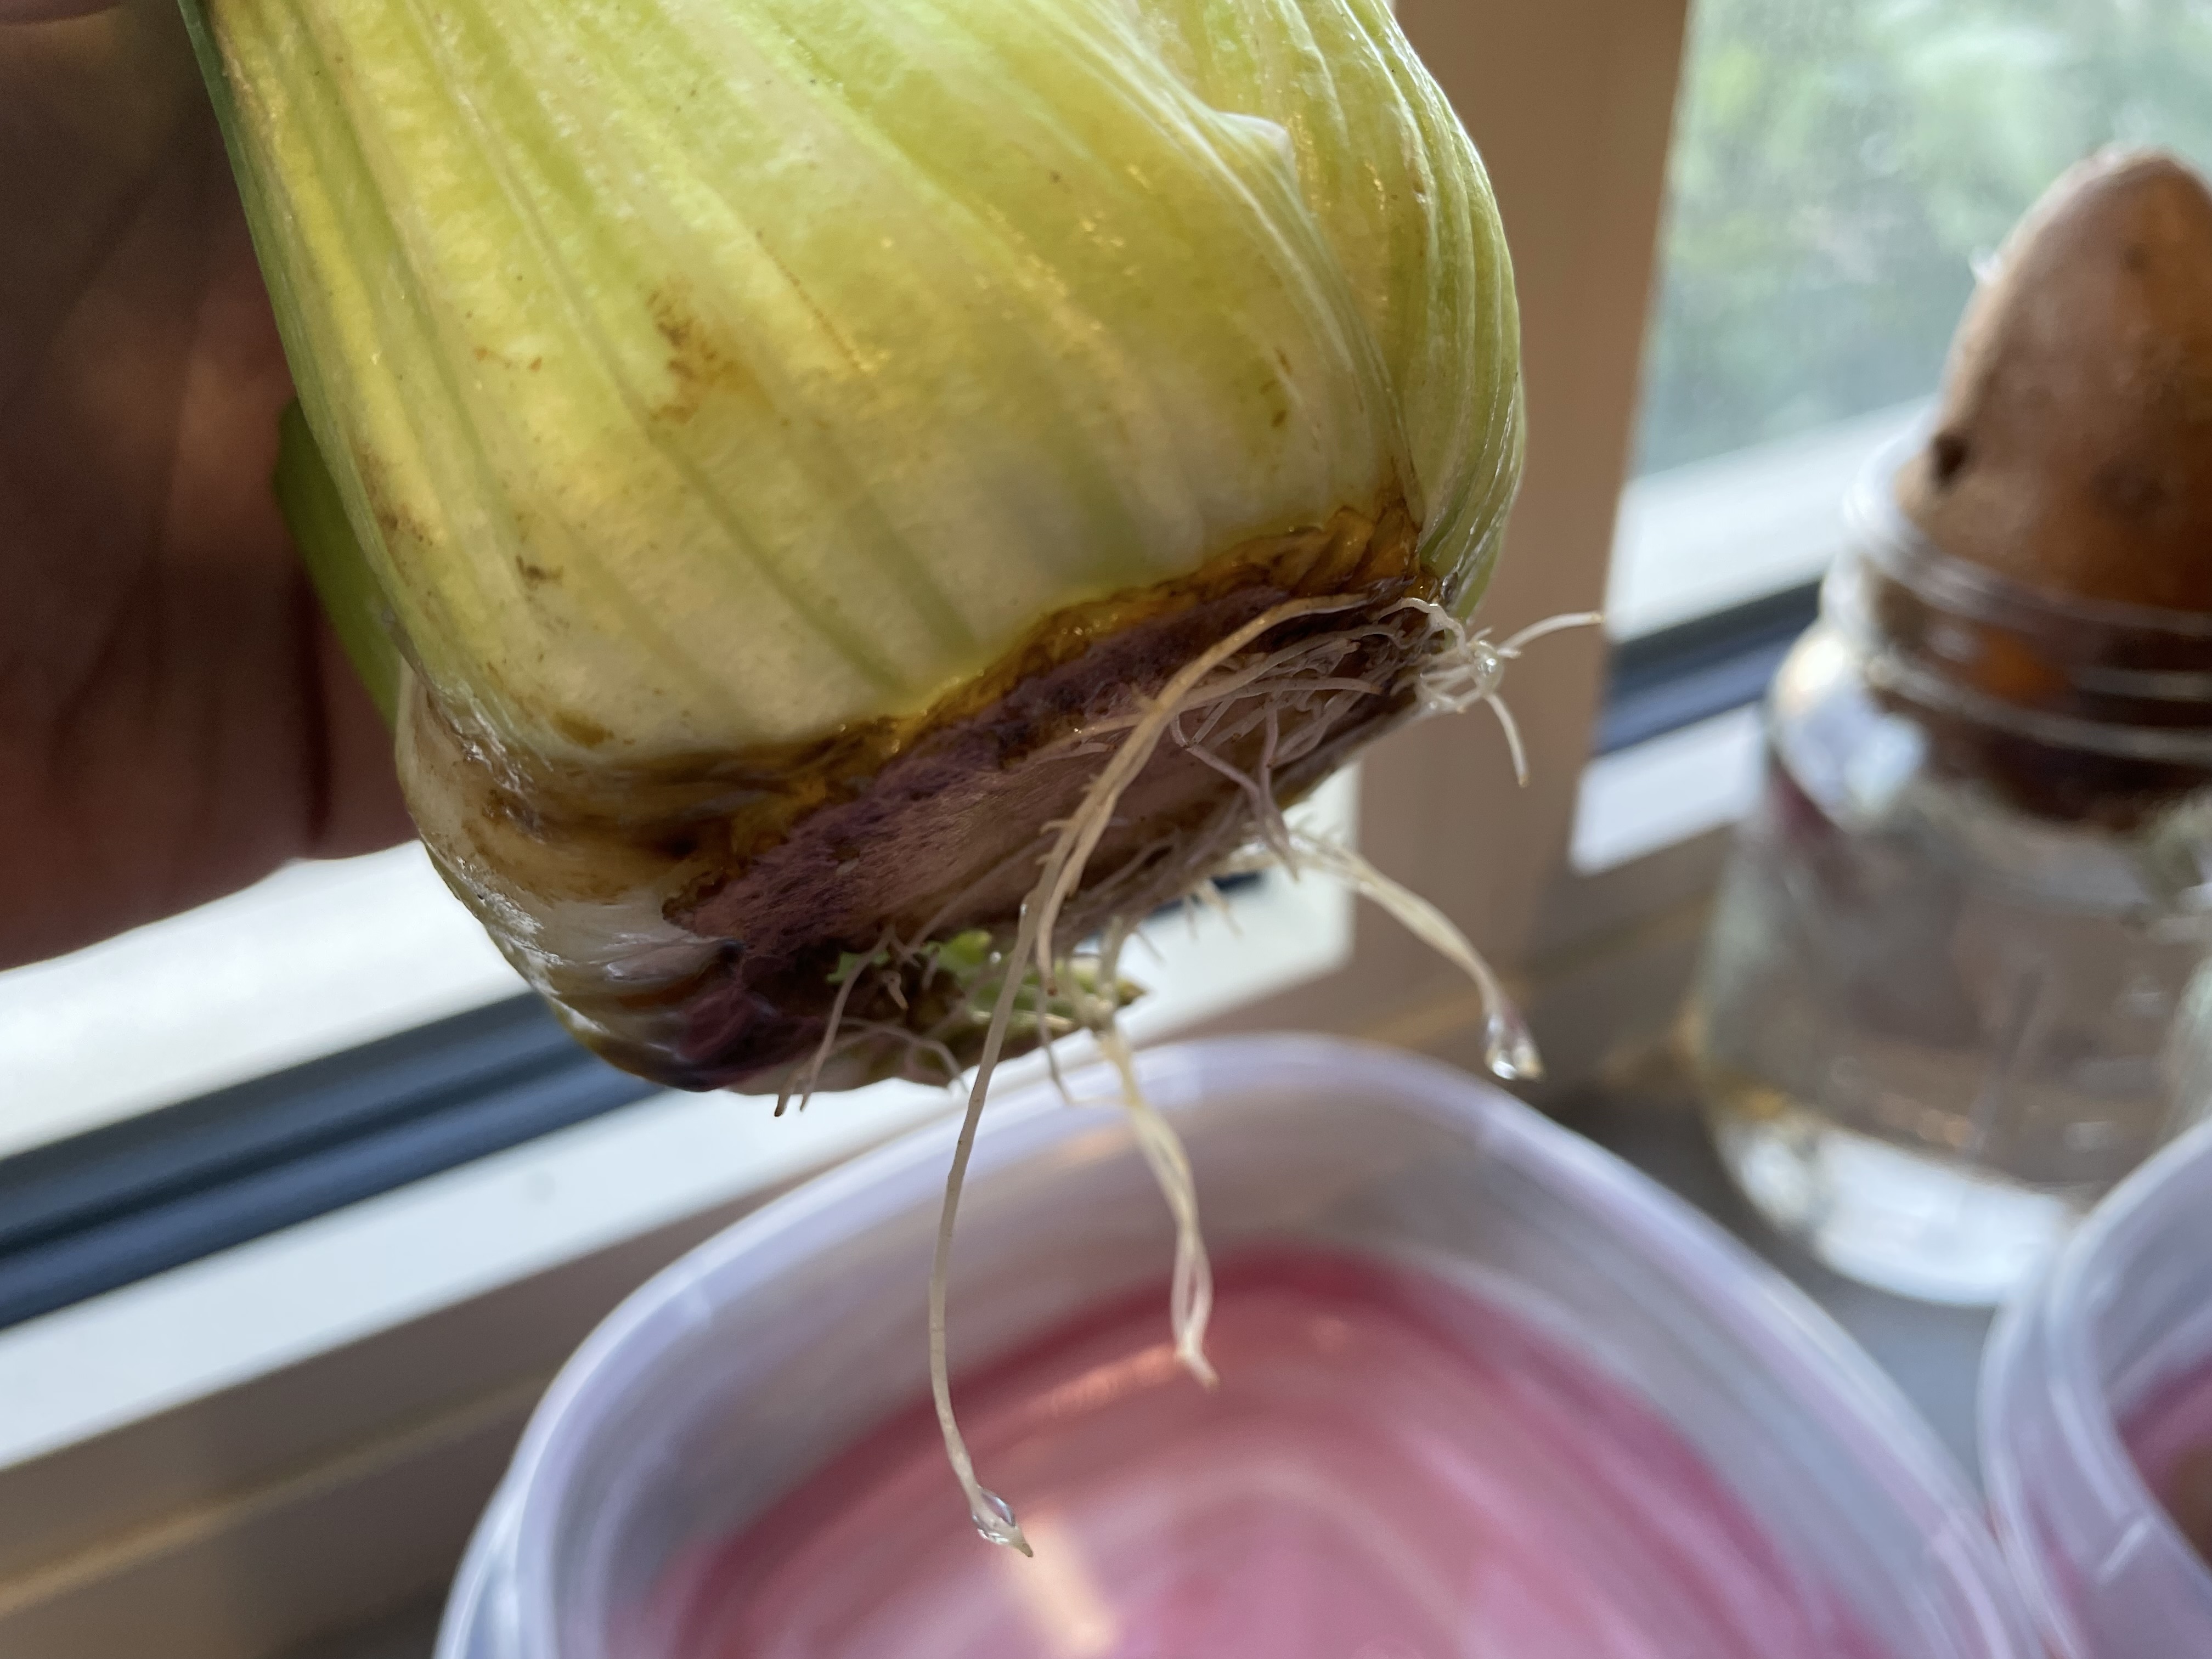 Figure 3. Roots on the bottom of celery.
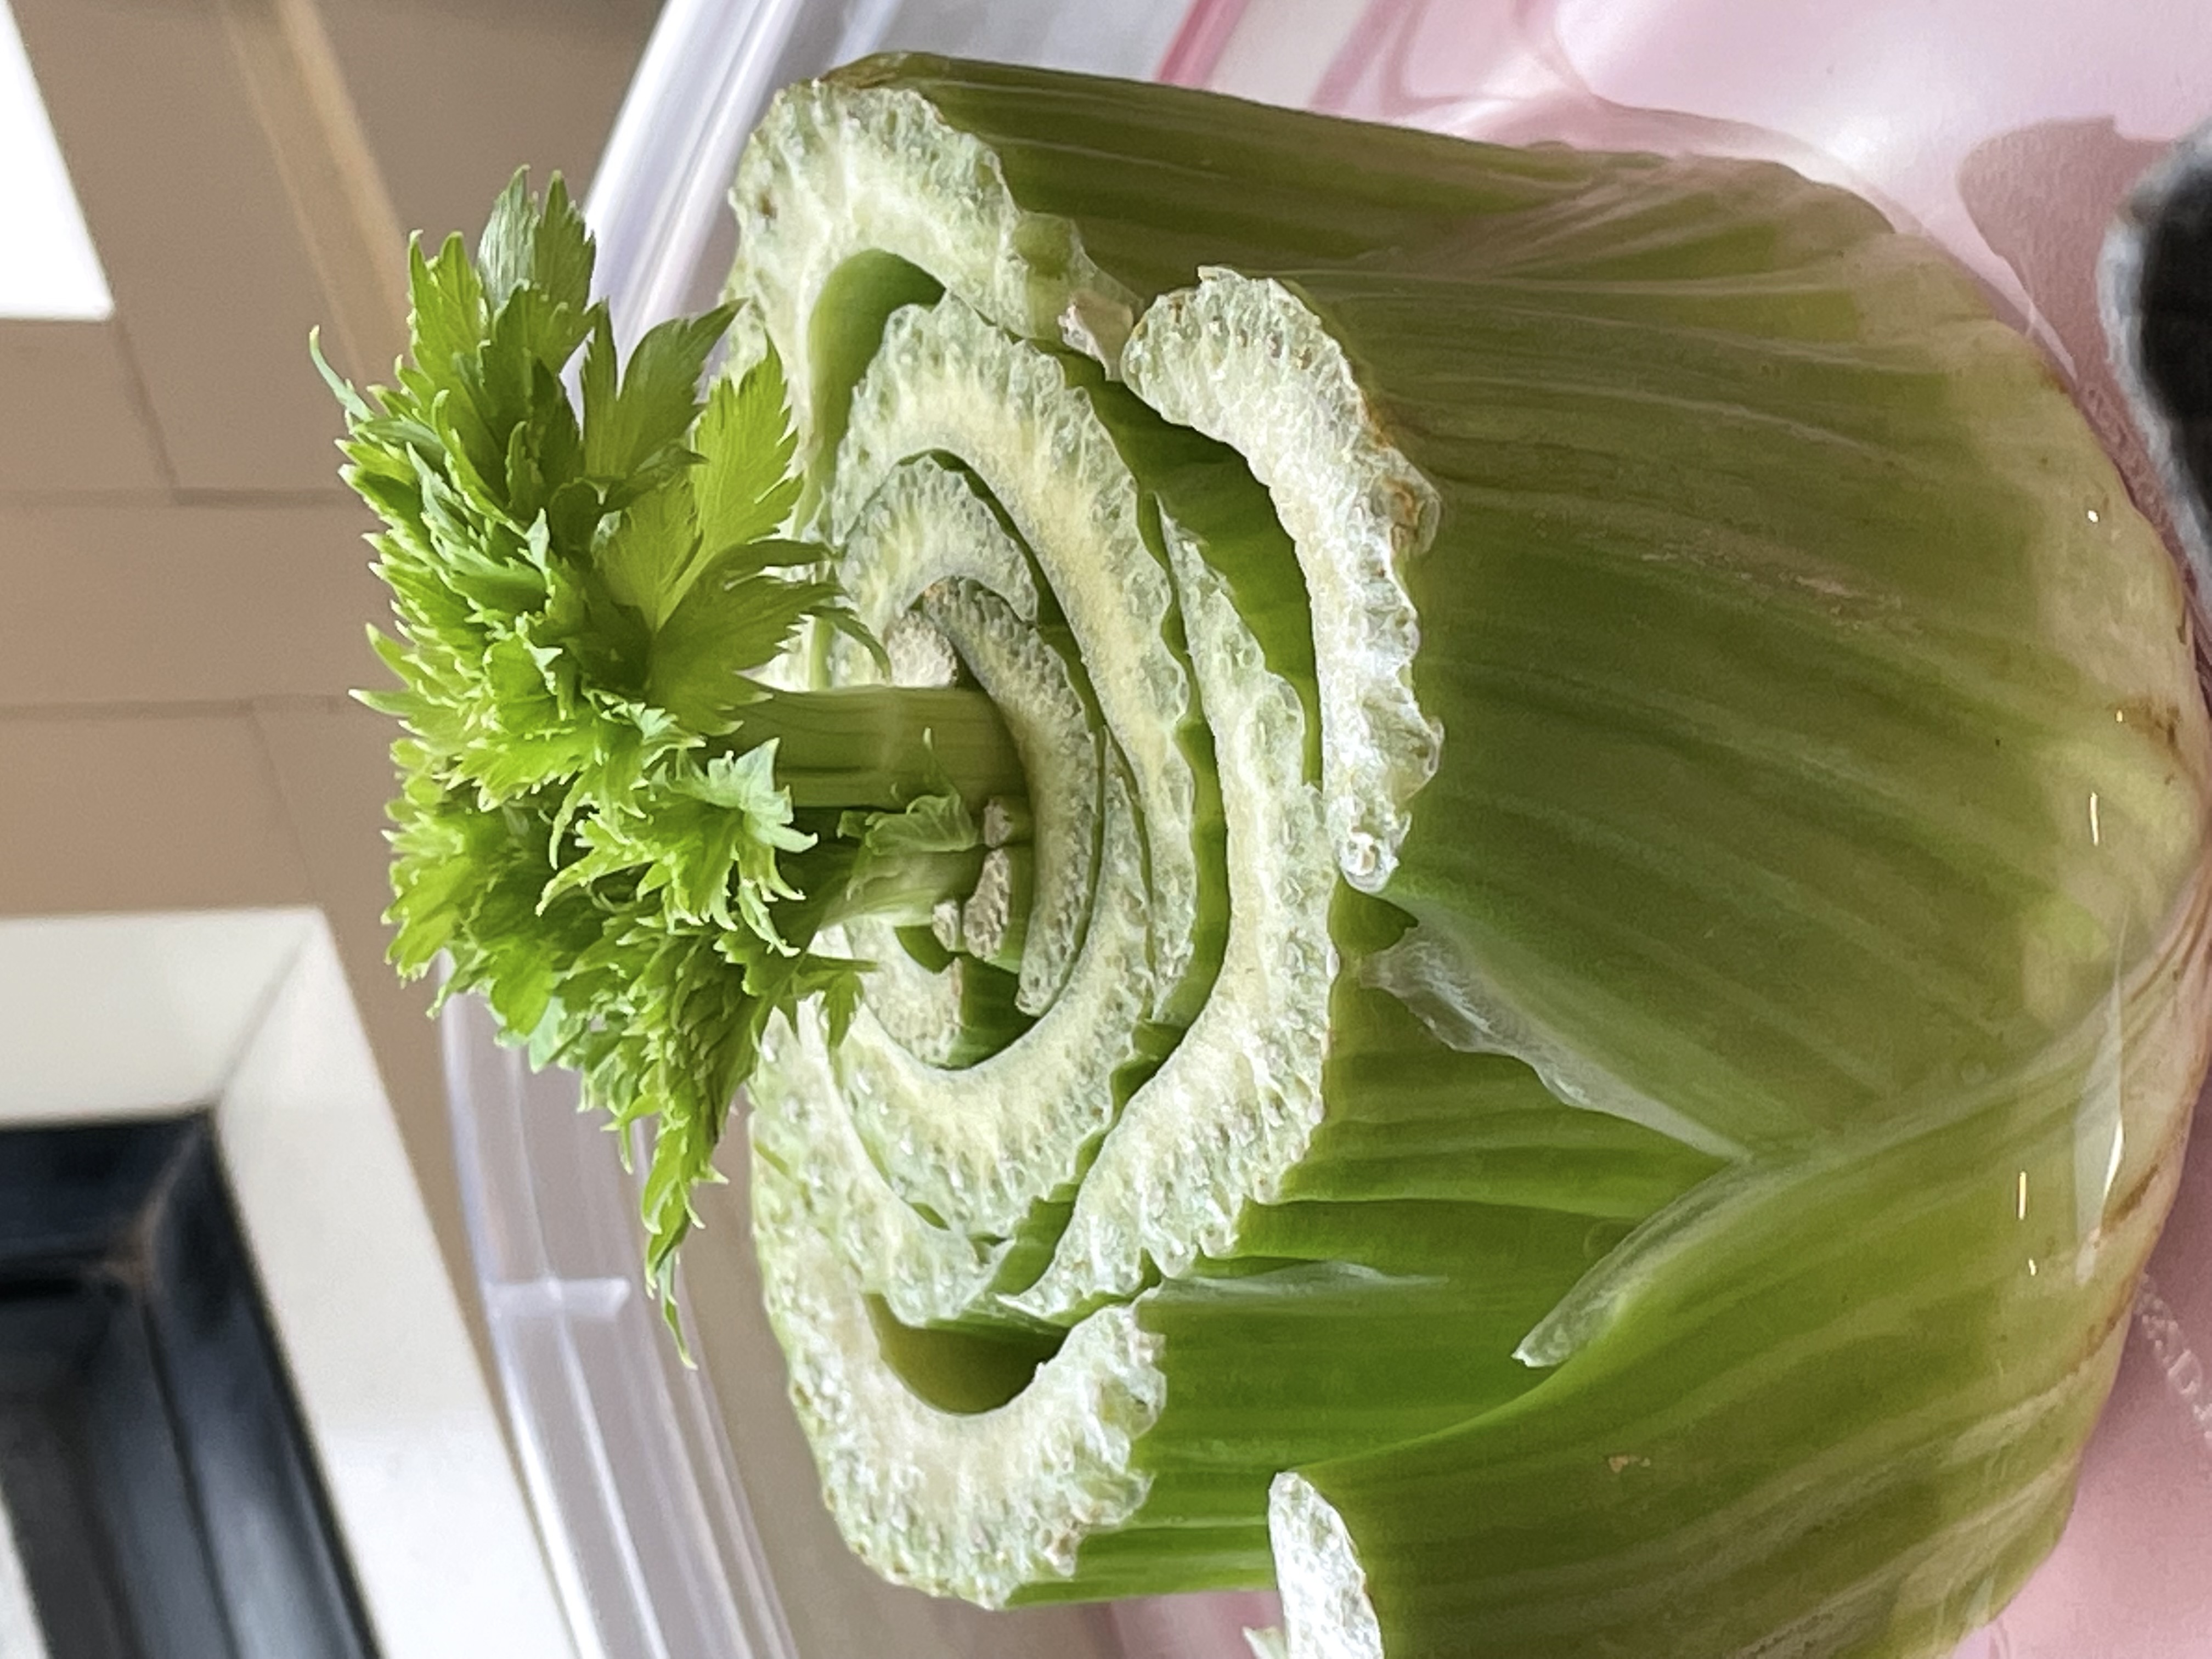 Figure 4. Celery regrowing in a dish of water.
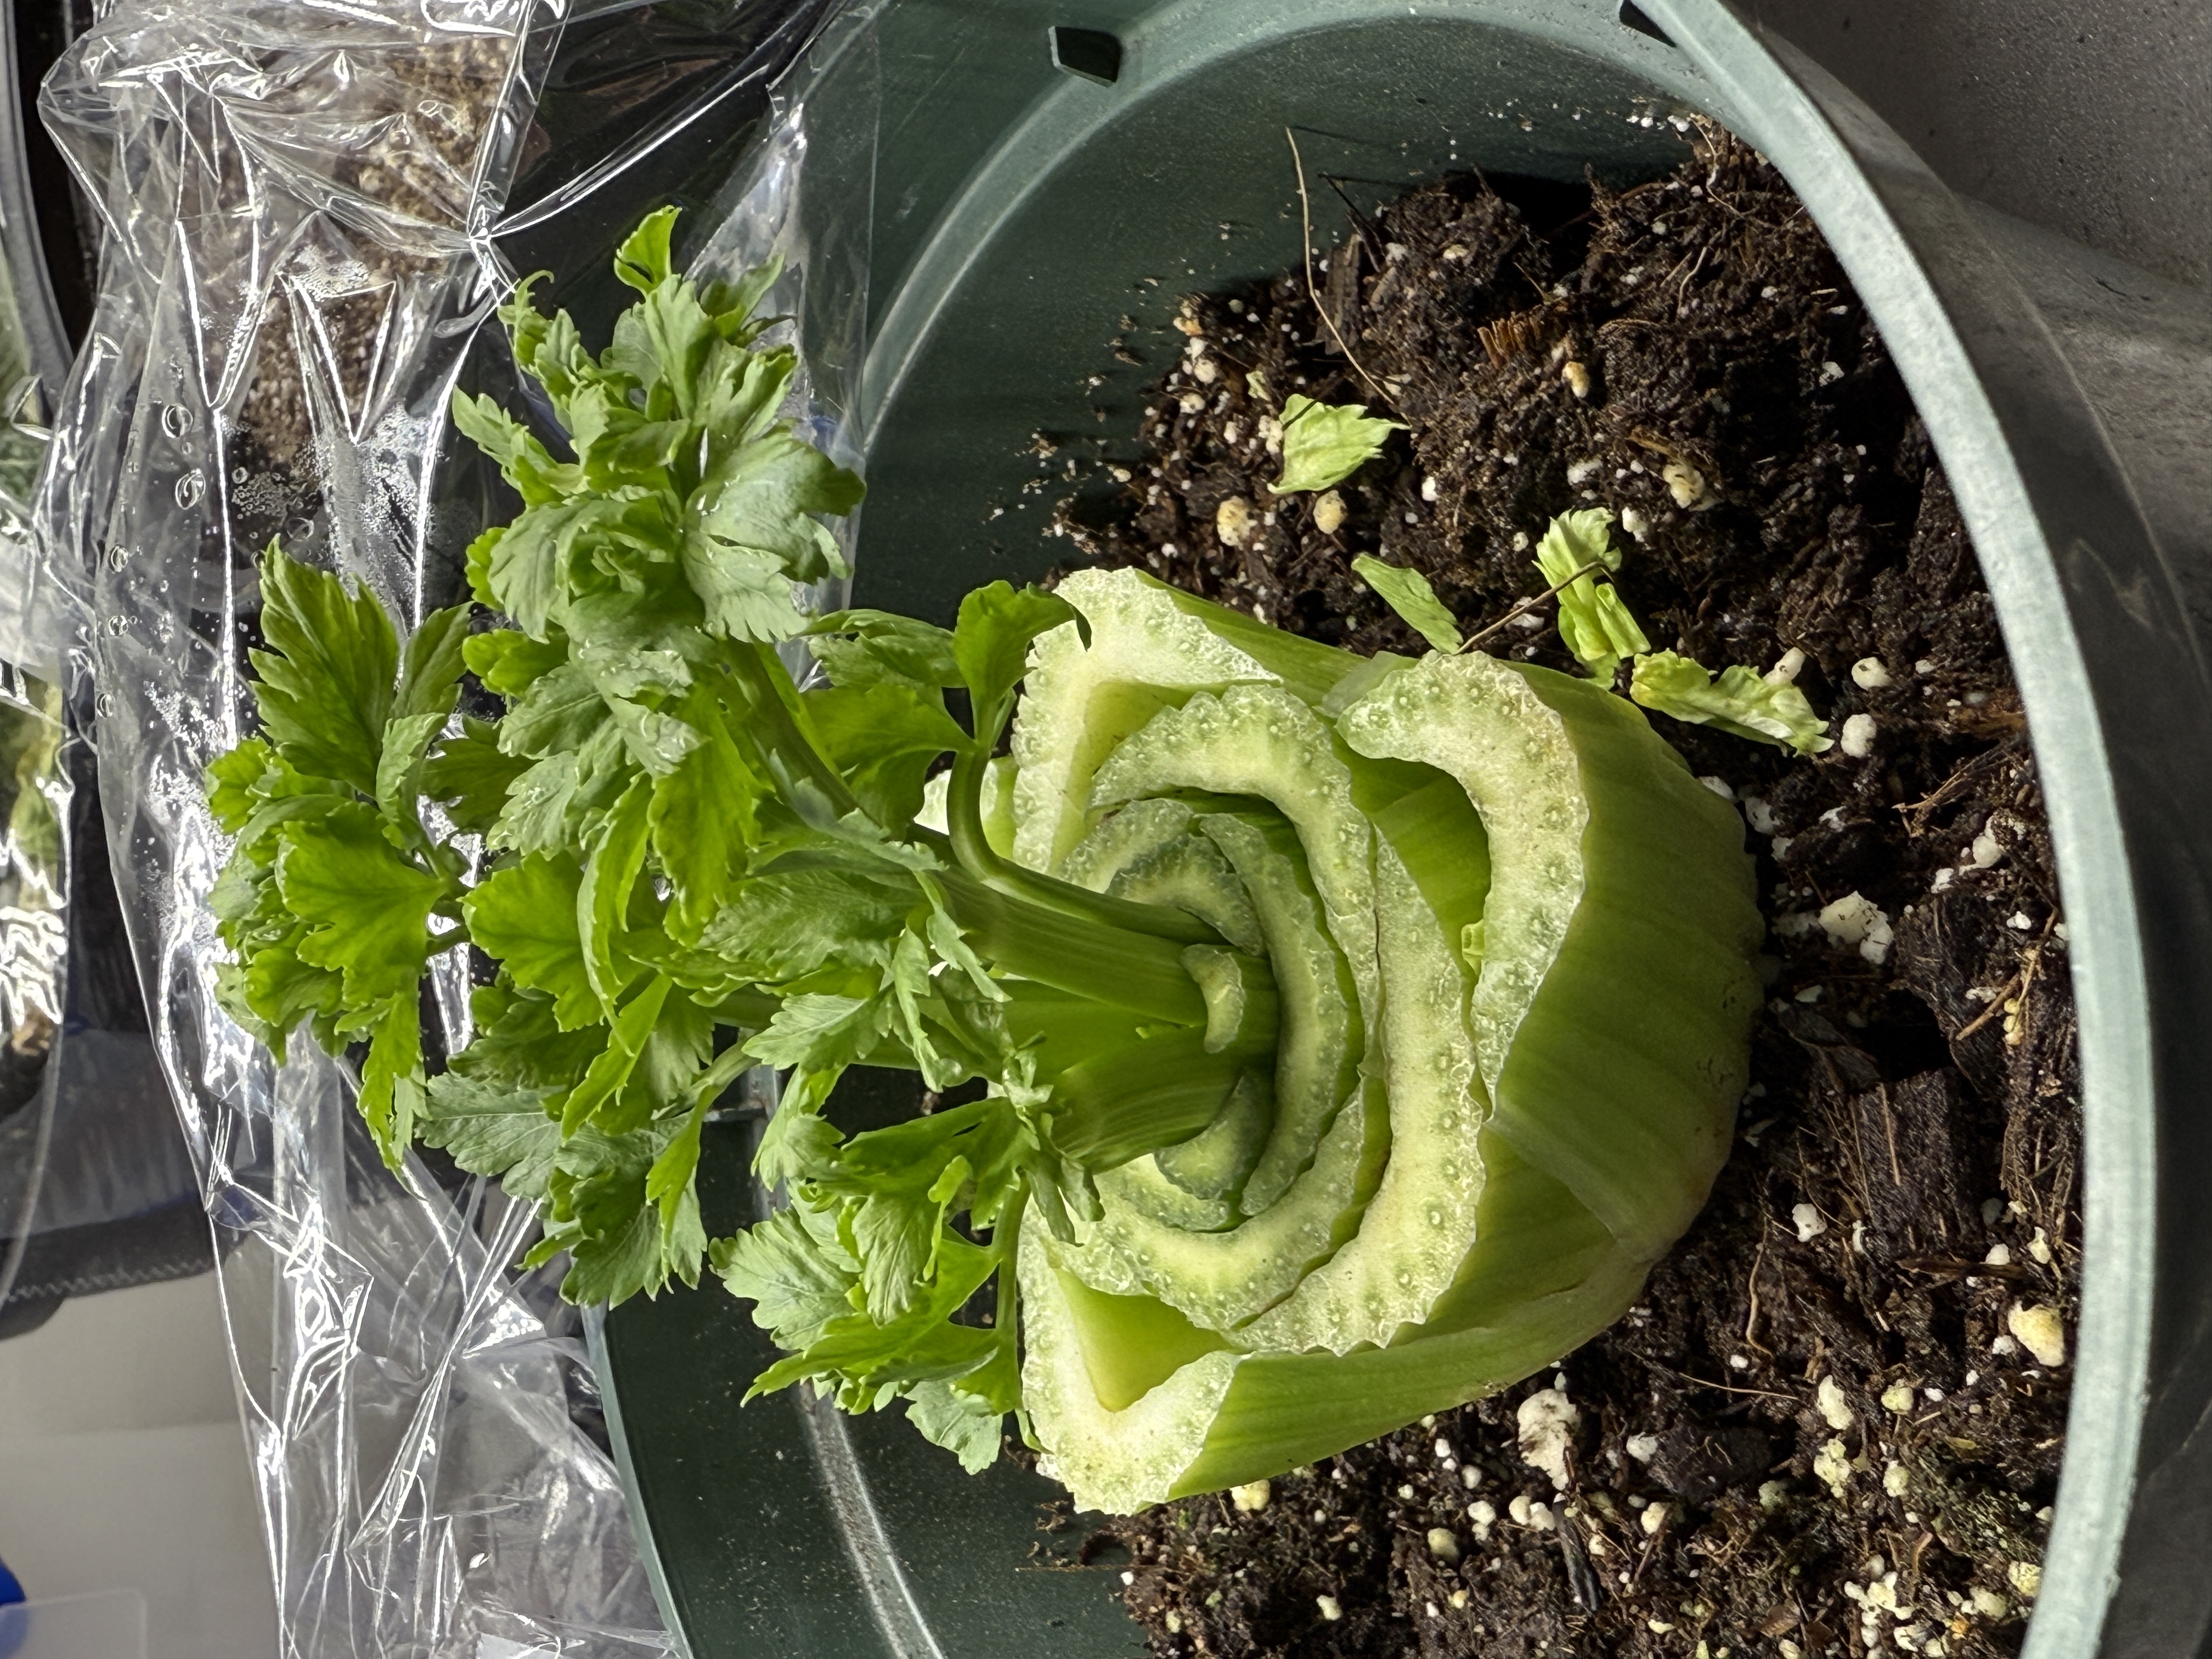 Figure 5. Celery 12 days after planting.
Pineapples
Cut the top off a pineapple and grow another to harvest (much) later. Either twist off the top or cut just below the greenery. Place the top in the soil, leaving the bottom of the greenery exposed. Keep it moist. Place the pineapple in bright light and warmth (a greenhouse is ideal, or as close as you can recreate one). New growth will emerge from the center of the leaf cluster, and a large, spiky fruit will form. A pineapple is a “multiple fruit.” A multiple fruit starts as a cluster of flowers. Each section of the pineapple develops from one flower in the cluster. Other examples of multiple fruits are blackberries and raspberries.
When the pineapple reaches full size and all fruits are fully yellow (no green lines around the edges), it is ready to be harvested. If ripe, it will take very little pressure to remove (you can use your hands). After harvesting, you can grow the top of the harvested pineapple to produce another pineapple. Note: It can take a year or even longer to harvest a new pineapple from a planted pineapple top.
The pineapples in the stores are often green or brown, which means they are not quite ripe. Pineapples are shipped before they are ripe, because ripe pineapples do not transport well. Unlike tomatoes, pineapples do not continue ripening after harvest, so stores normally have unripe pineapples for sale.
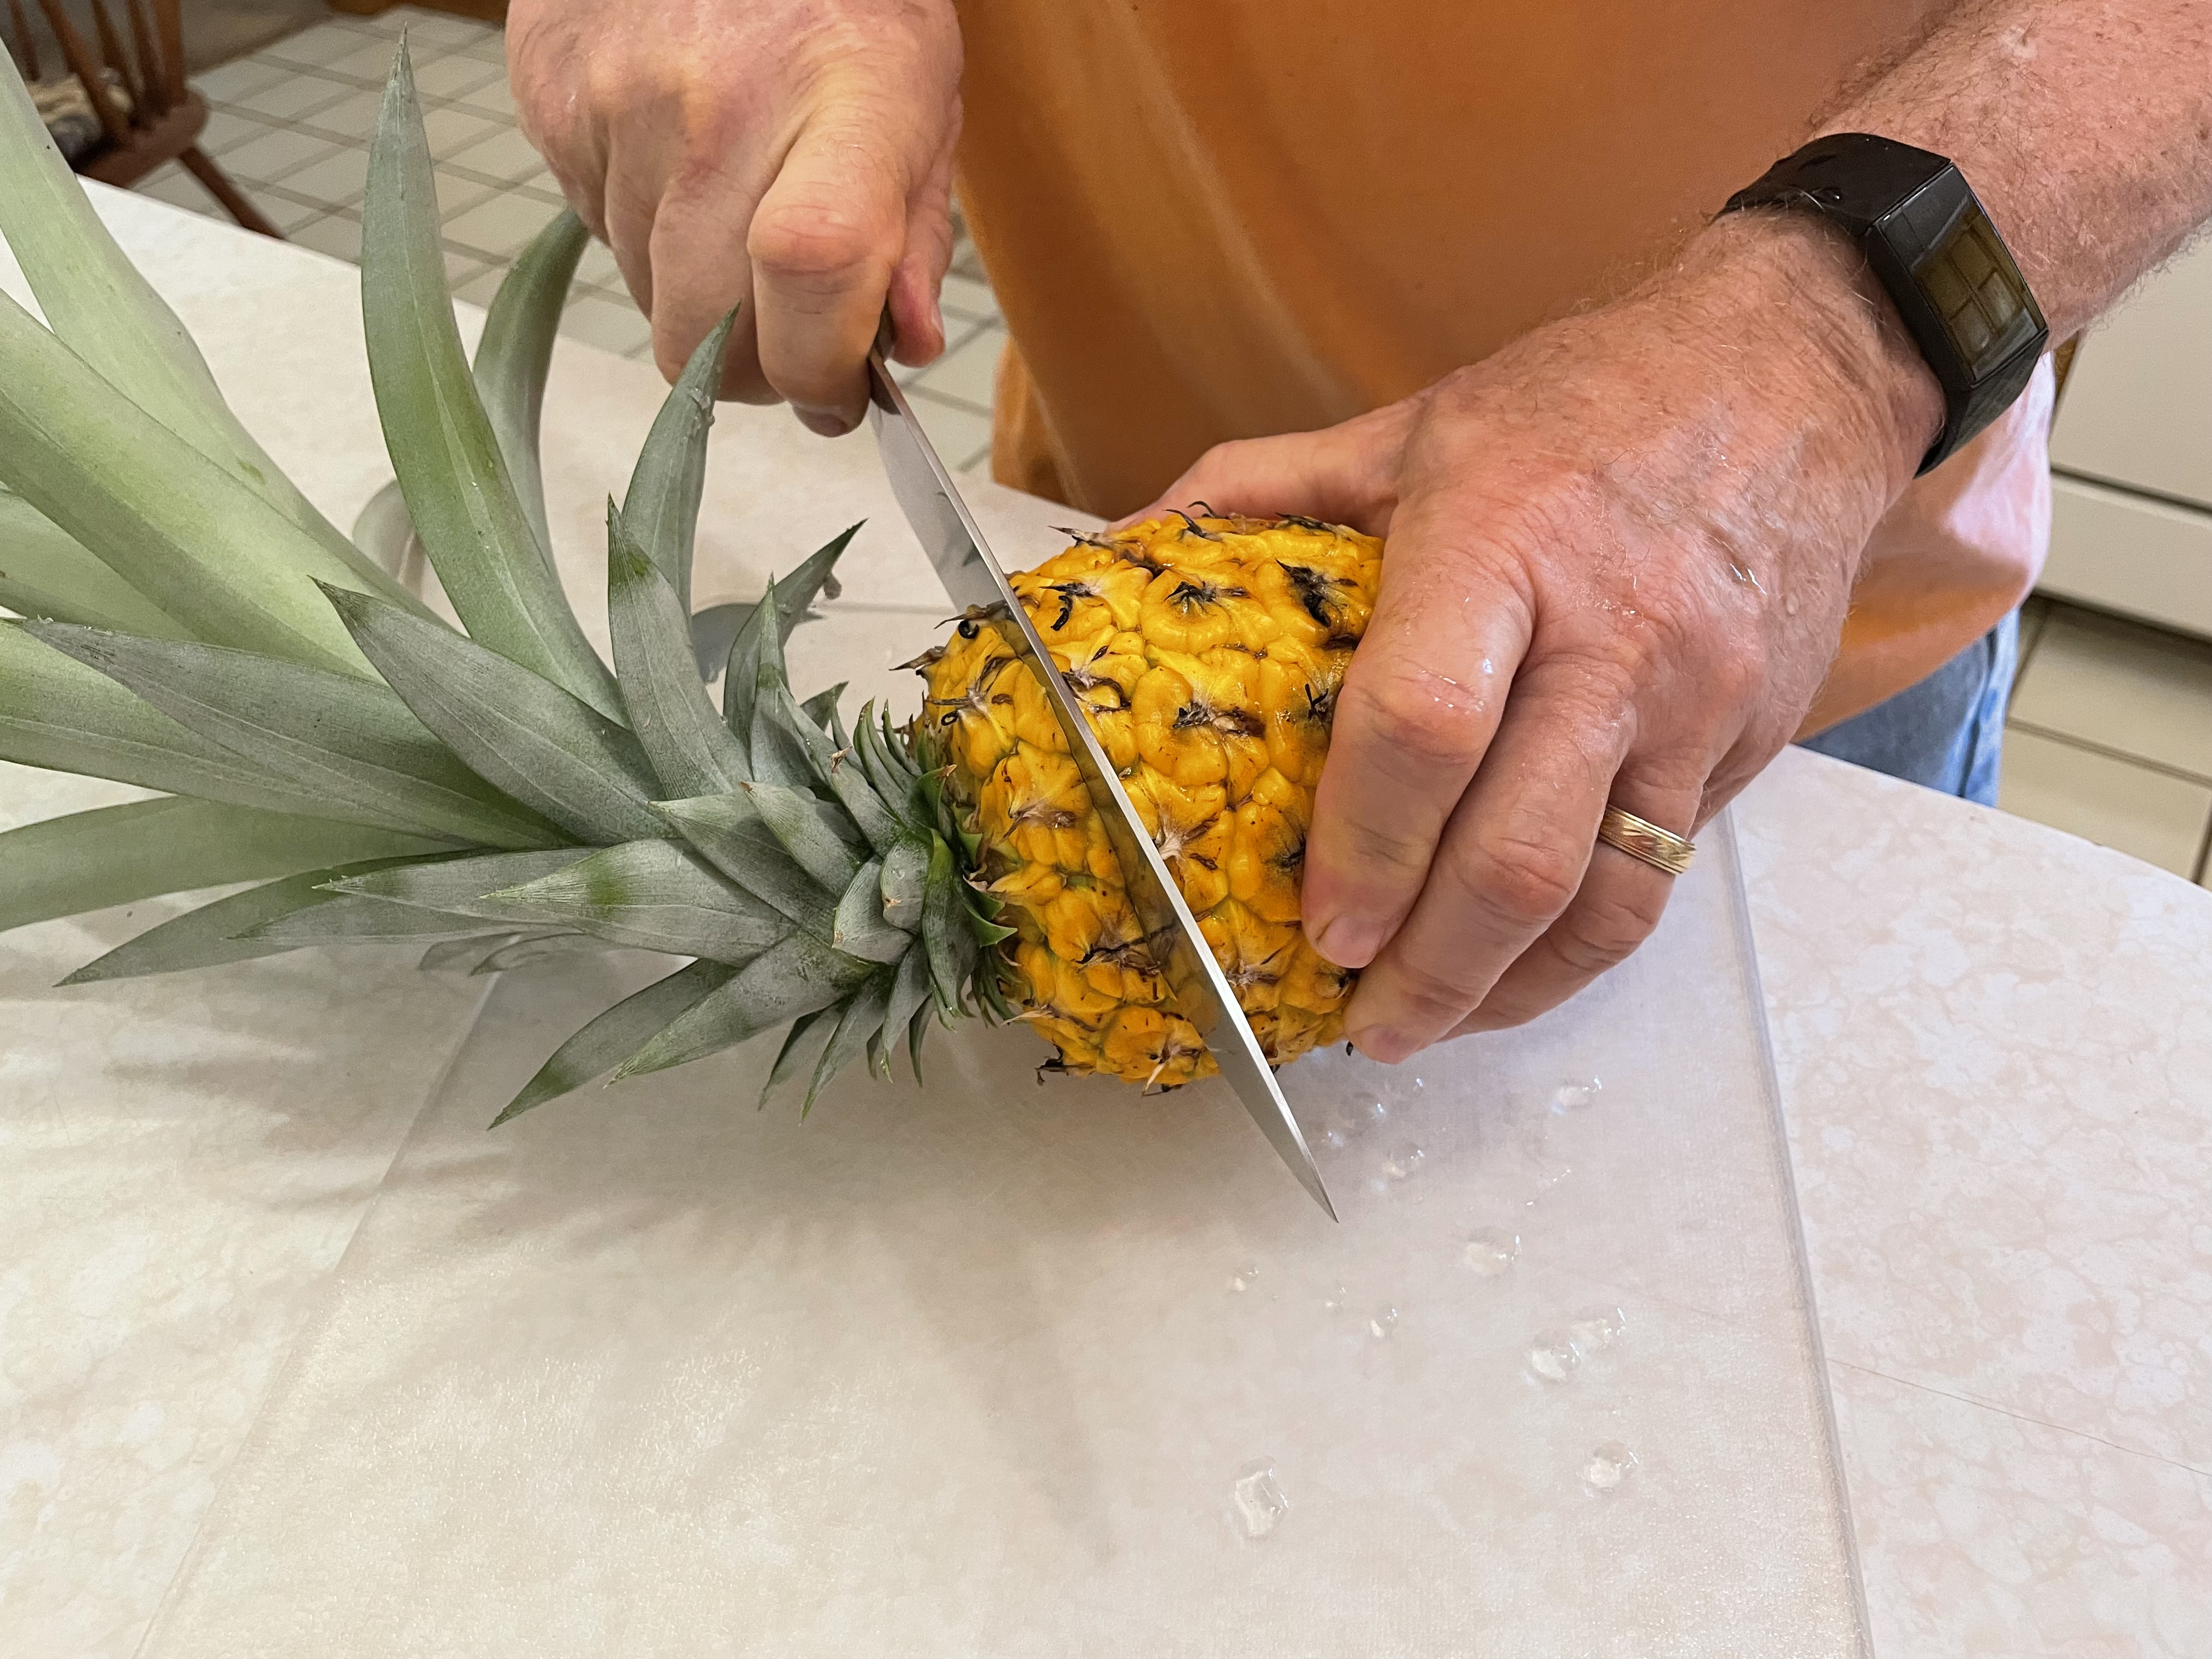 Figure 6. Cutting the top off a pineapple.
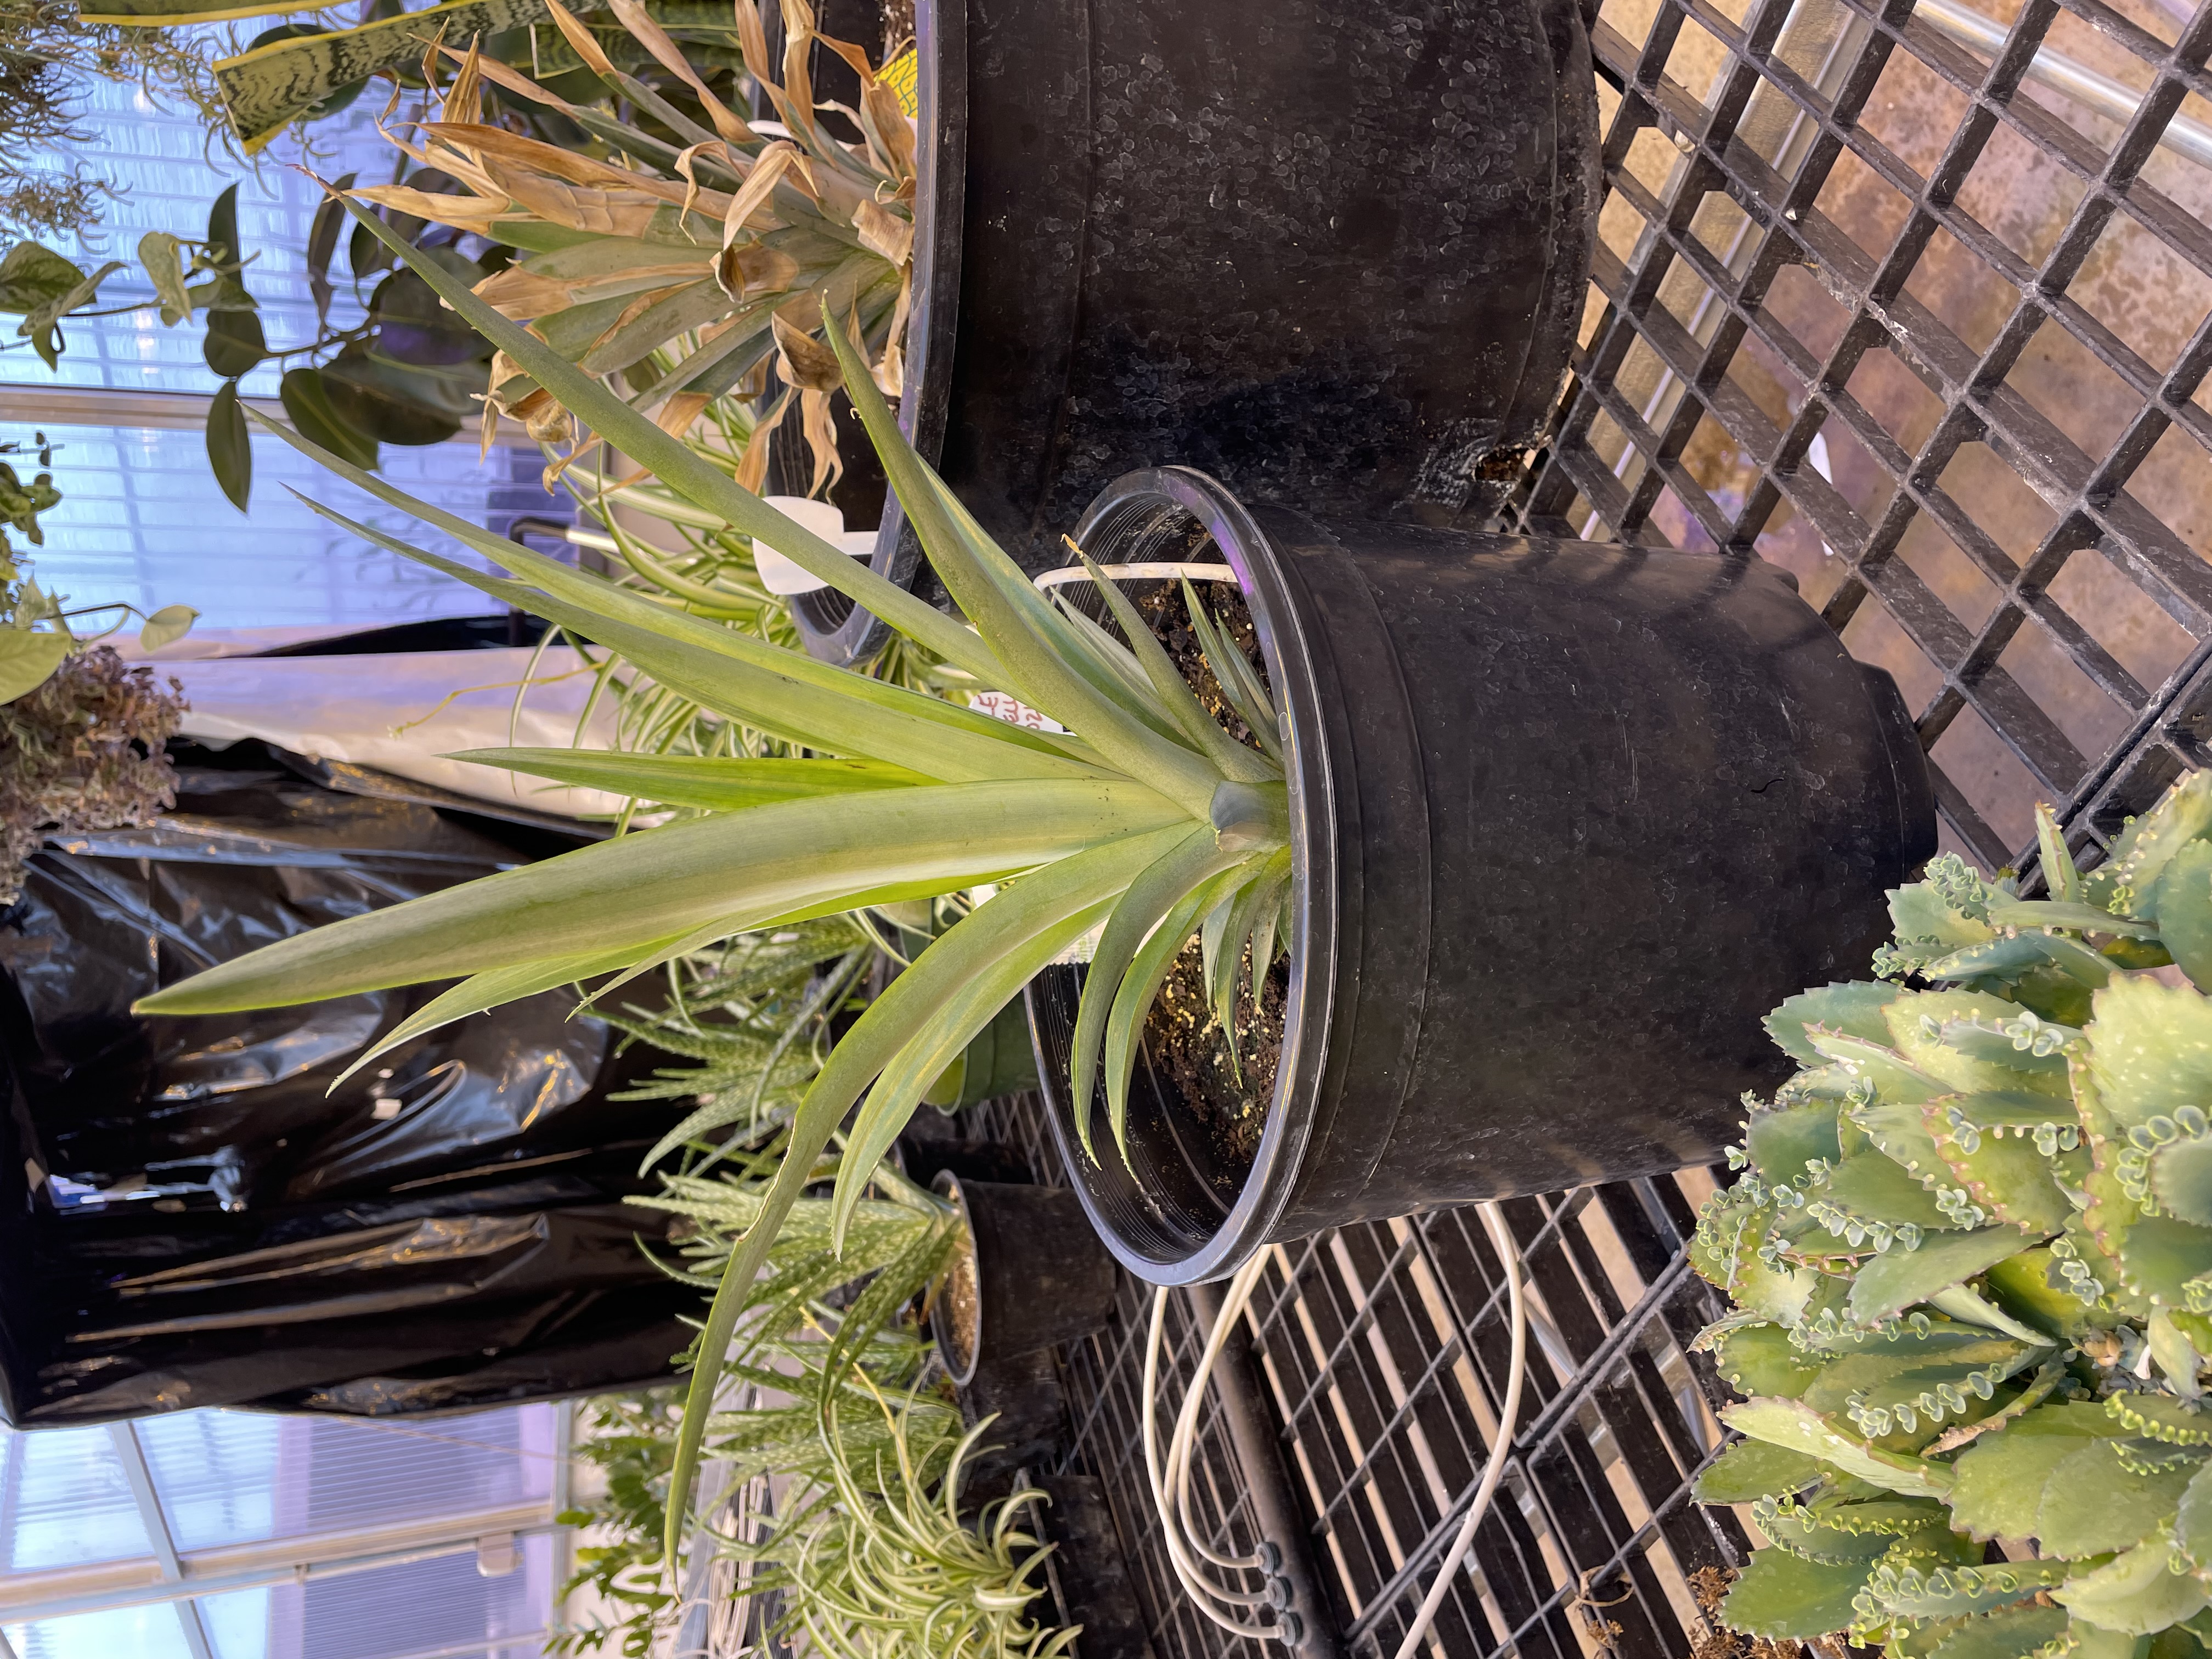 Figure 7. A potted pineapple in bright light.
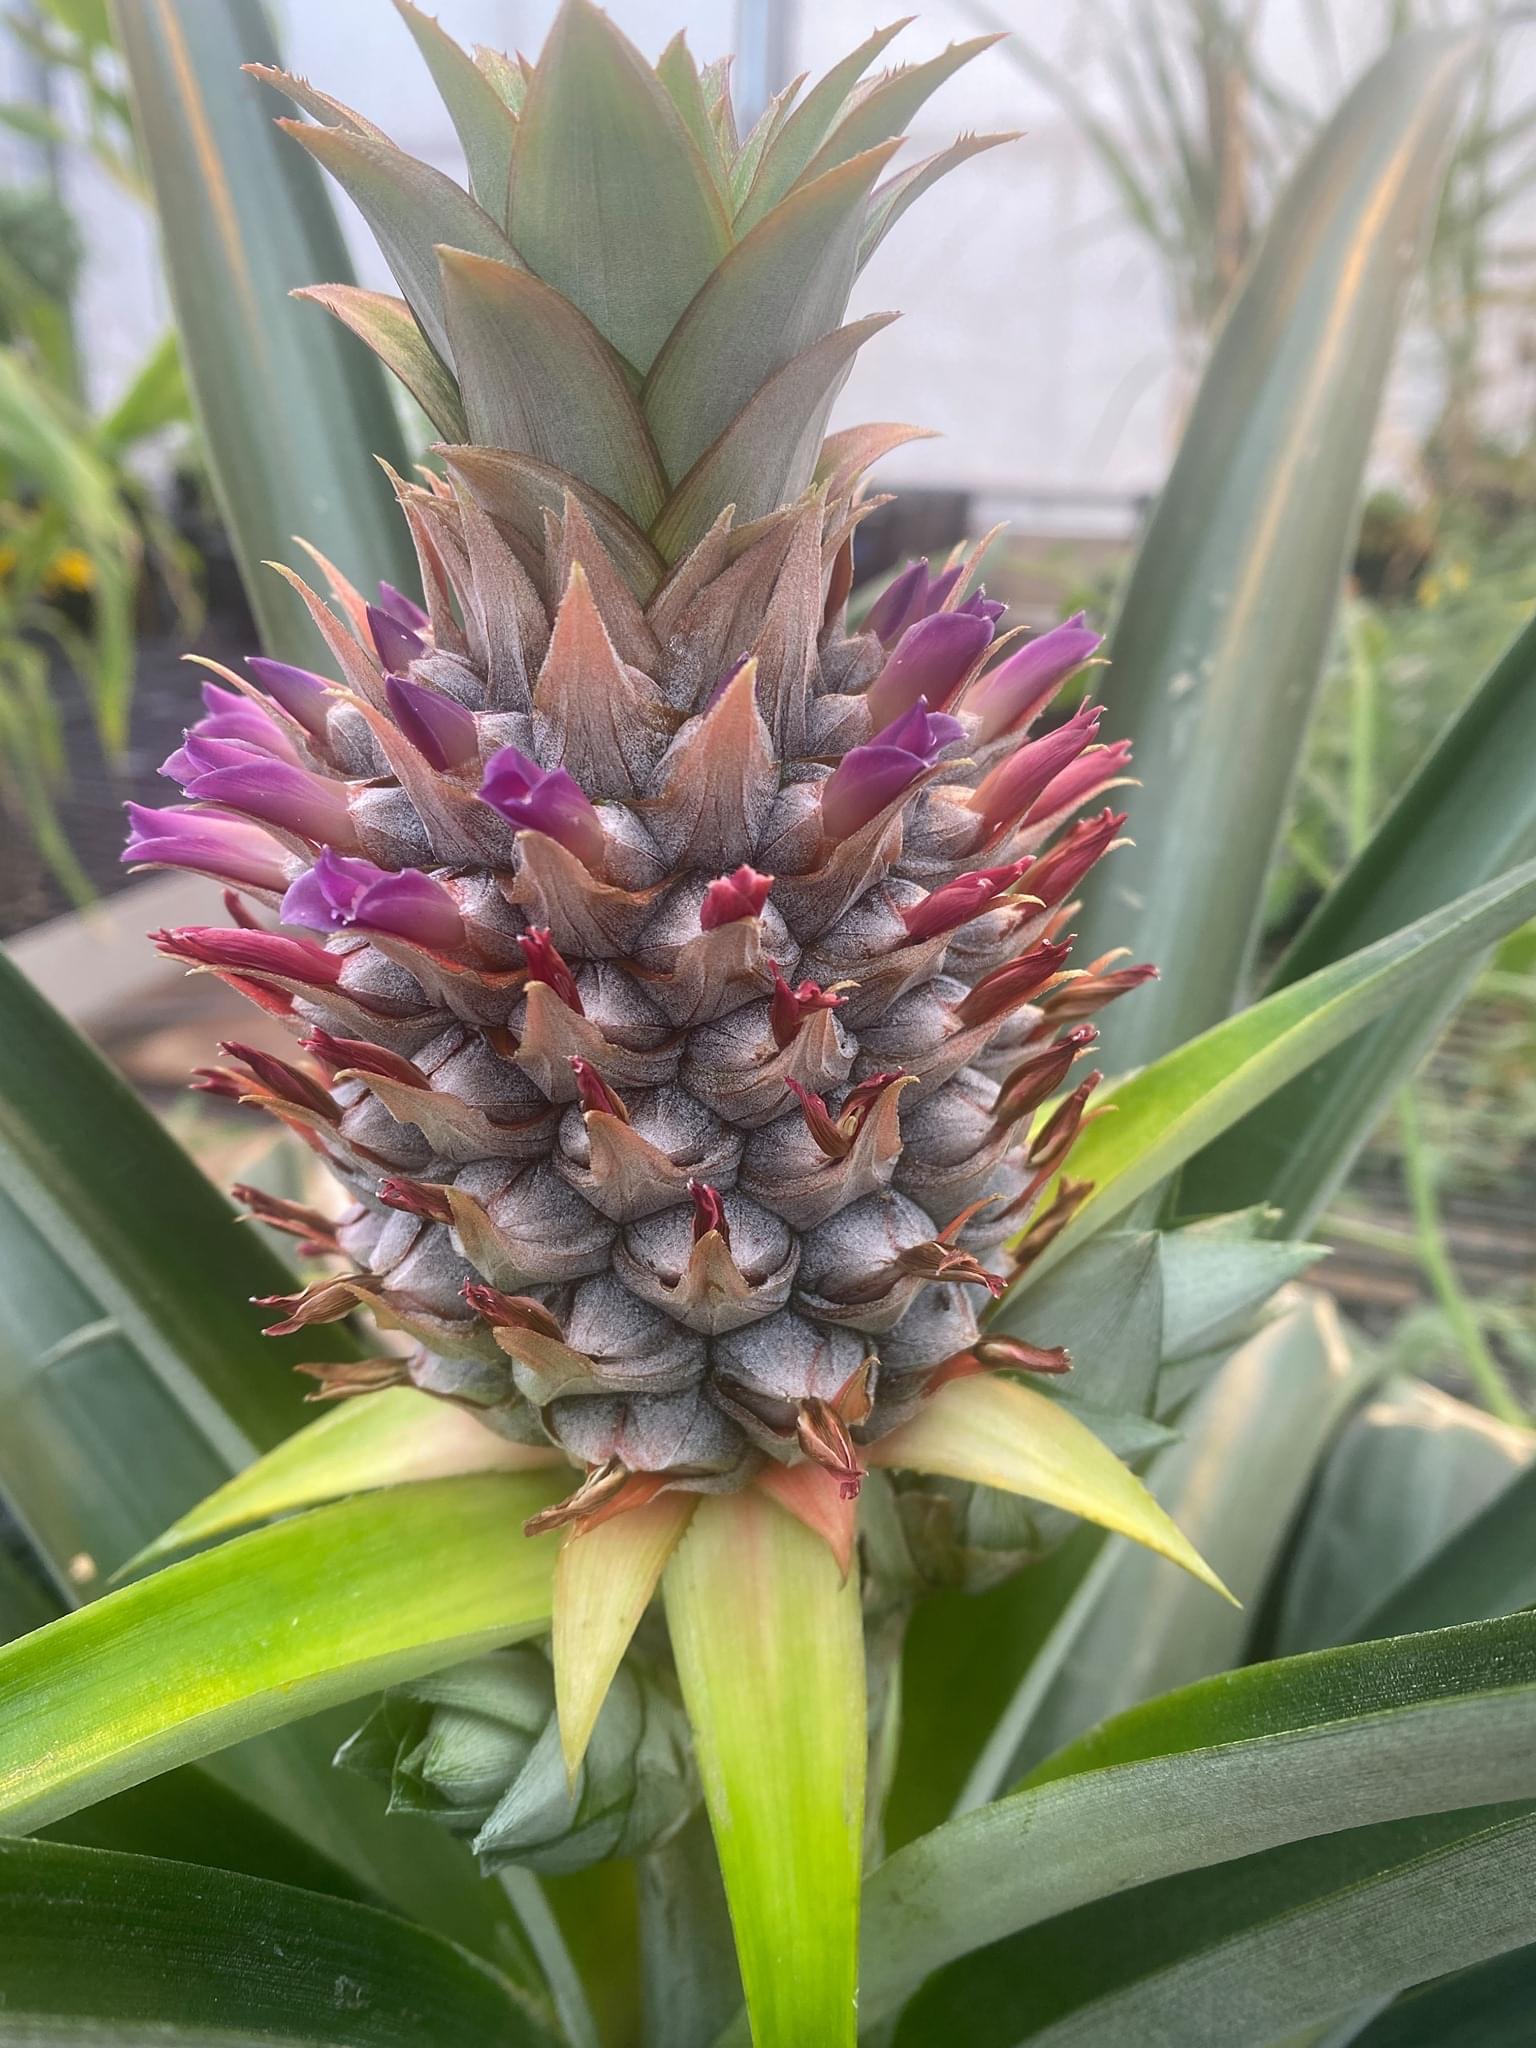 Figure 8. Individual fruits of pineapple with their flowers.
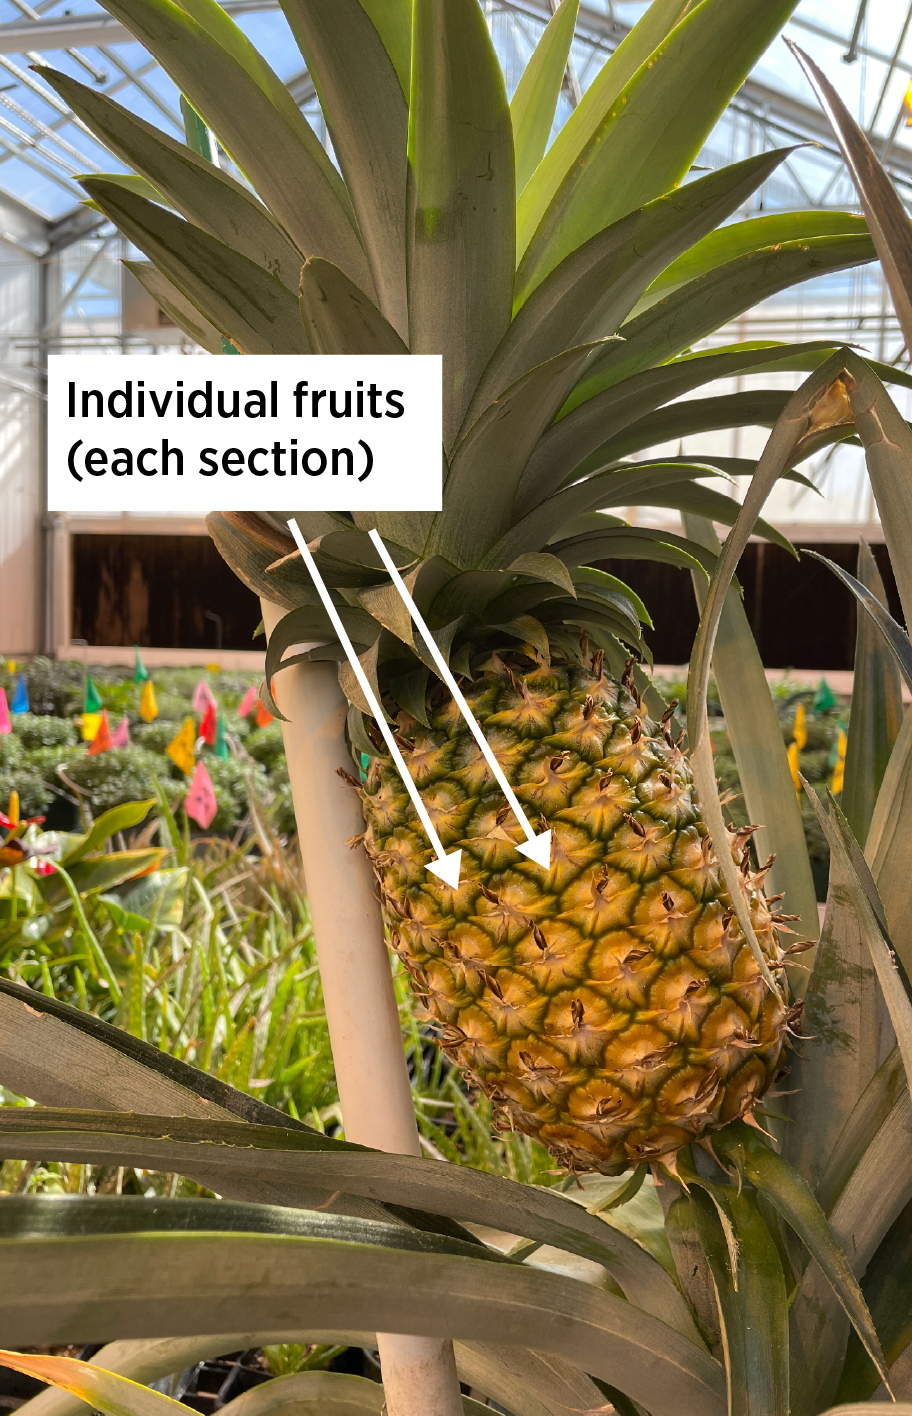 Figure 9. Almost ripe pineapple with green around each fruit.
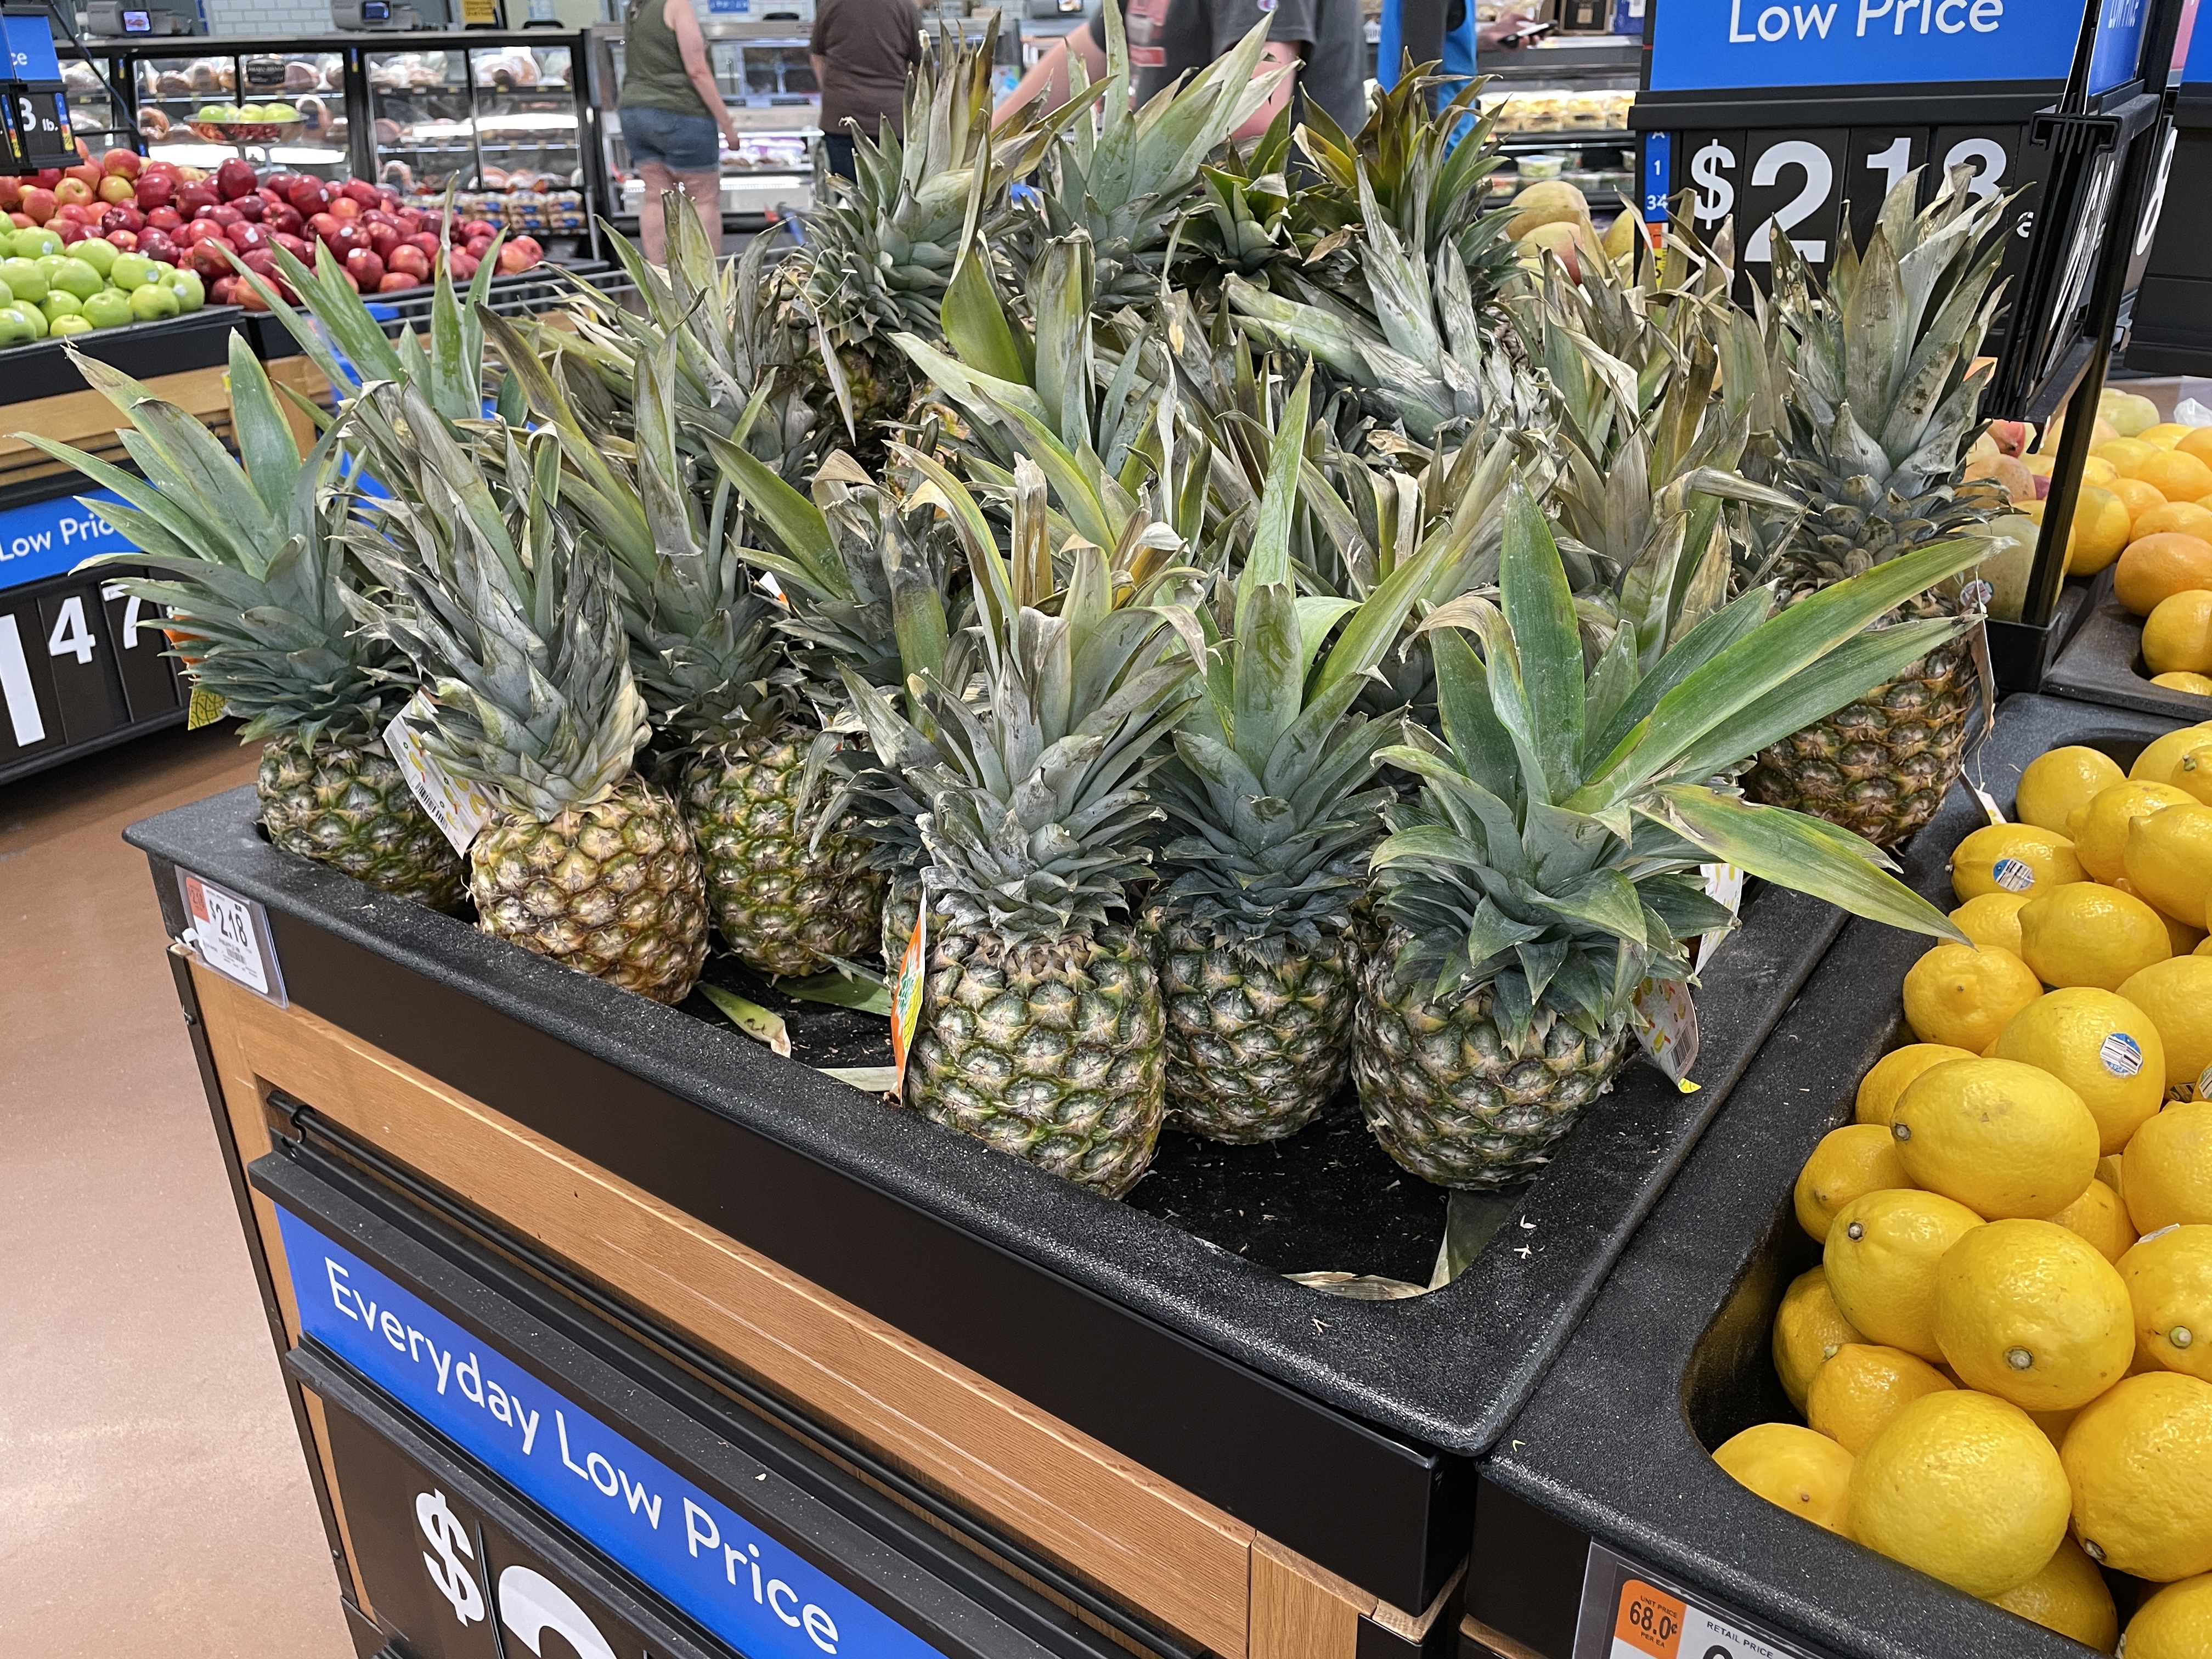 Figure 10. Unripe pineapples for sale in a supermarket.
Green Onions
To regrow green onions, save the white bulb with the roots attached and plant its root-side down in soil, leaving about half an inch above the soil surface. New shoots will quickly sprout from the center, and because green onions have one of the fastest plant-to-harvest cycles, you will be able to start harvesting within a week. Keep the bulbs in the soil and simply snip off as much of the green tops as you need for cooking — they’ll continue to regrow.
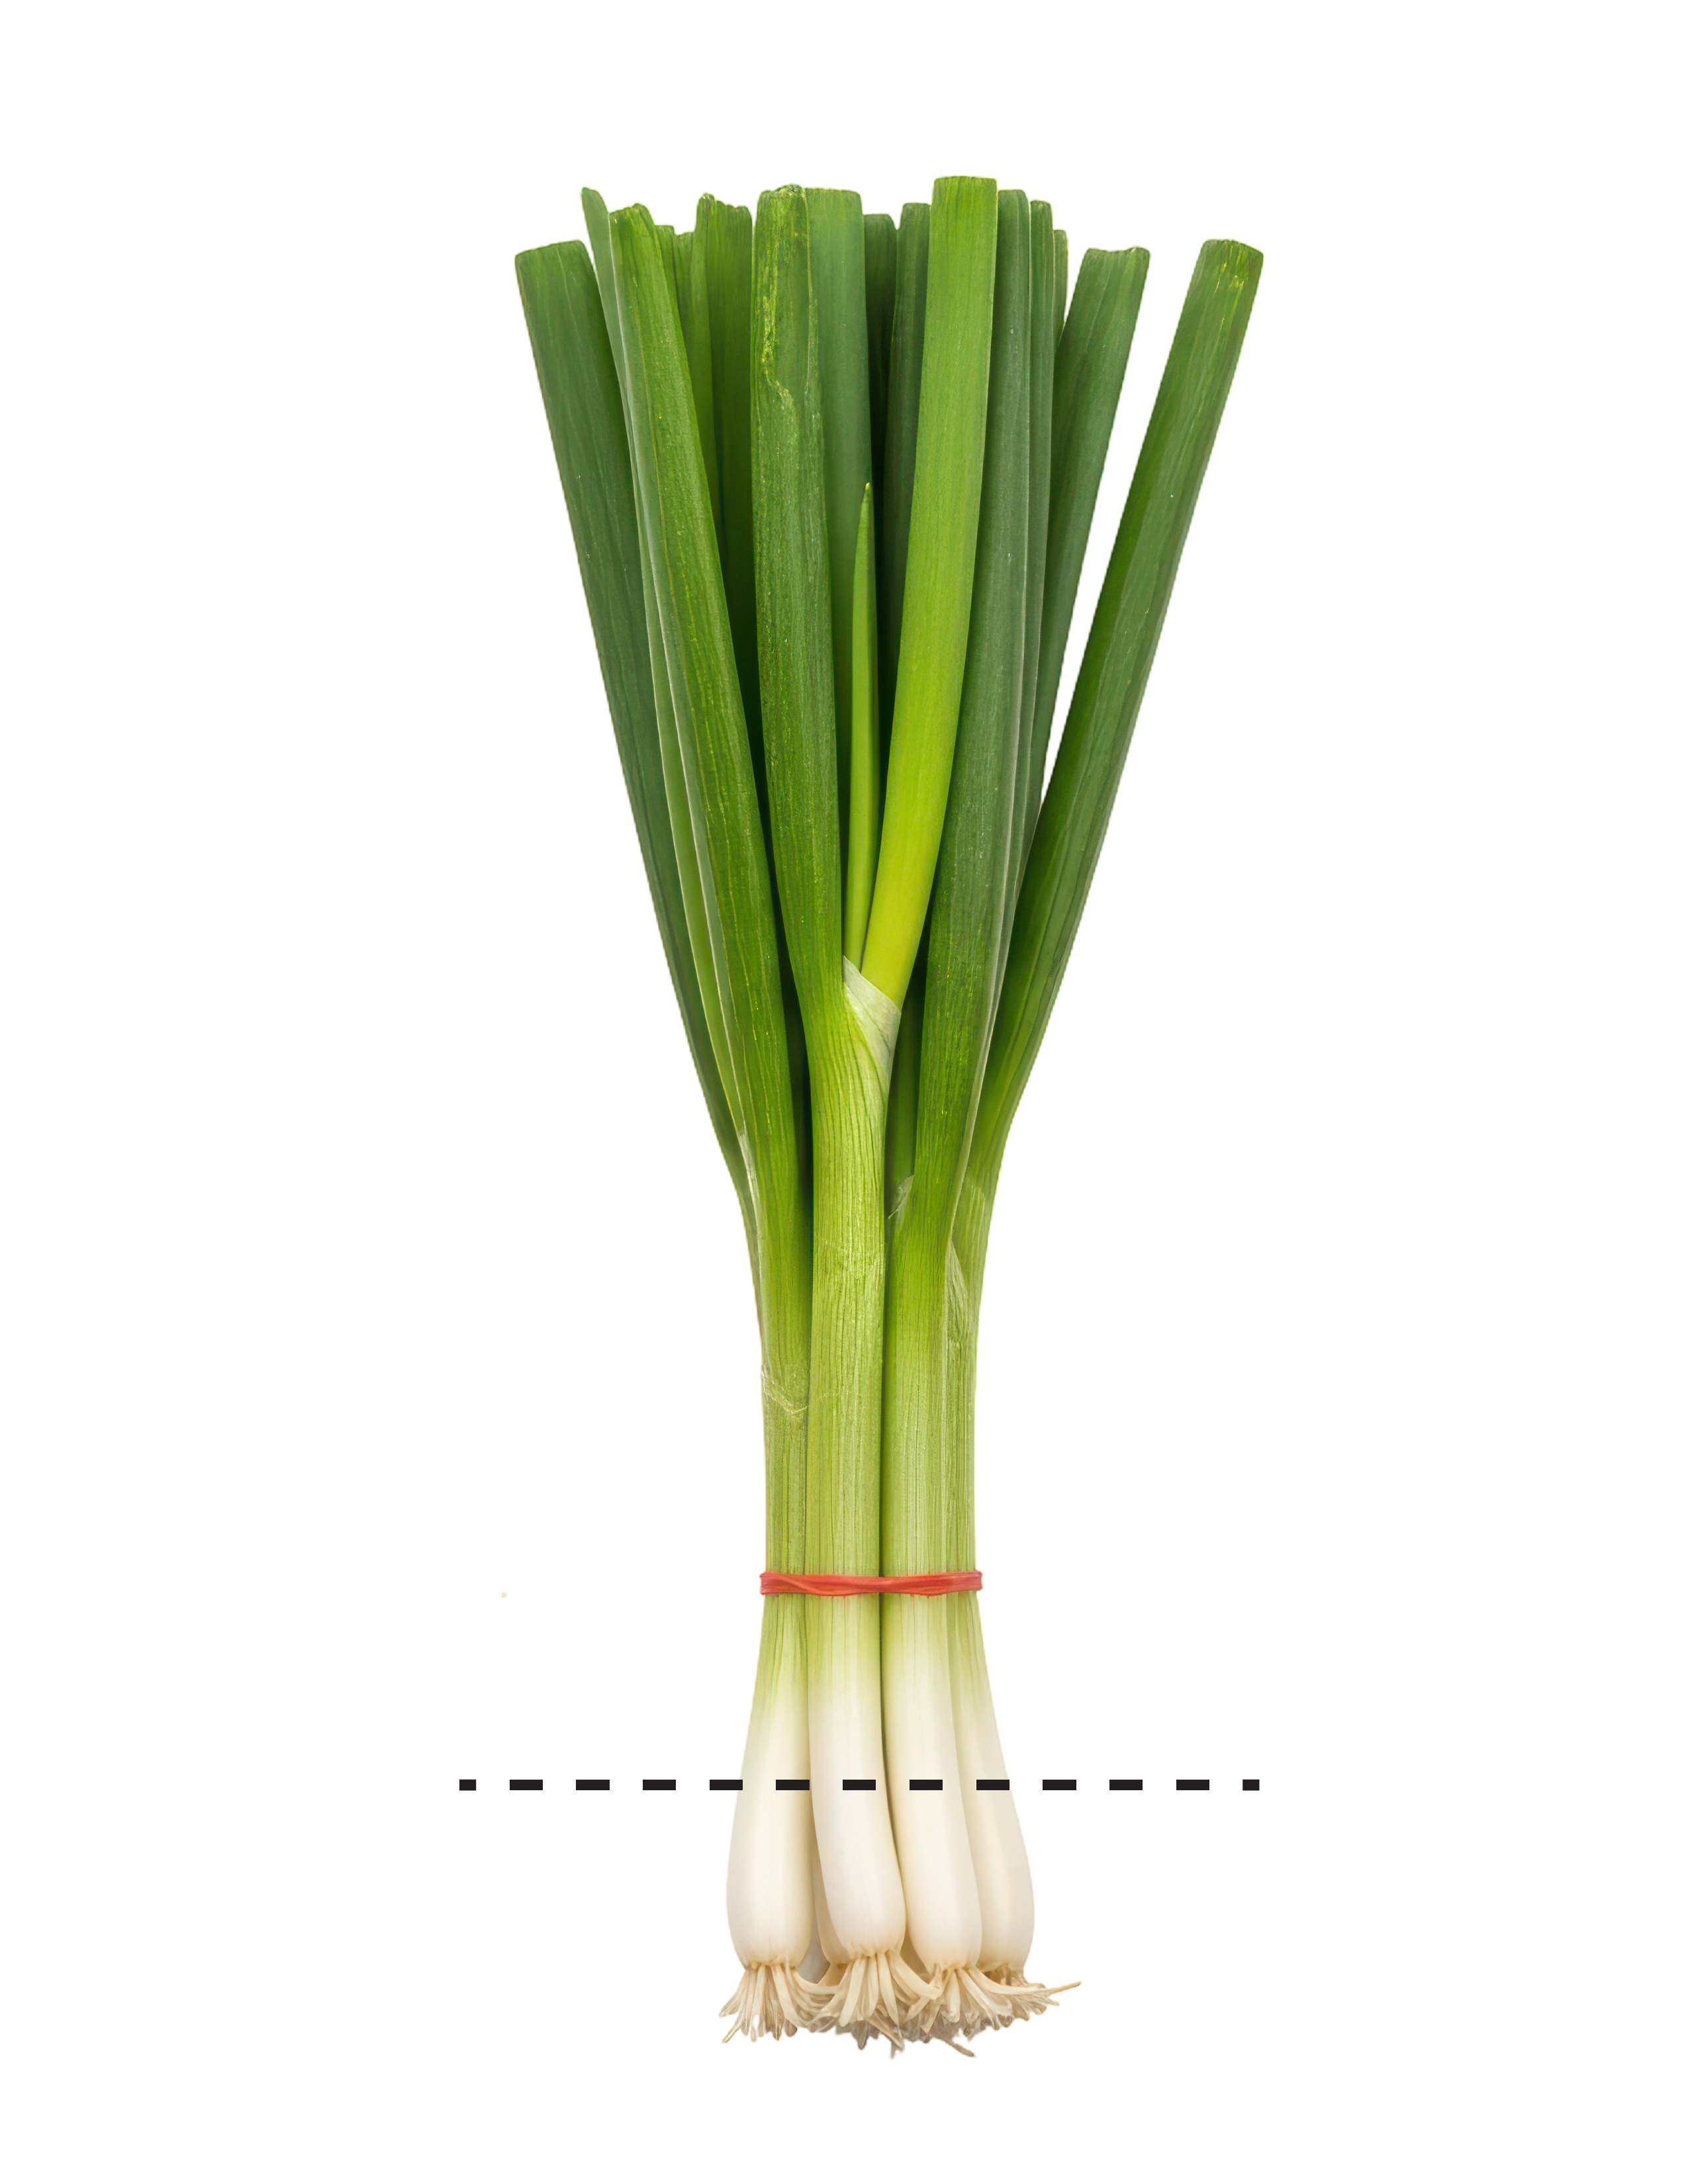 Figure 11. Where to cut green onions.
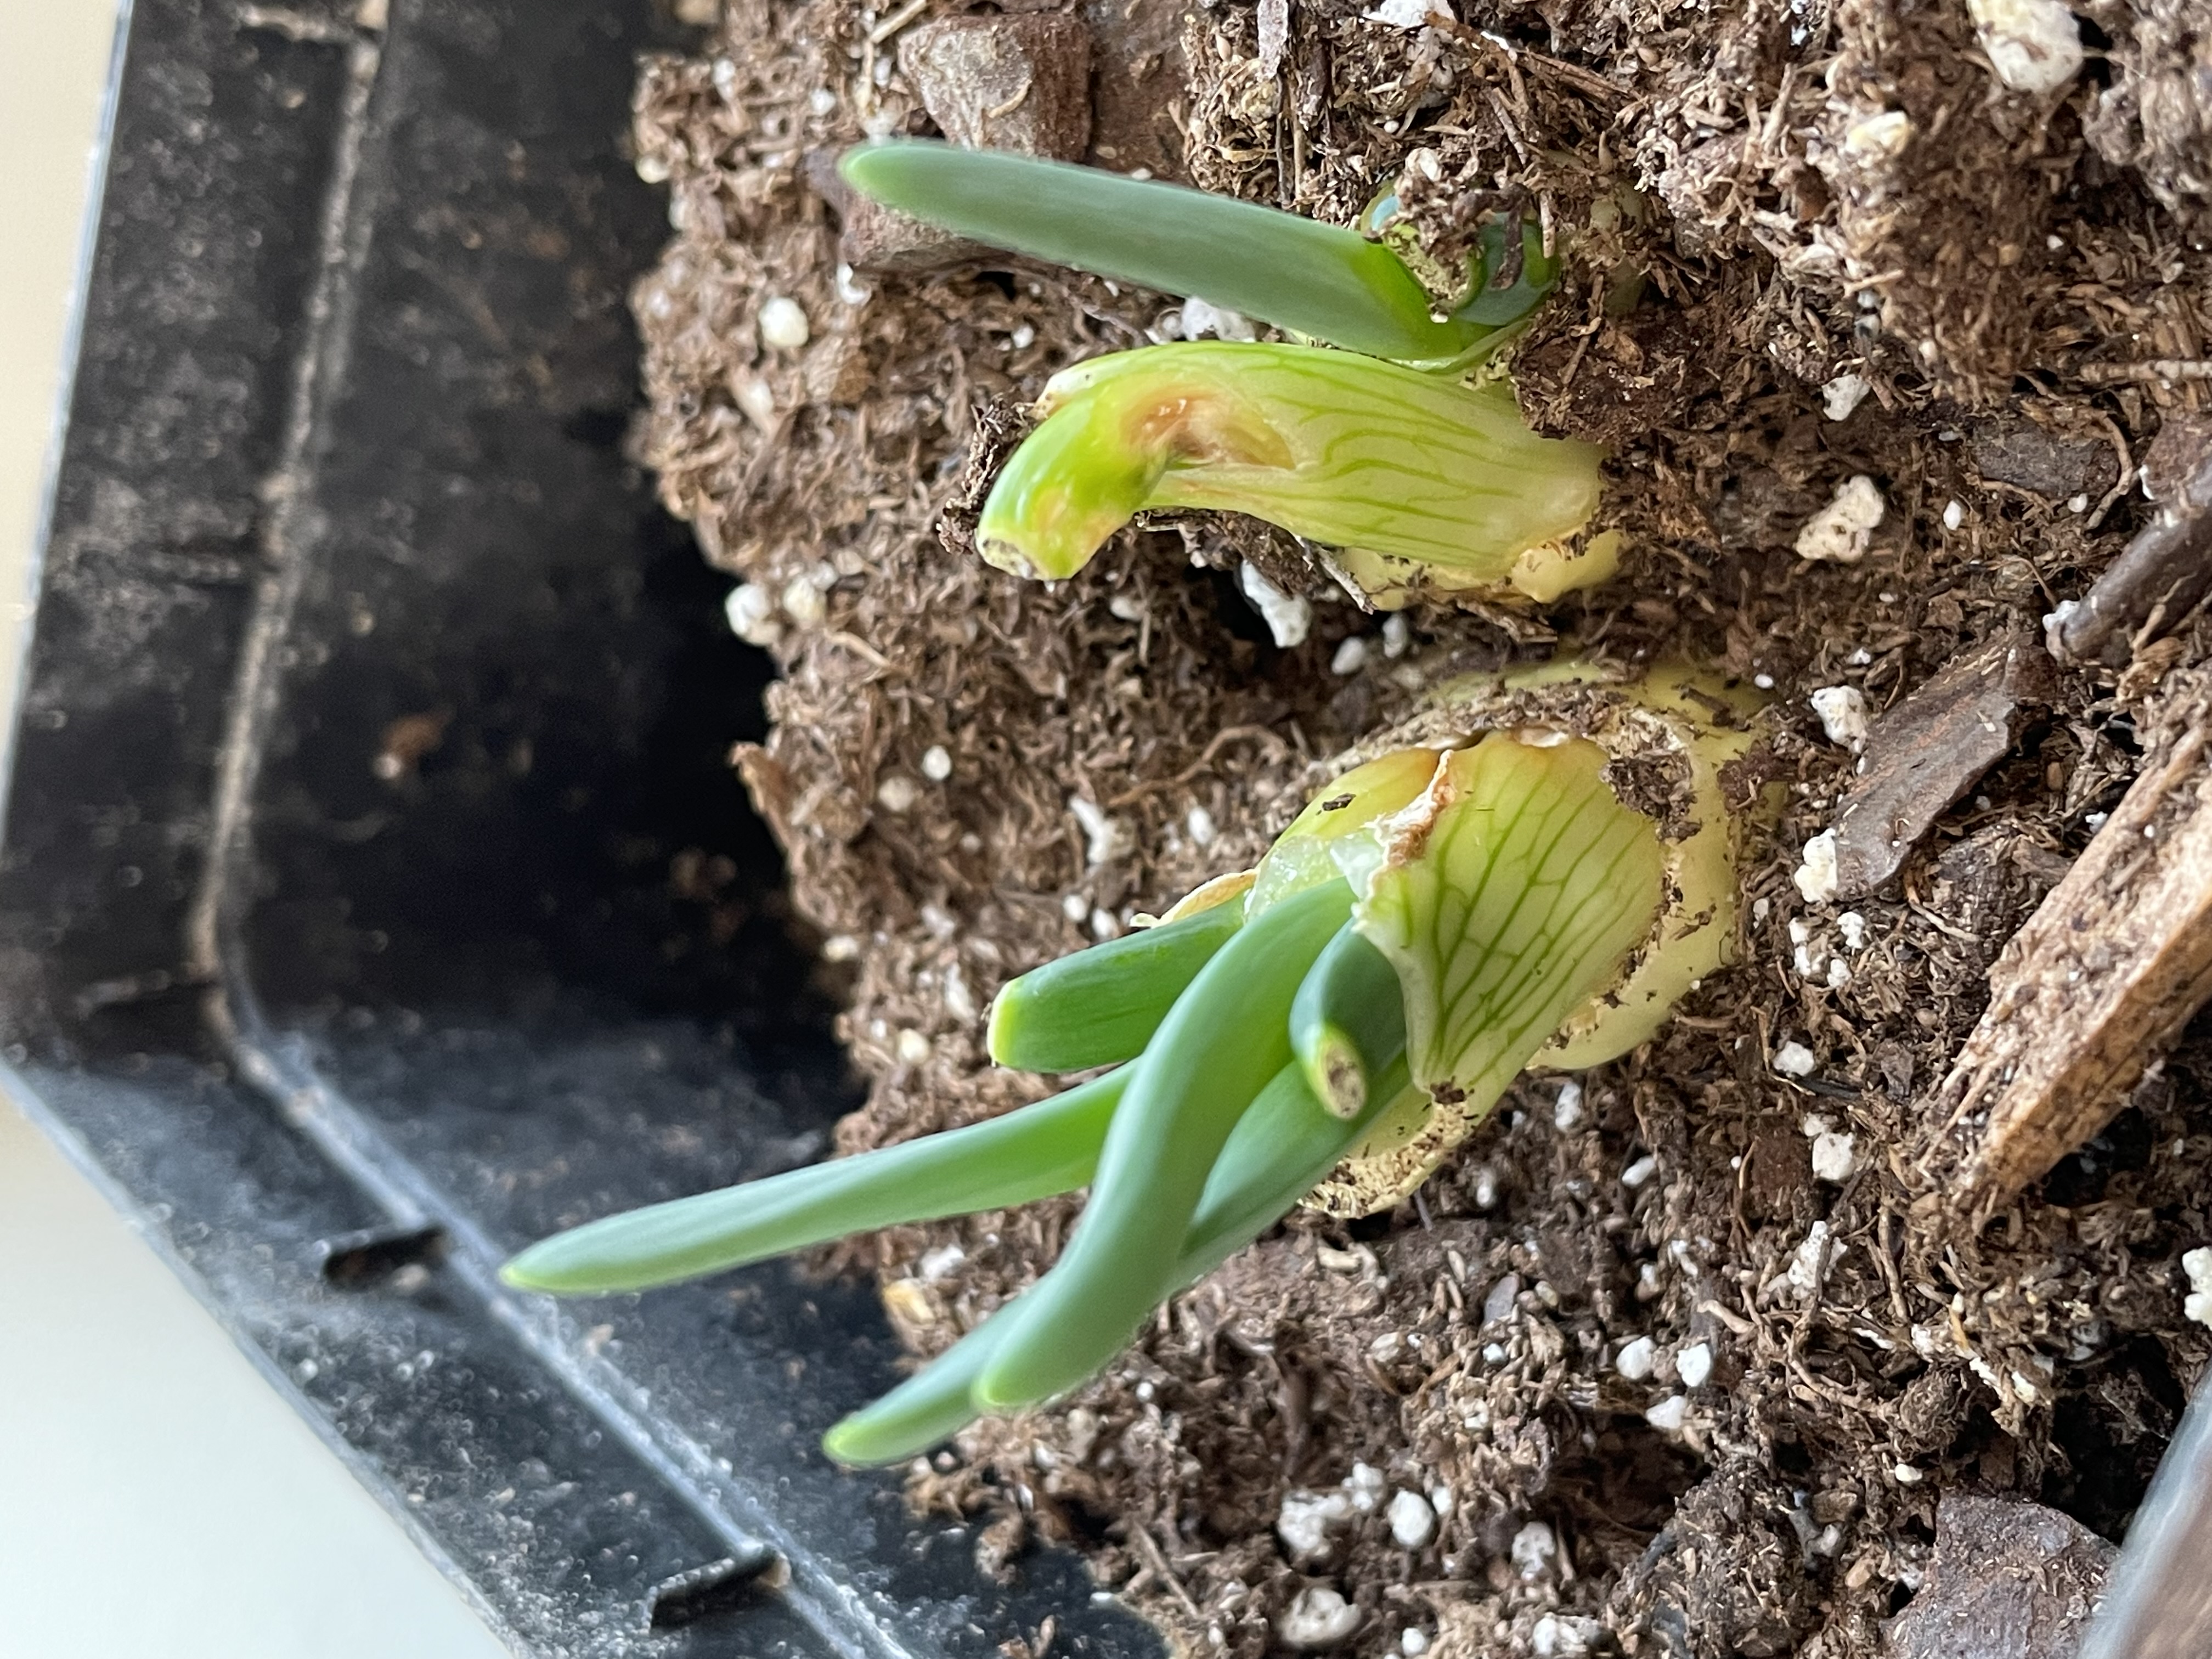 Figure 12. Green onions resprouting.
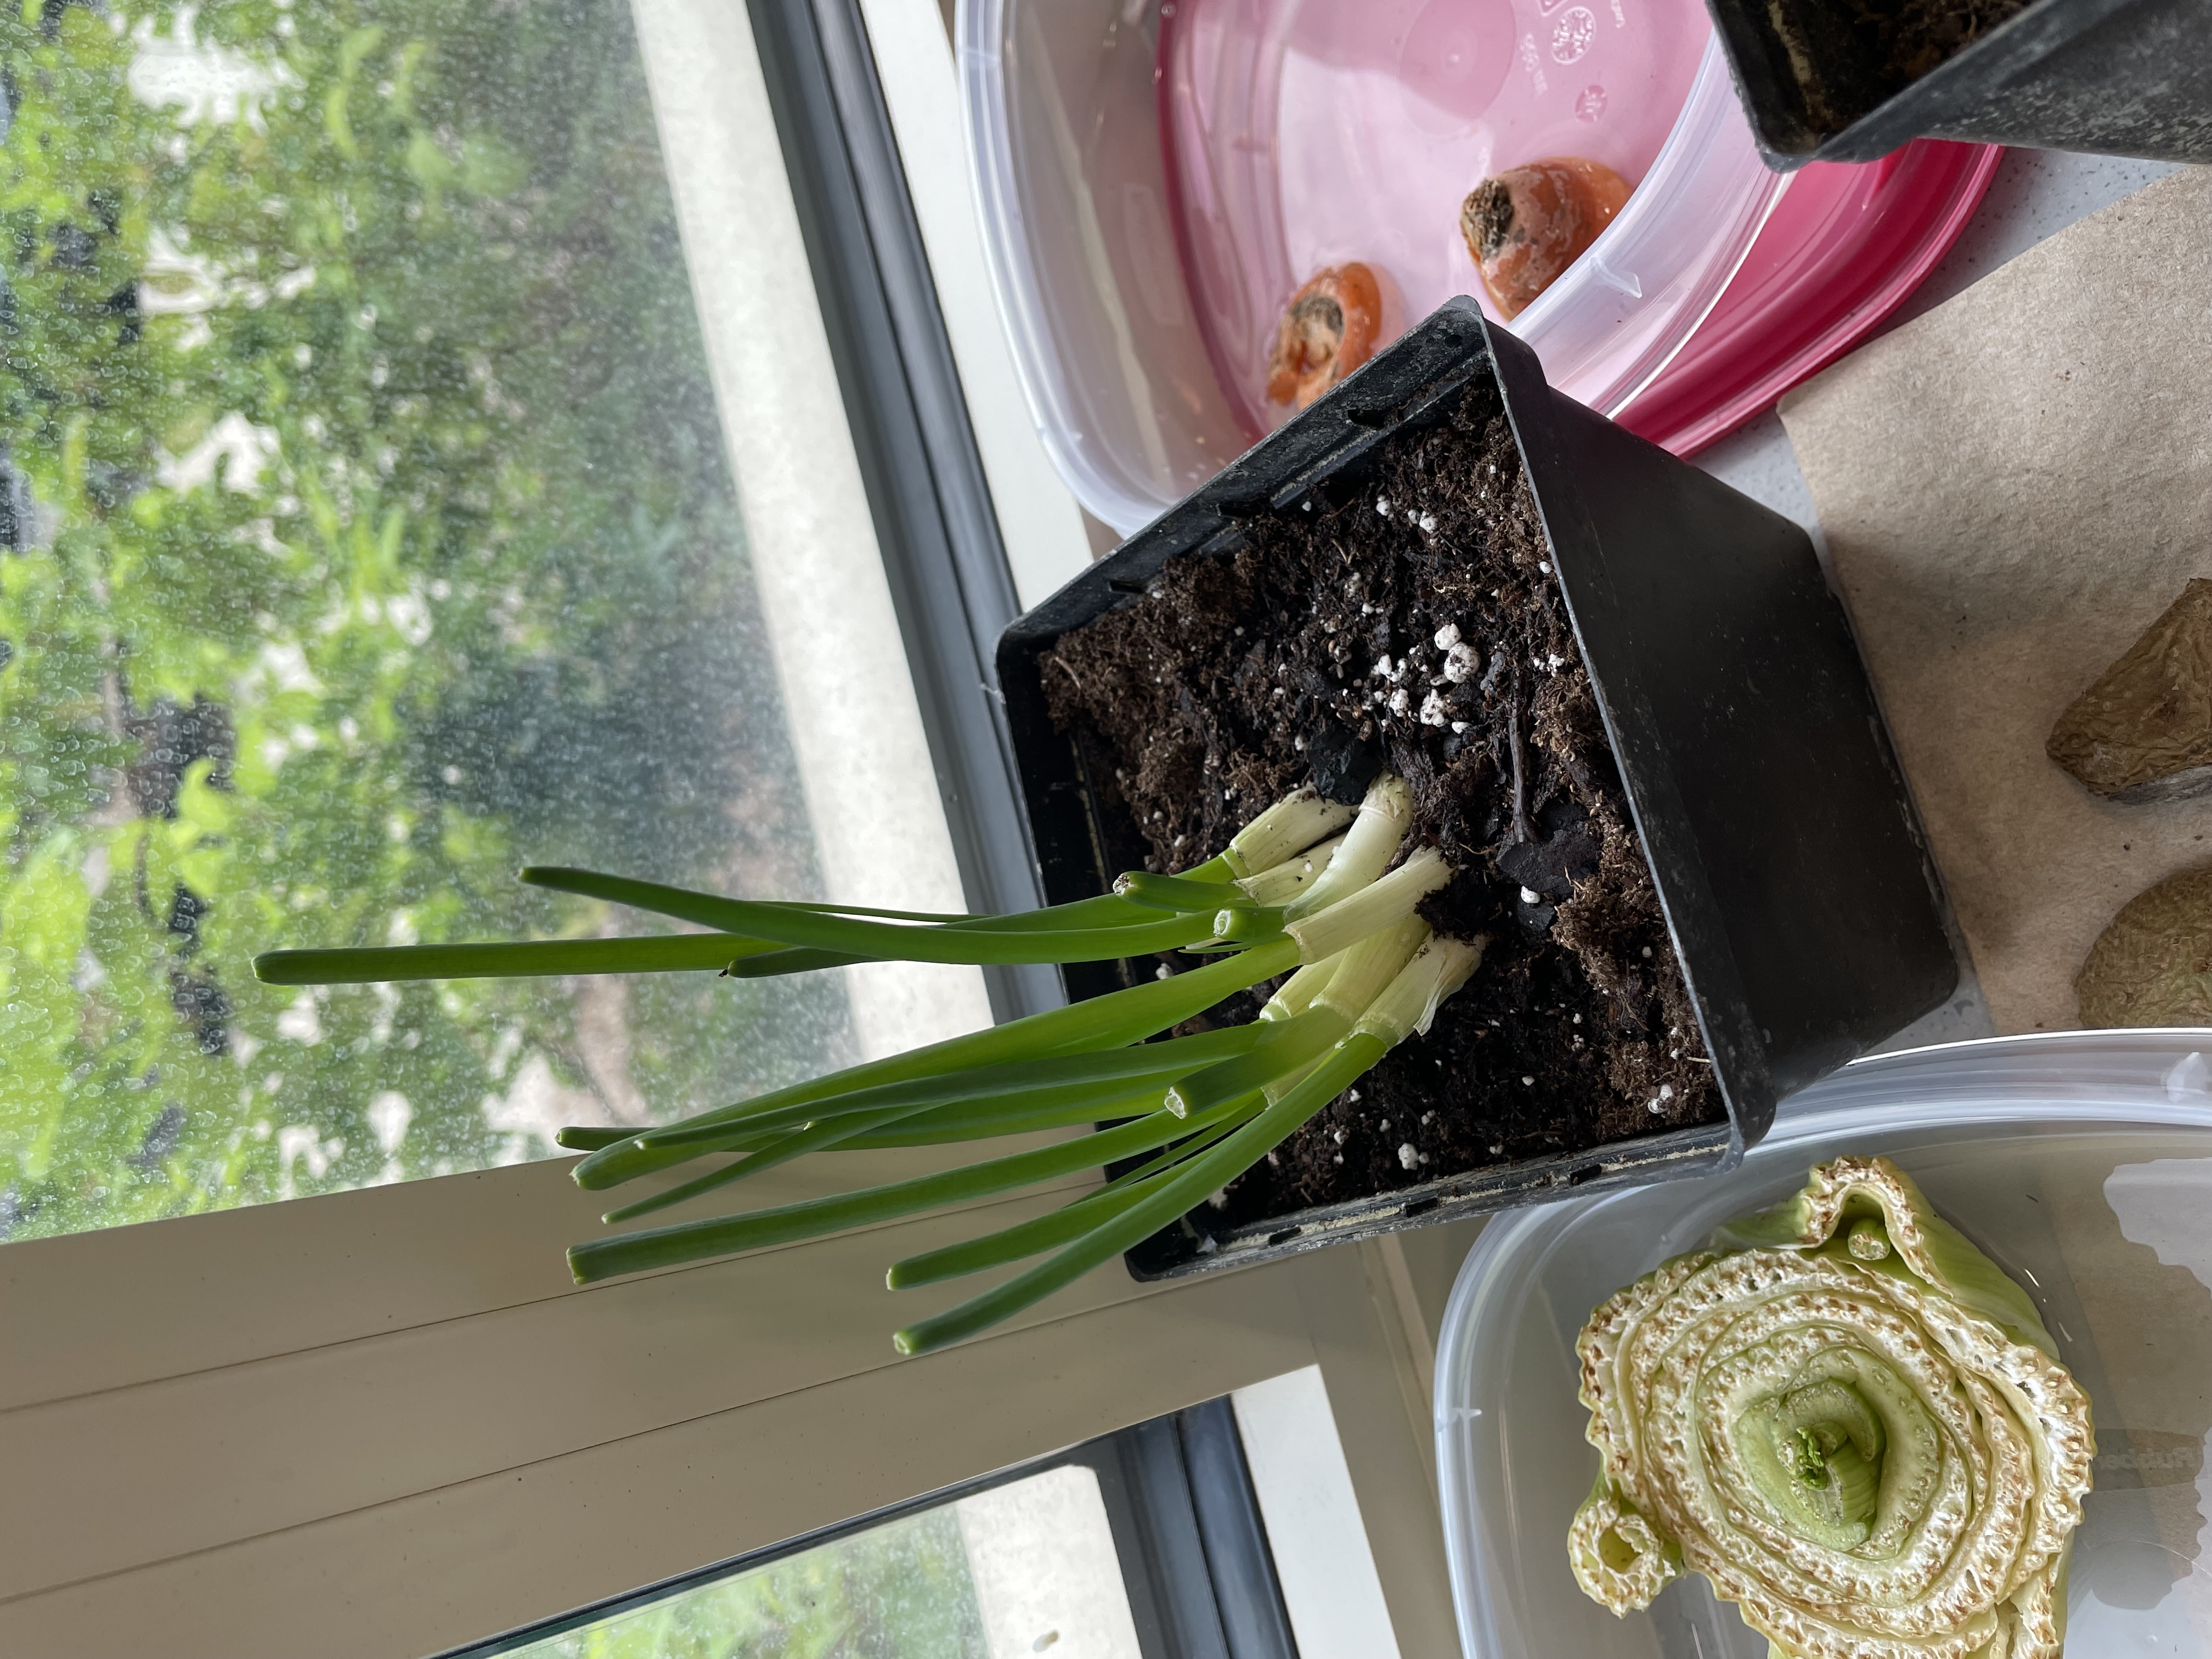 Figure 13. Green onions resprouting by a window.
Onions
To regrow onions, save the bottom portion with the small roots attached and place it root-side down in a pot of soil (or start it in a shallow dish of water). New shoots will sprout from the cut surface, and once they reach several inches tall, you can transplant the onion into the ground. Cover it with soil up to the base of the shoots, and in three to four months, when the tops turn yellow and fall over, your onions will be ready to harvest.
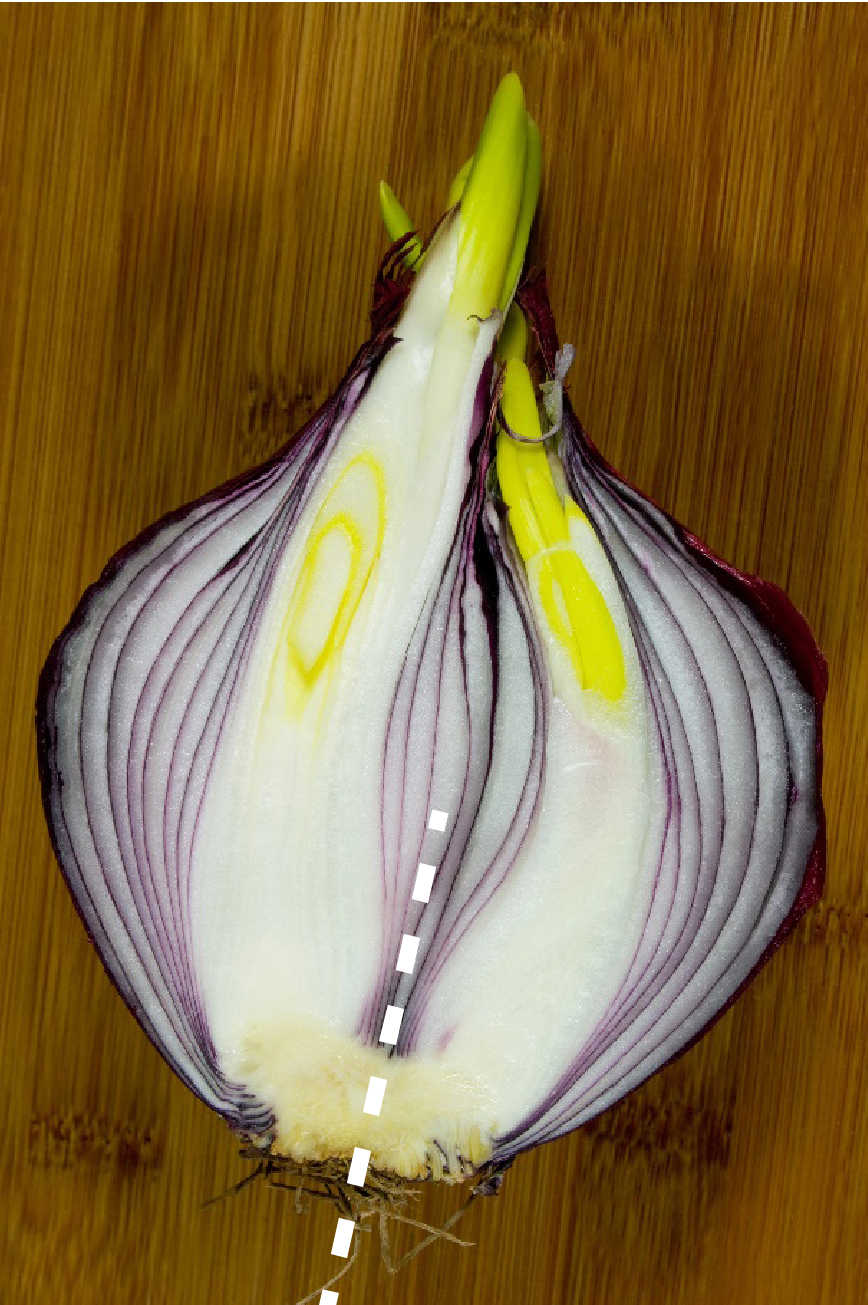 Figure 14. You can split an onion with several sprouts and grow them separately as long as each sprout has roots.
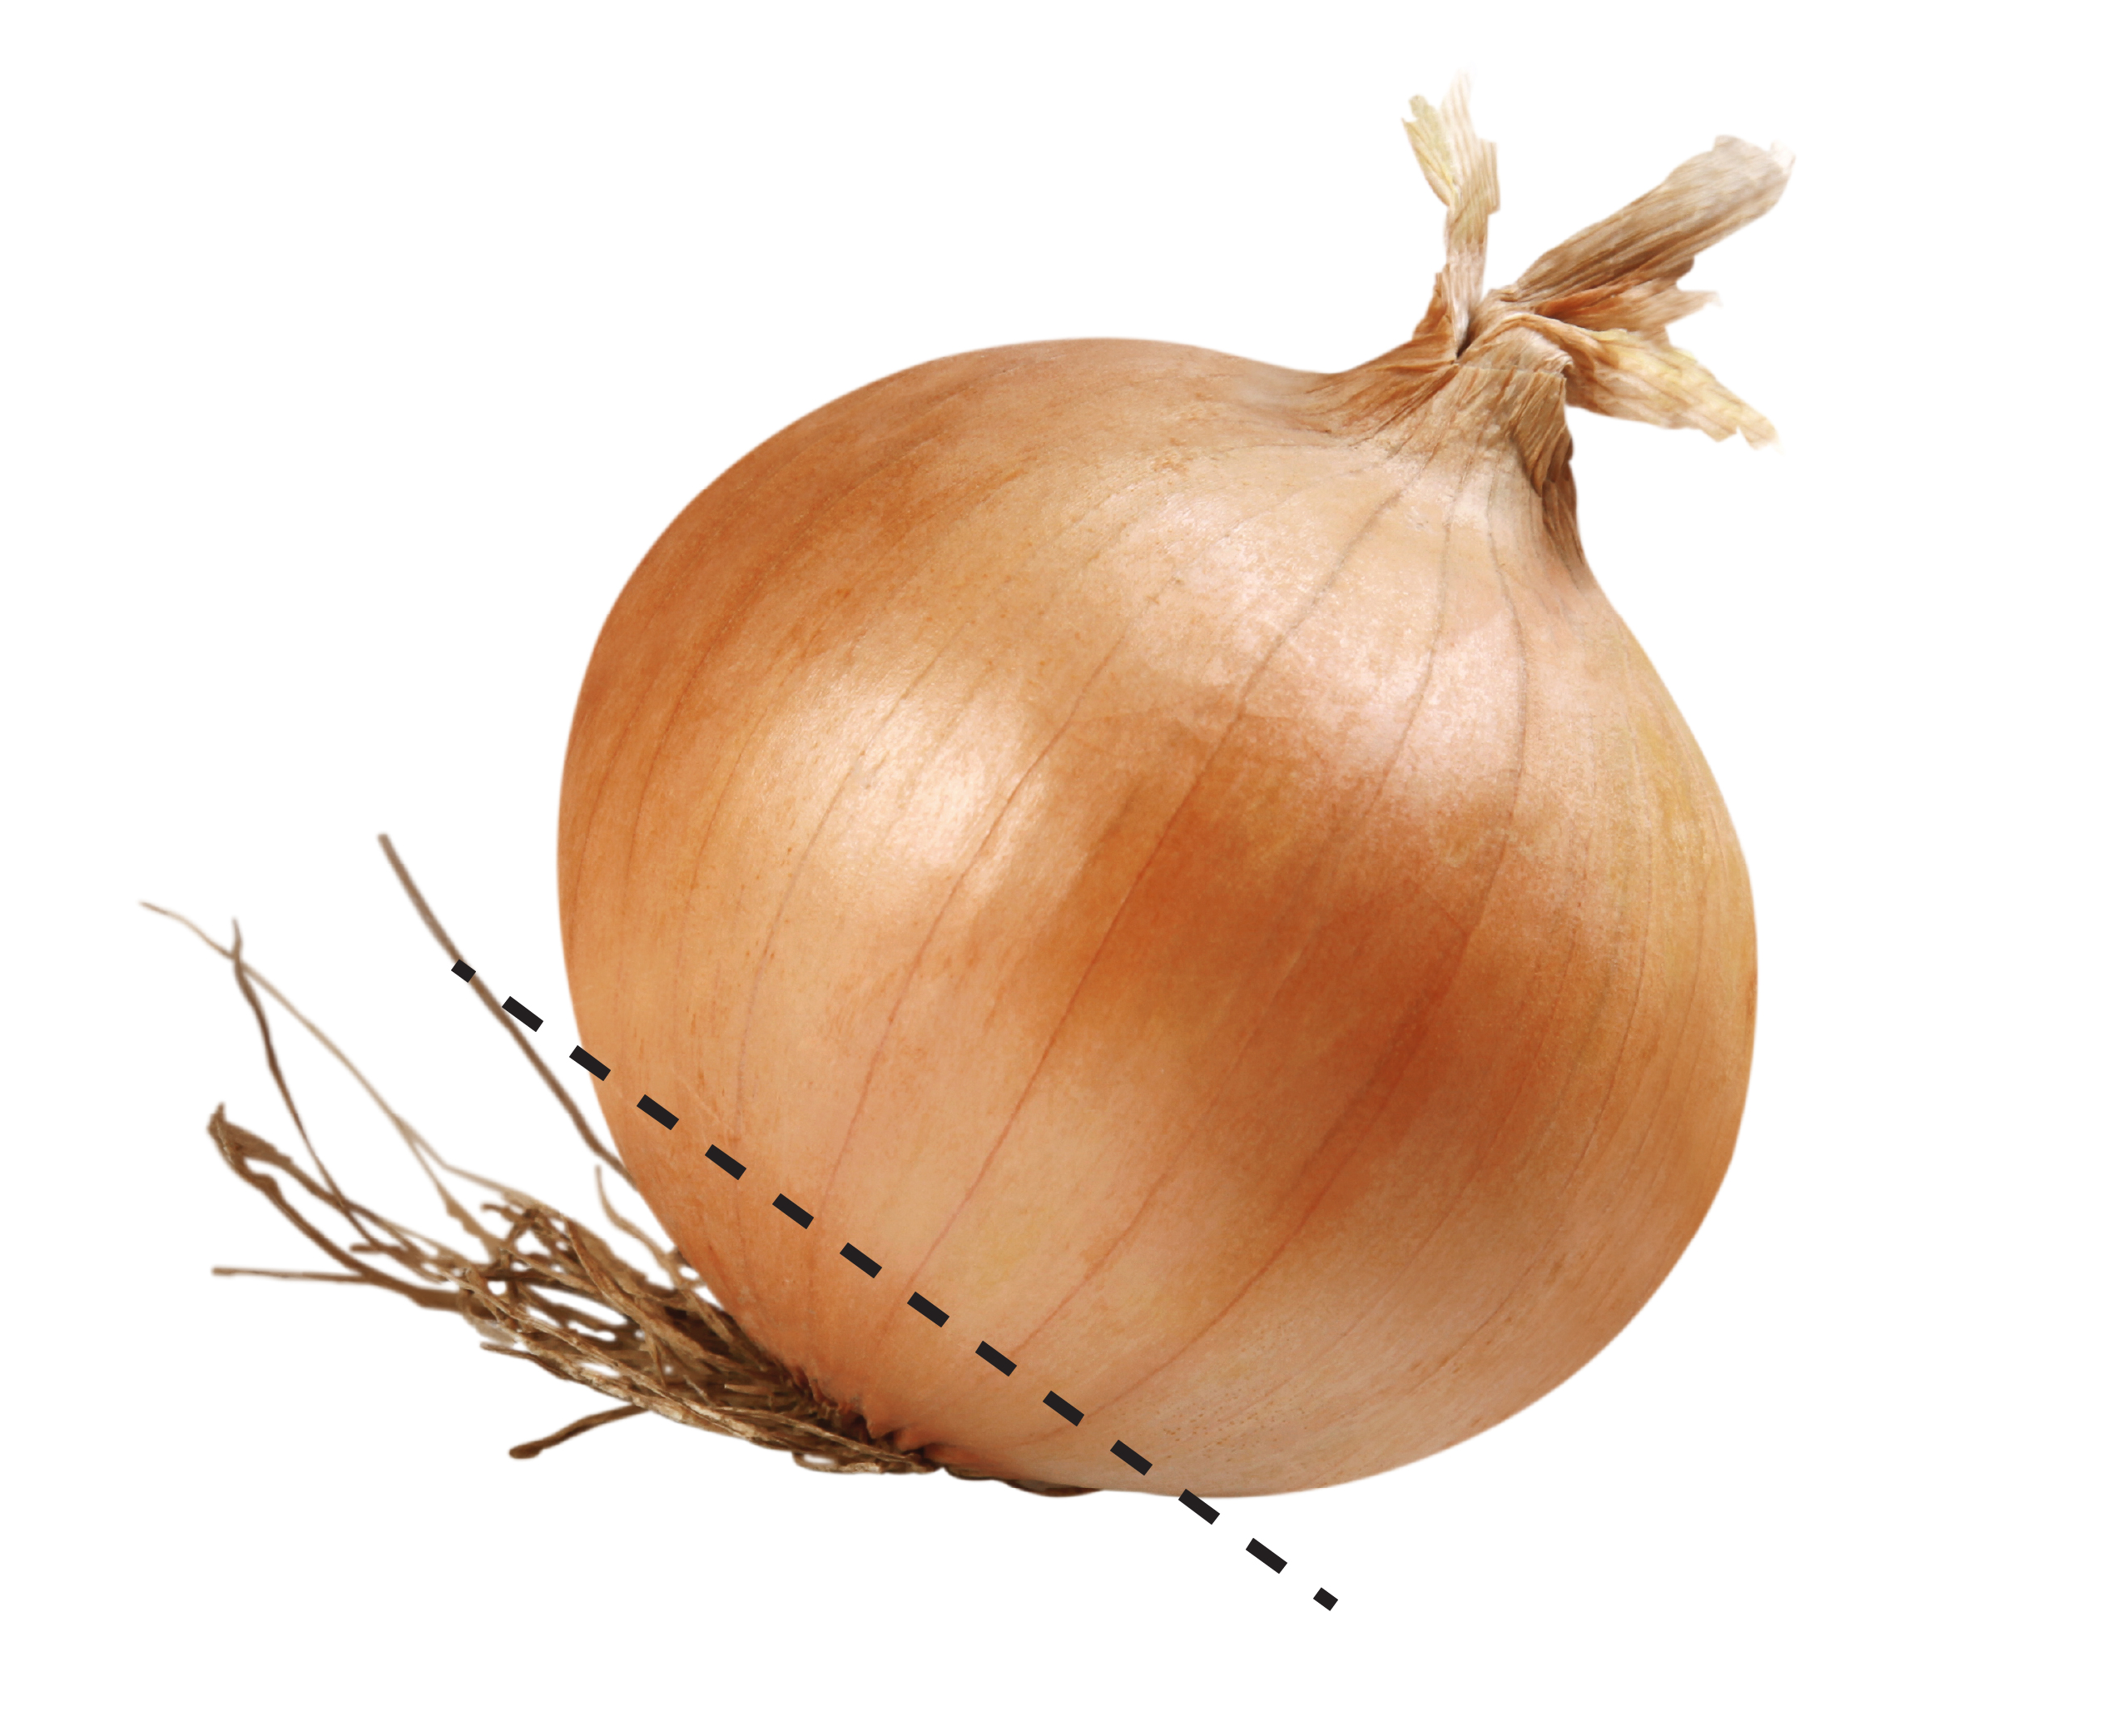 Figure 15. Cut the bottom of the onion off.
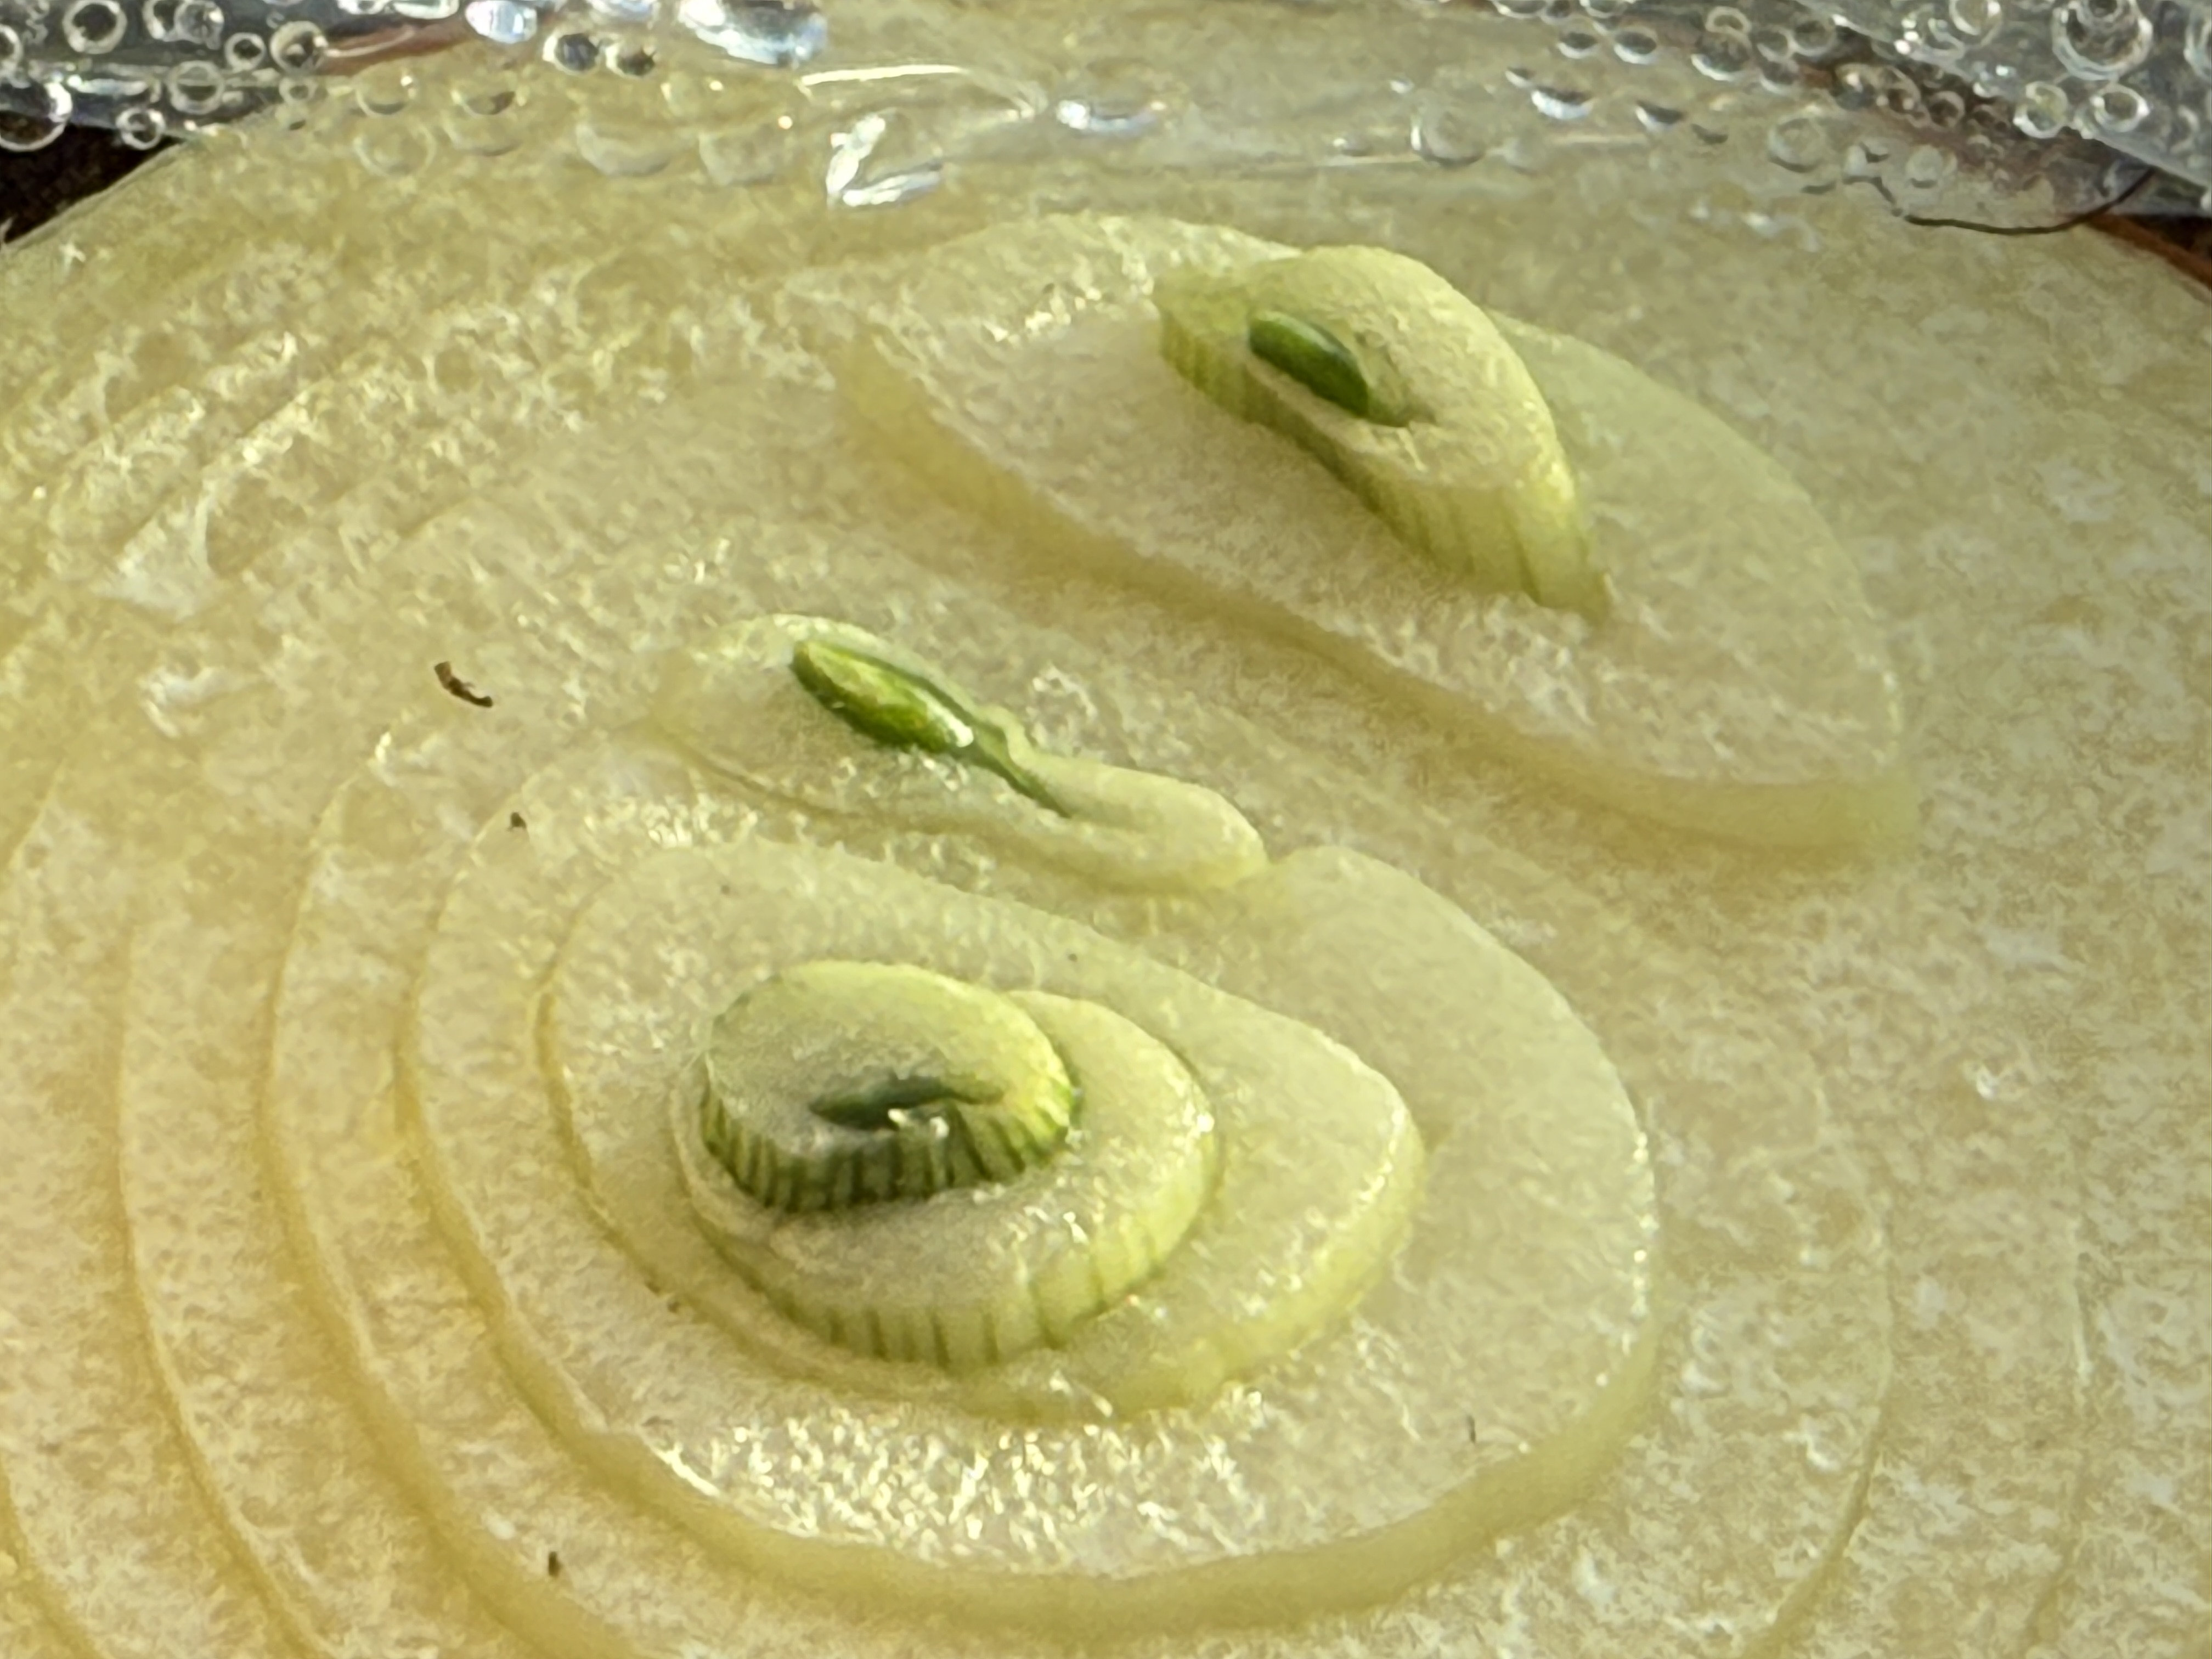 Figure 16. Onion 5 days after planting.
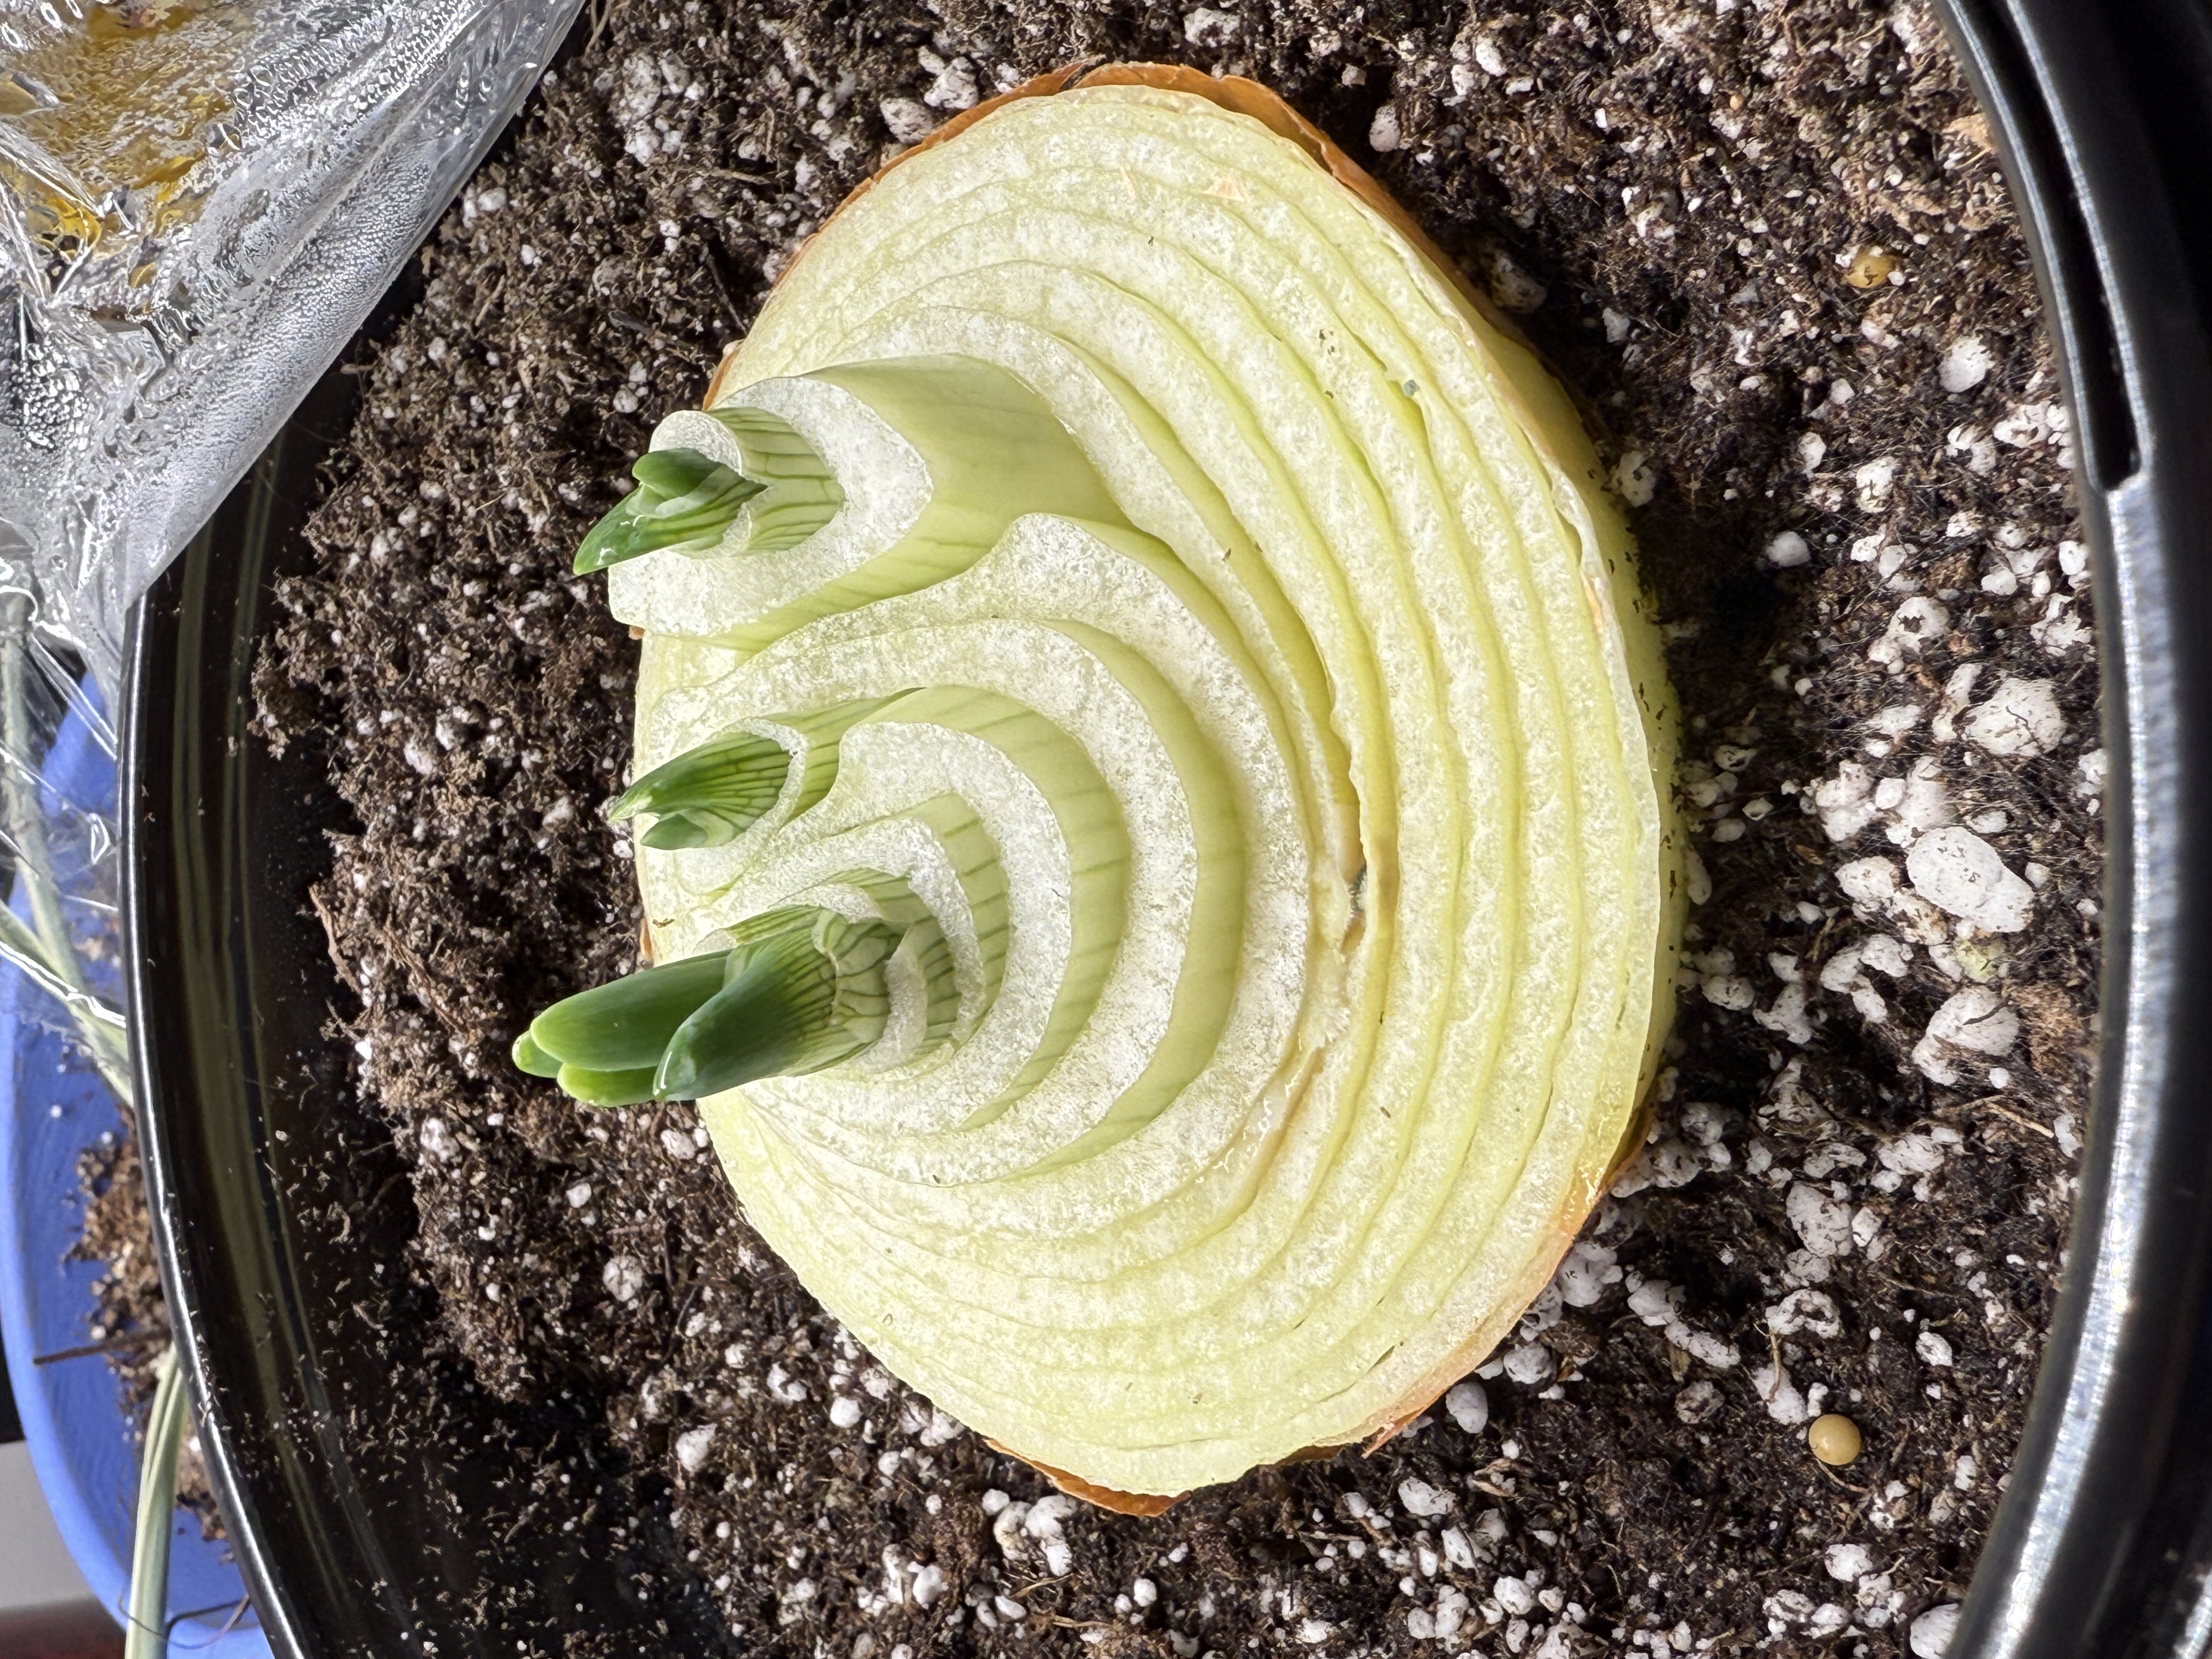 Figure 17. Onion day 12. Plant this and you will get three separate bulbs connected at the base.
Sweet Potato
If you want to see new roots form, suspend a sweet potato over a container of water using toothpicks. Make sure the end with the small roots (usually the wider end) is in the water. Keep the water level high enough to submerge a couple of inches of sweet potato. Change the water every few days to keep it fresh. In time, the sweet potato will grow new shoots, called “slips.” When the slips are several inches long and have a few leaves, you can pull them or cut them off, ensuring that each slip has roots.
You can also grow sweet potato slips by placing a sweet potato in a shallow pan of soil and keeping it moist until new shoots form.
Plant slips outside after the last frost, or plant in a pot and keep it in a sunny location indoors. Each slip can produce about six sweet potatoes. Harvest will be about 3 to 4 months after planting the slips. Be sure to harvest before the first frost for the best quality.
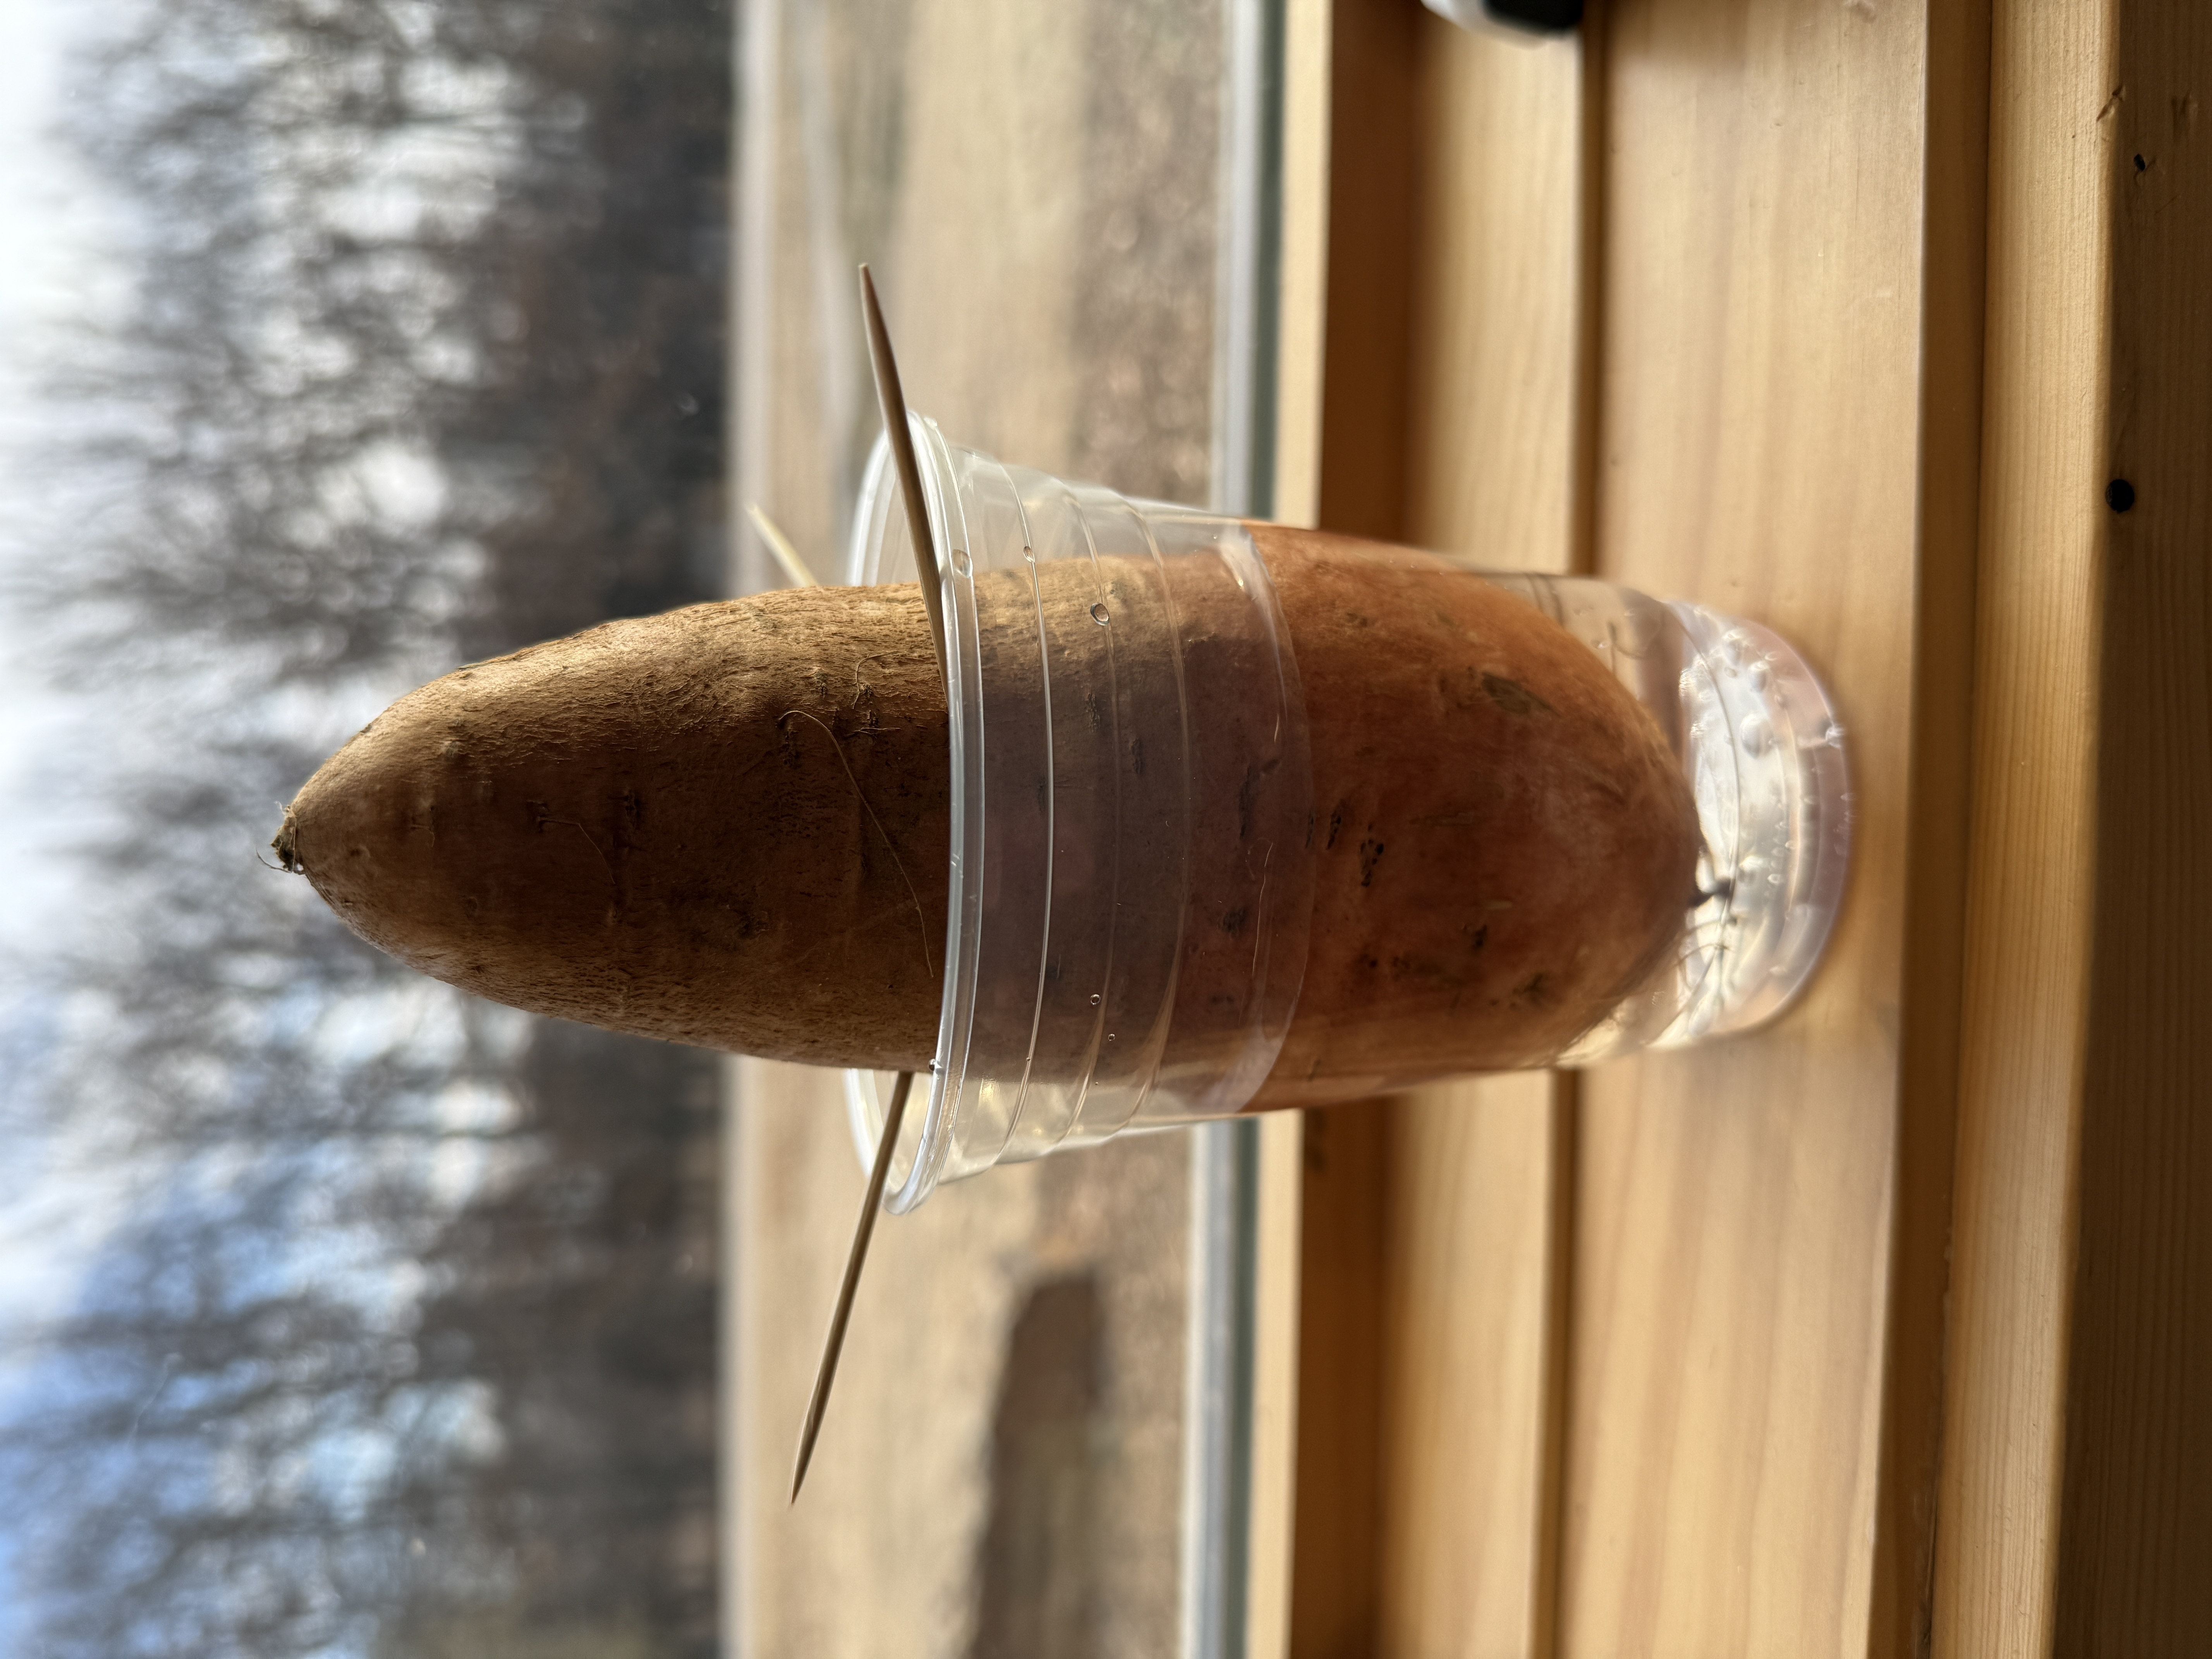 Figure 18. Sweet potato suspended in clear cup with root end in the water.
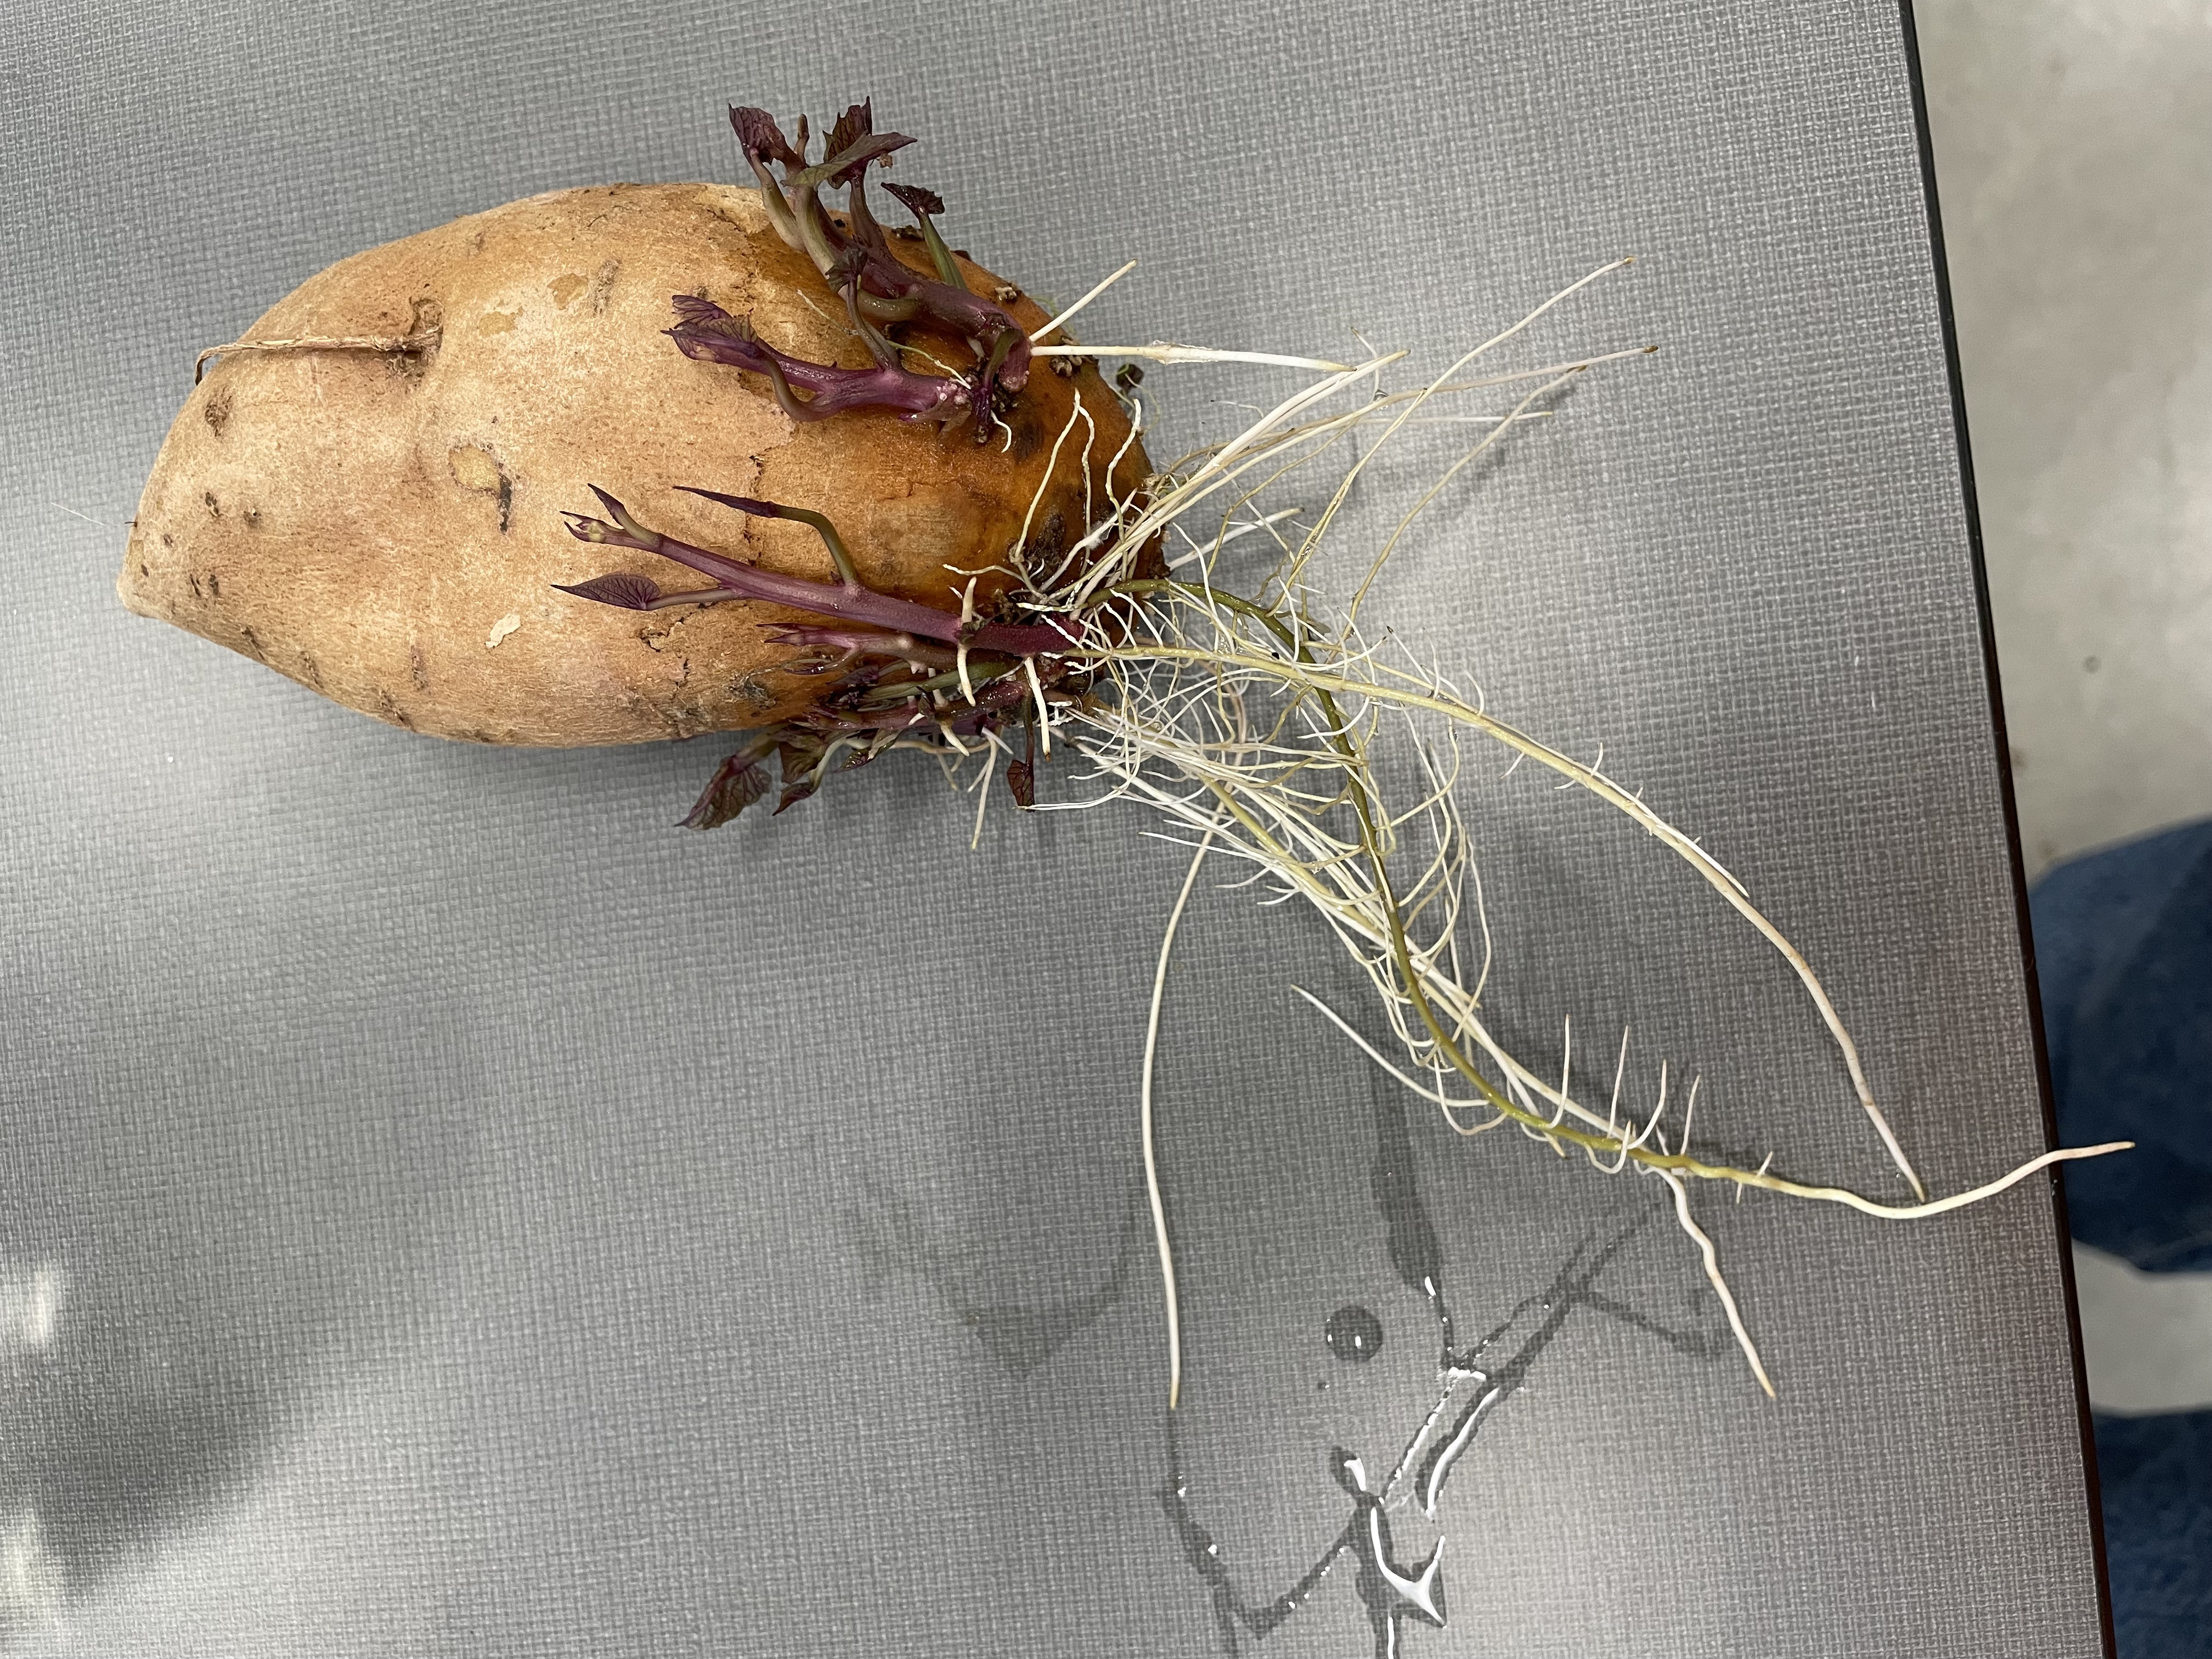 Figure 19. Slips on sweet potato.
Potato
Potatoes are very easy to regrow. If you are not quick to eat all the potatoes you buy at the store, they will start sprouting, because potatoes are stems, not roots. A potato is a tuber — a swollen part of an underground stem used by the plant for food storage. Potatoes can be cut so that each piece has at least one or two “eyes” (buds that can grow into new plants — look for the potato indentations). Set the pieces aside for a few days so the cut sides can dry, reducing the risk of rot. Plant them in soil eye-side up. If you want to plant potatoes directly in the ground, you can usually do so around mid-March. If you want to get a head start on the growing season, start the potatoes in pots inside before that.
Bury all but a few of the leaves. As potato plants grow taller, add soil every week to cover most of the new leaves. This technique creates mounds of soil, a practice called “hilling.” By covering most of the potato plant, you are growing longer underground stems — more stem length means more potatoes.
Potatoes are harvested when the top leaves die and turn brown. Just reach in and pull them out as you feel them. New potatoes are harvested before they reach full maturity and are usually a little sweeter. Potatoes mature in two to four months, depending on the variety grown.
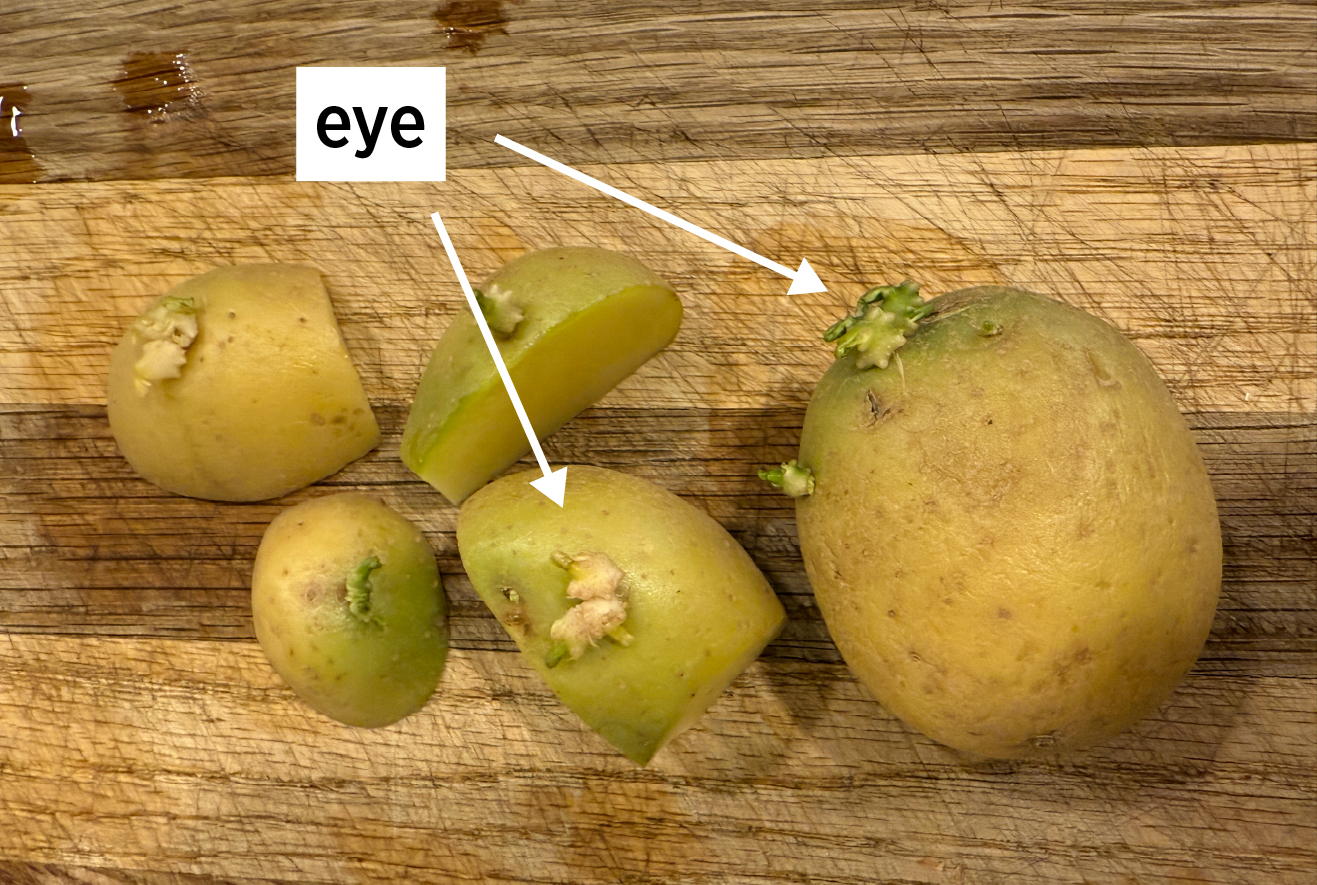 Figure 20. Eyes on potatoes.
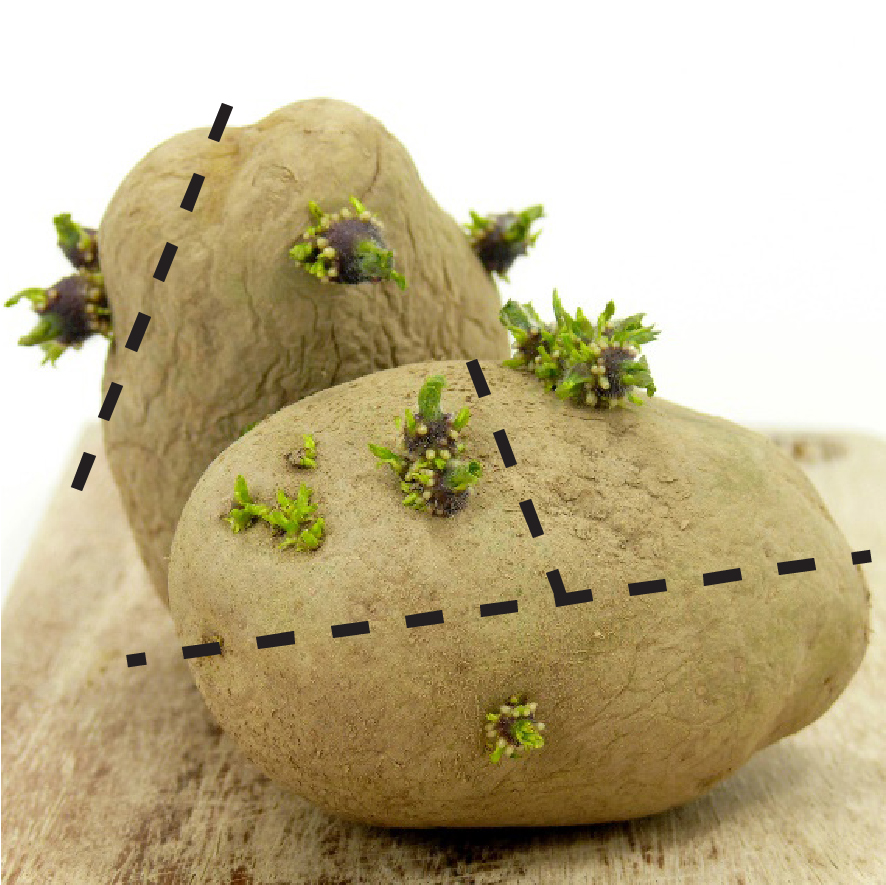 Figure 21. Cut potatoes so that each piece has one or two eyes. Then set aside for a few days until the exposed surfaces are dry.
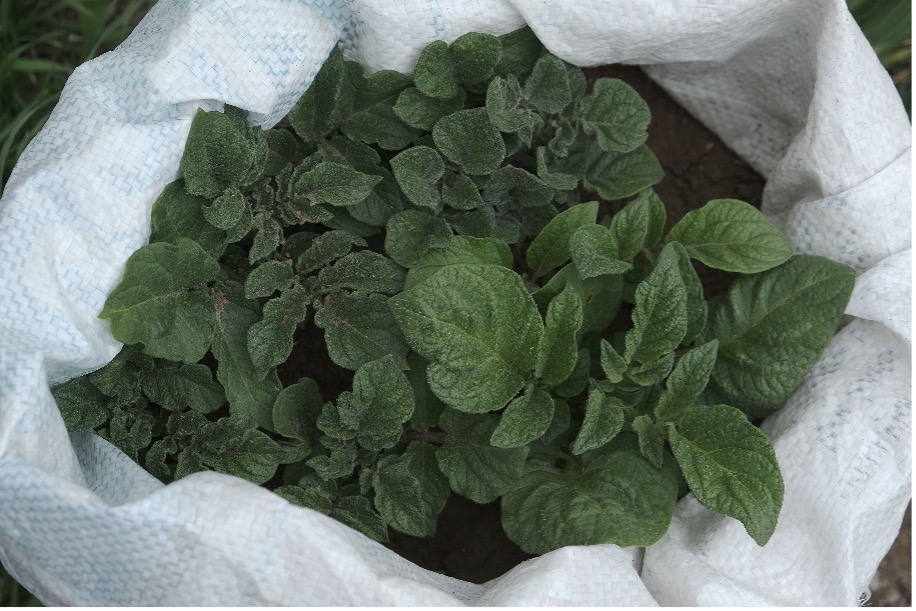 Figure 22. If you grow potatoes in bags, you can unroll the sides as more soil is added.
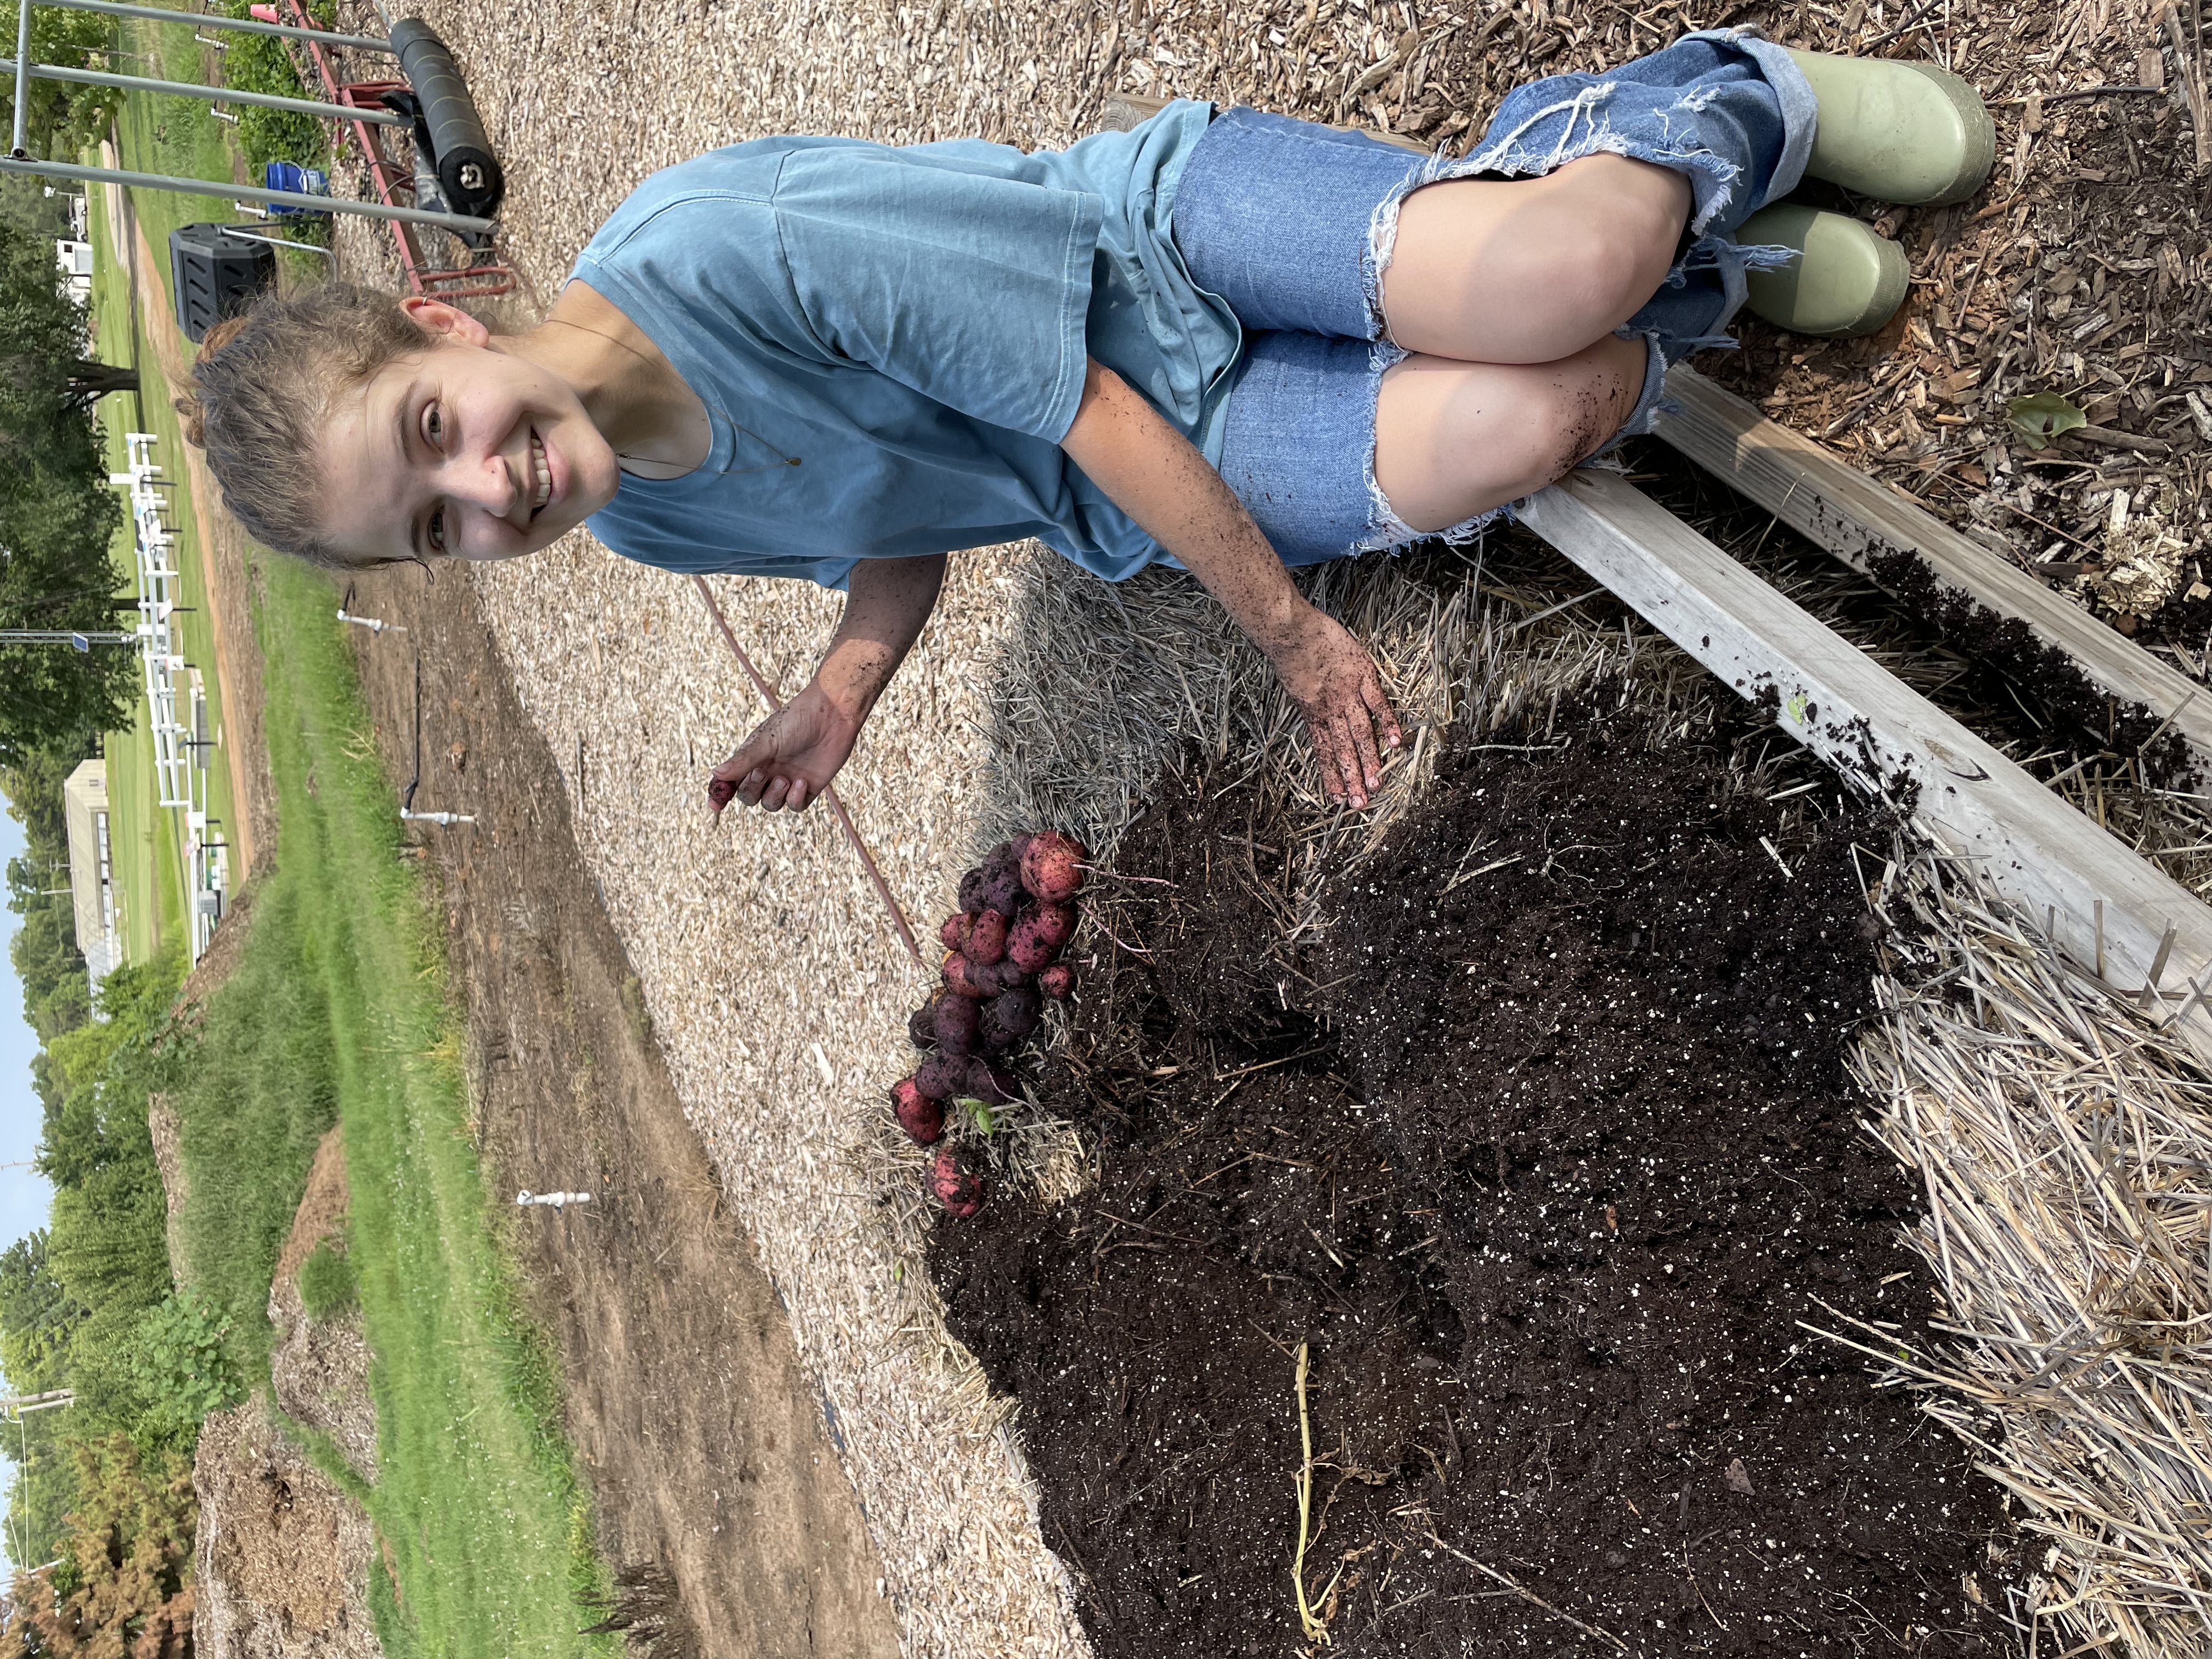 Figure 23. Harvesting blue potatoes from soil mounded as high as a straw bale.
Romaine Lettuce
Just like onions and celery, to grow more Romaine lettuce, save the bottom couple of inches of the head and put it in some soil (or water). It will start making more leaves. When the leaves are large enough to eat, harvest them. It should only be a few weeks before the leaves are large.
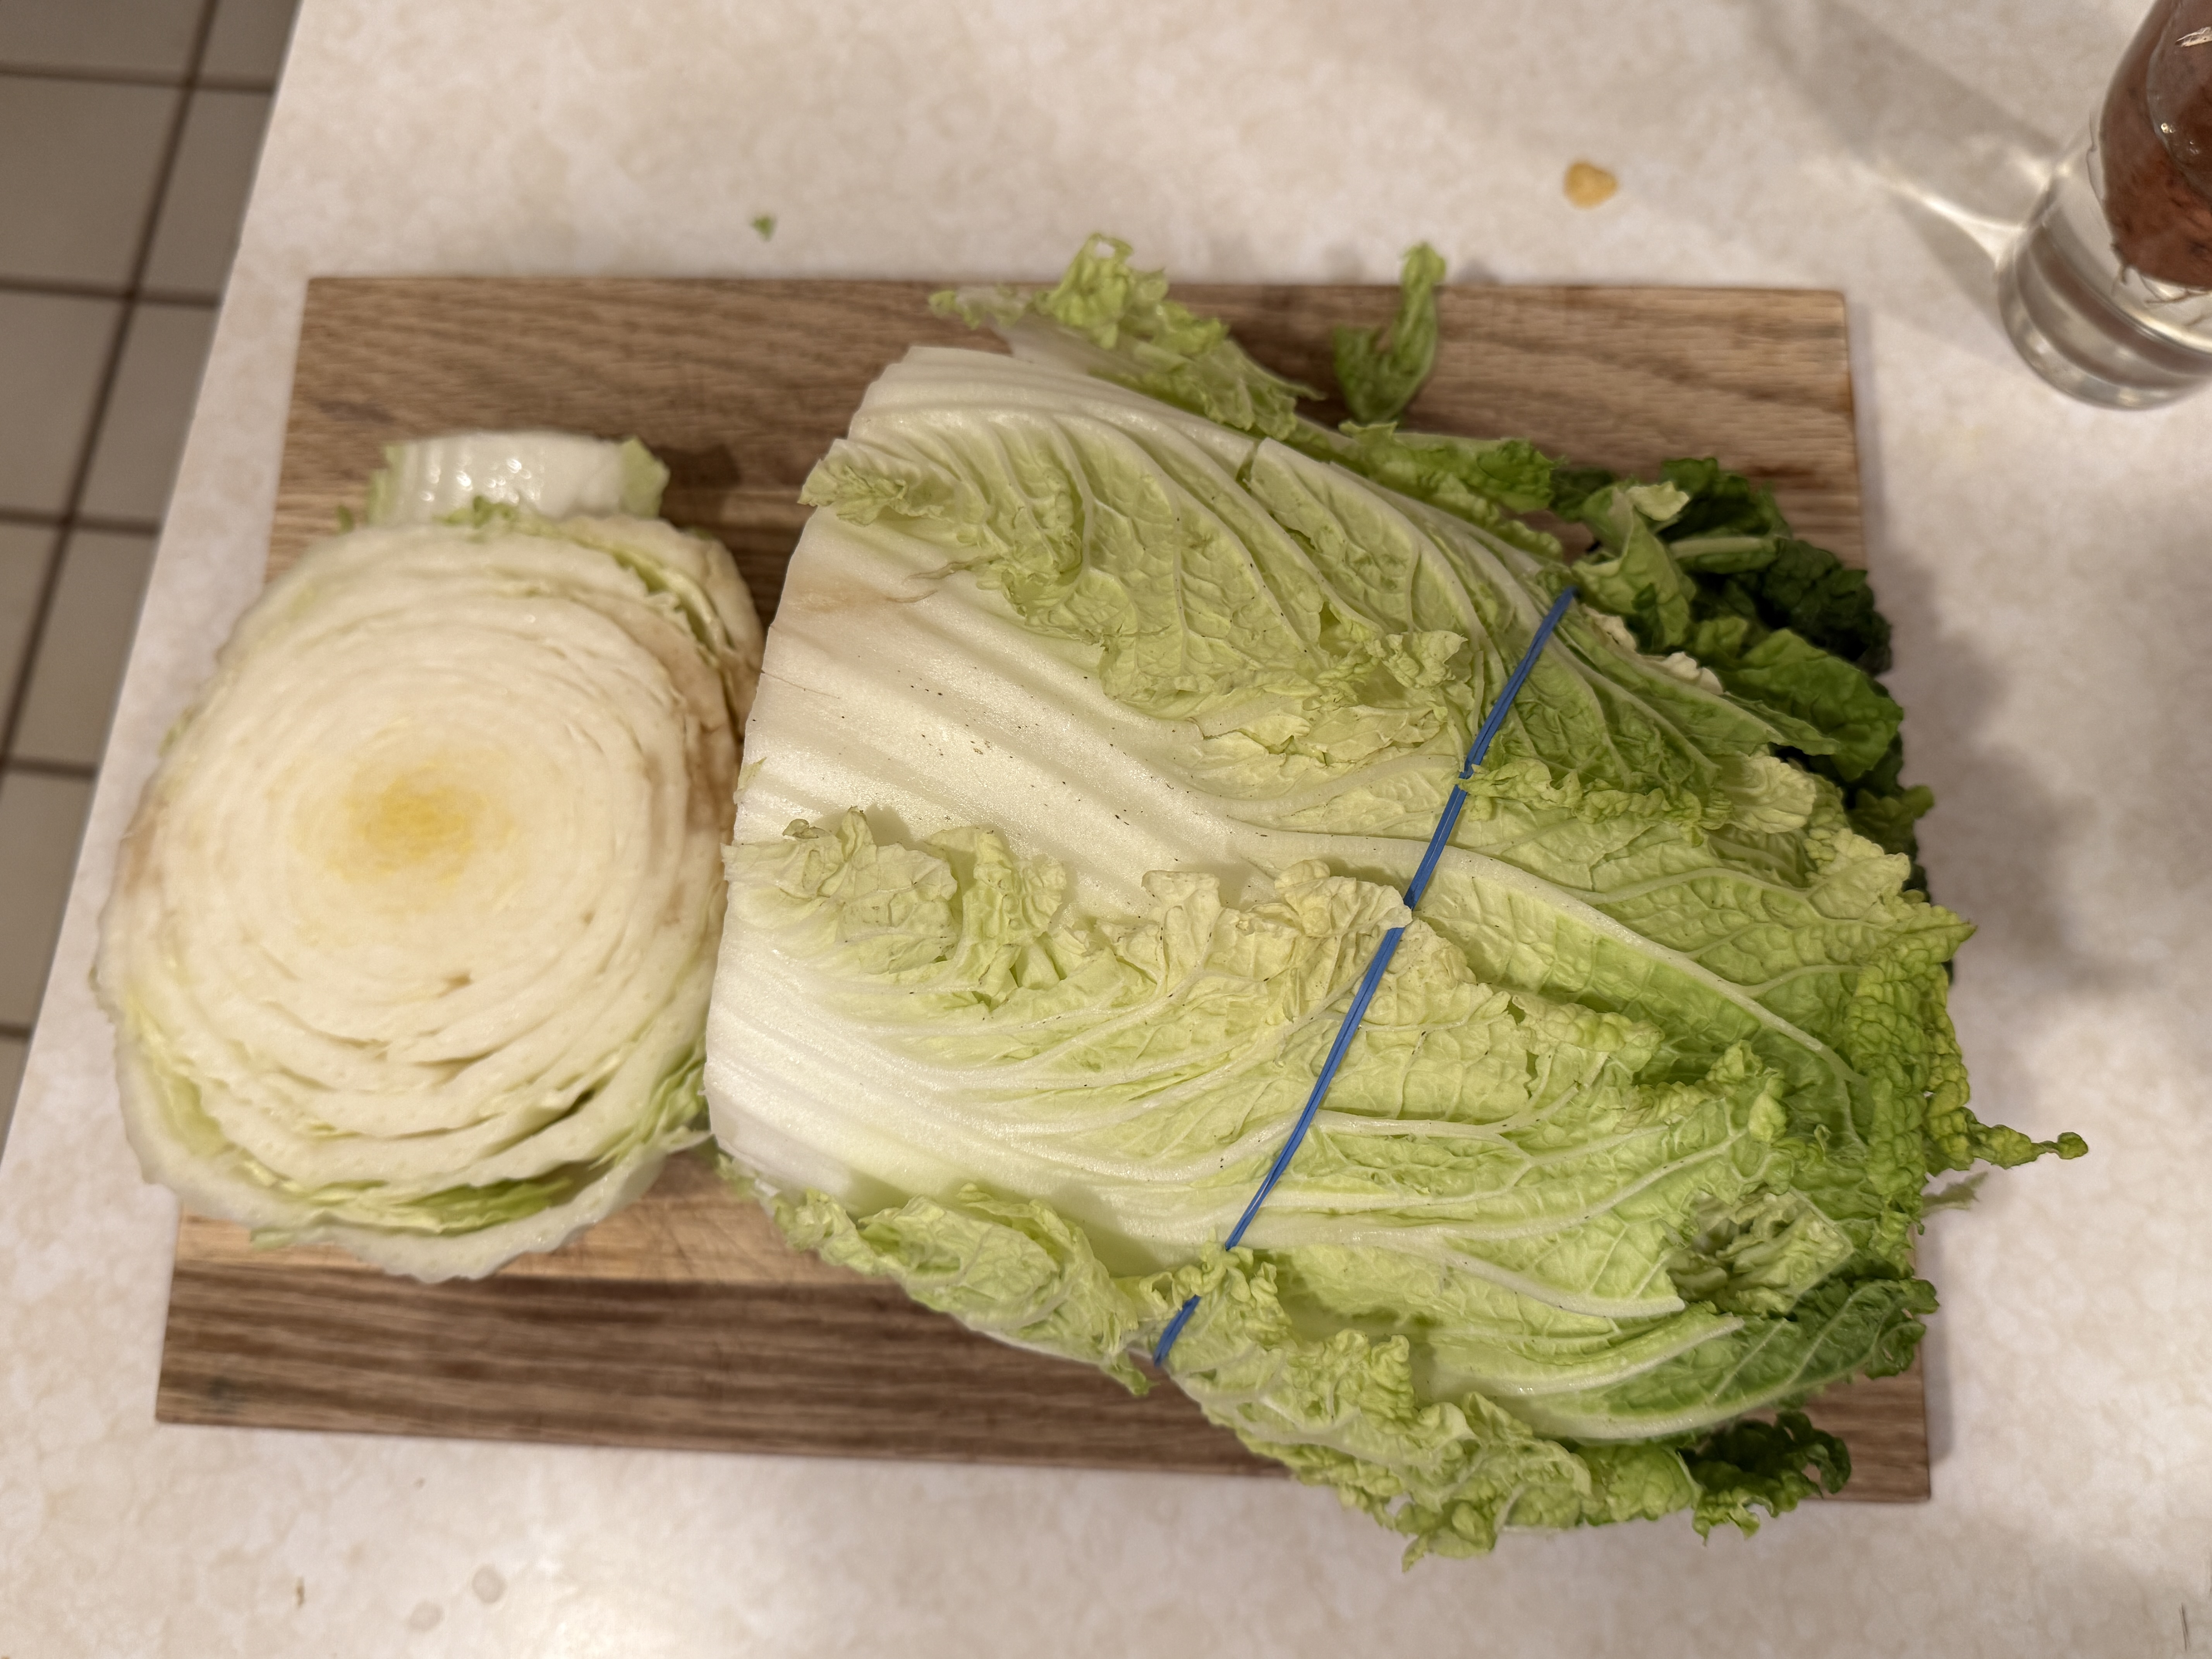 Figure 24. Where to cut romaine lettuce.
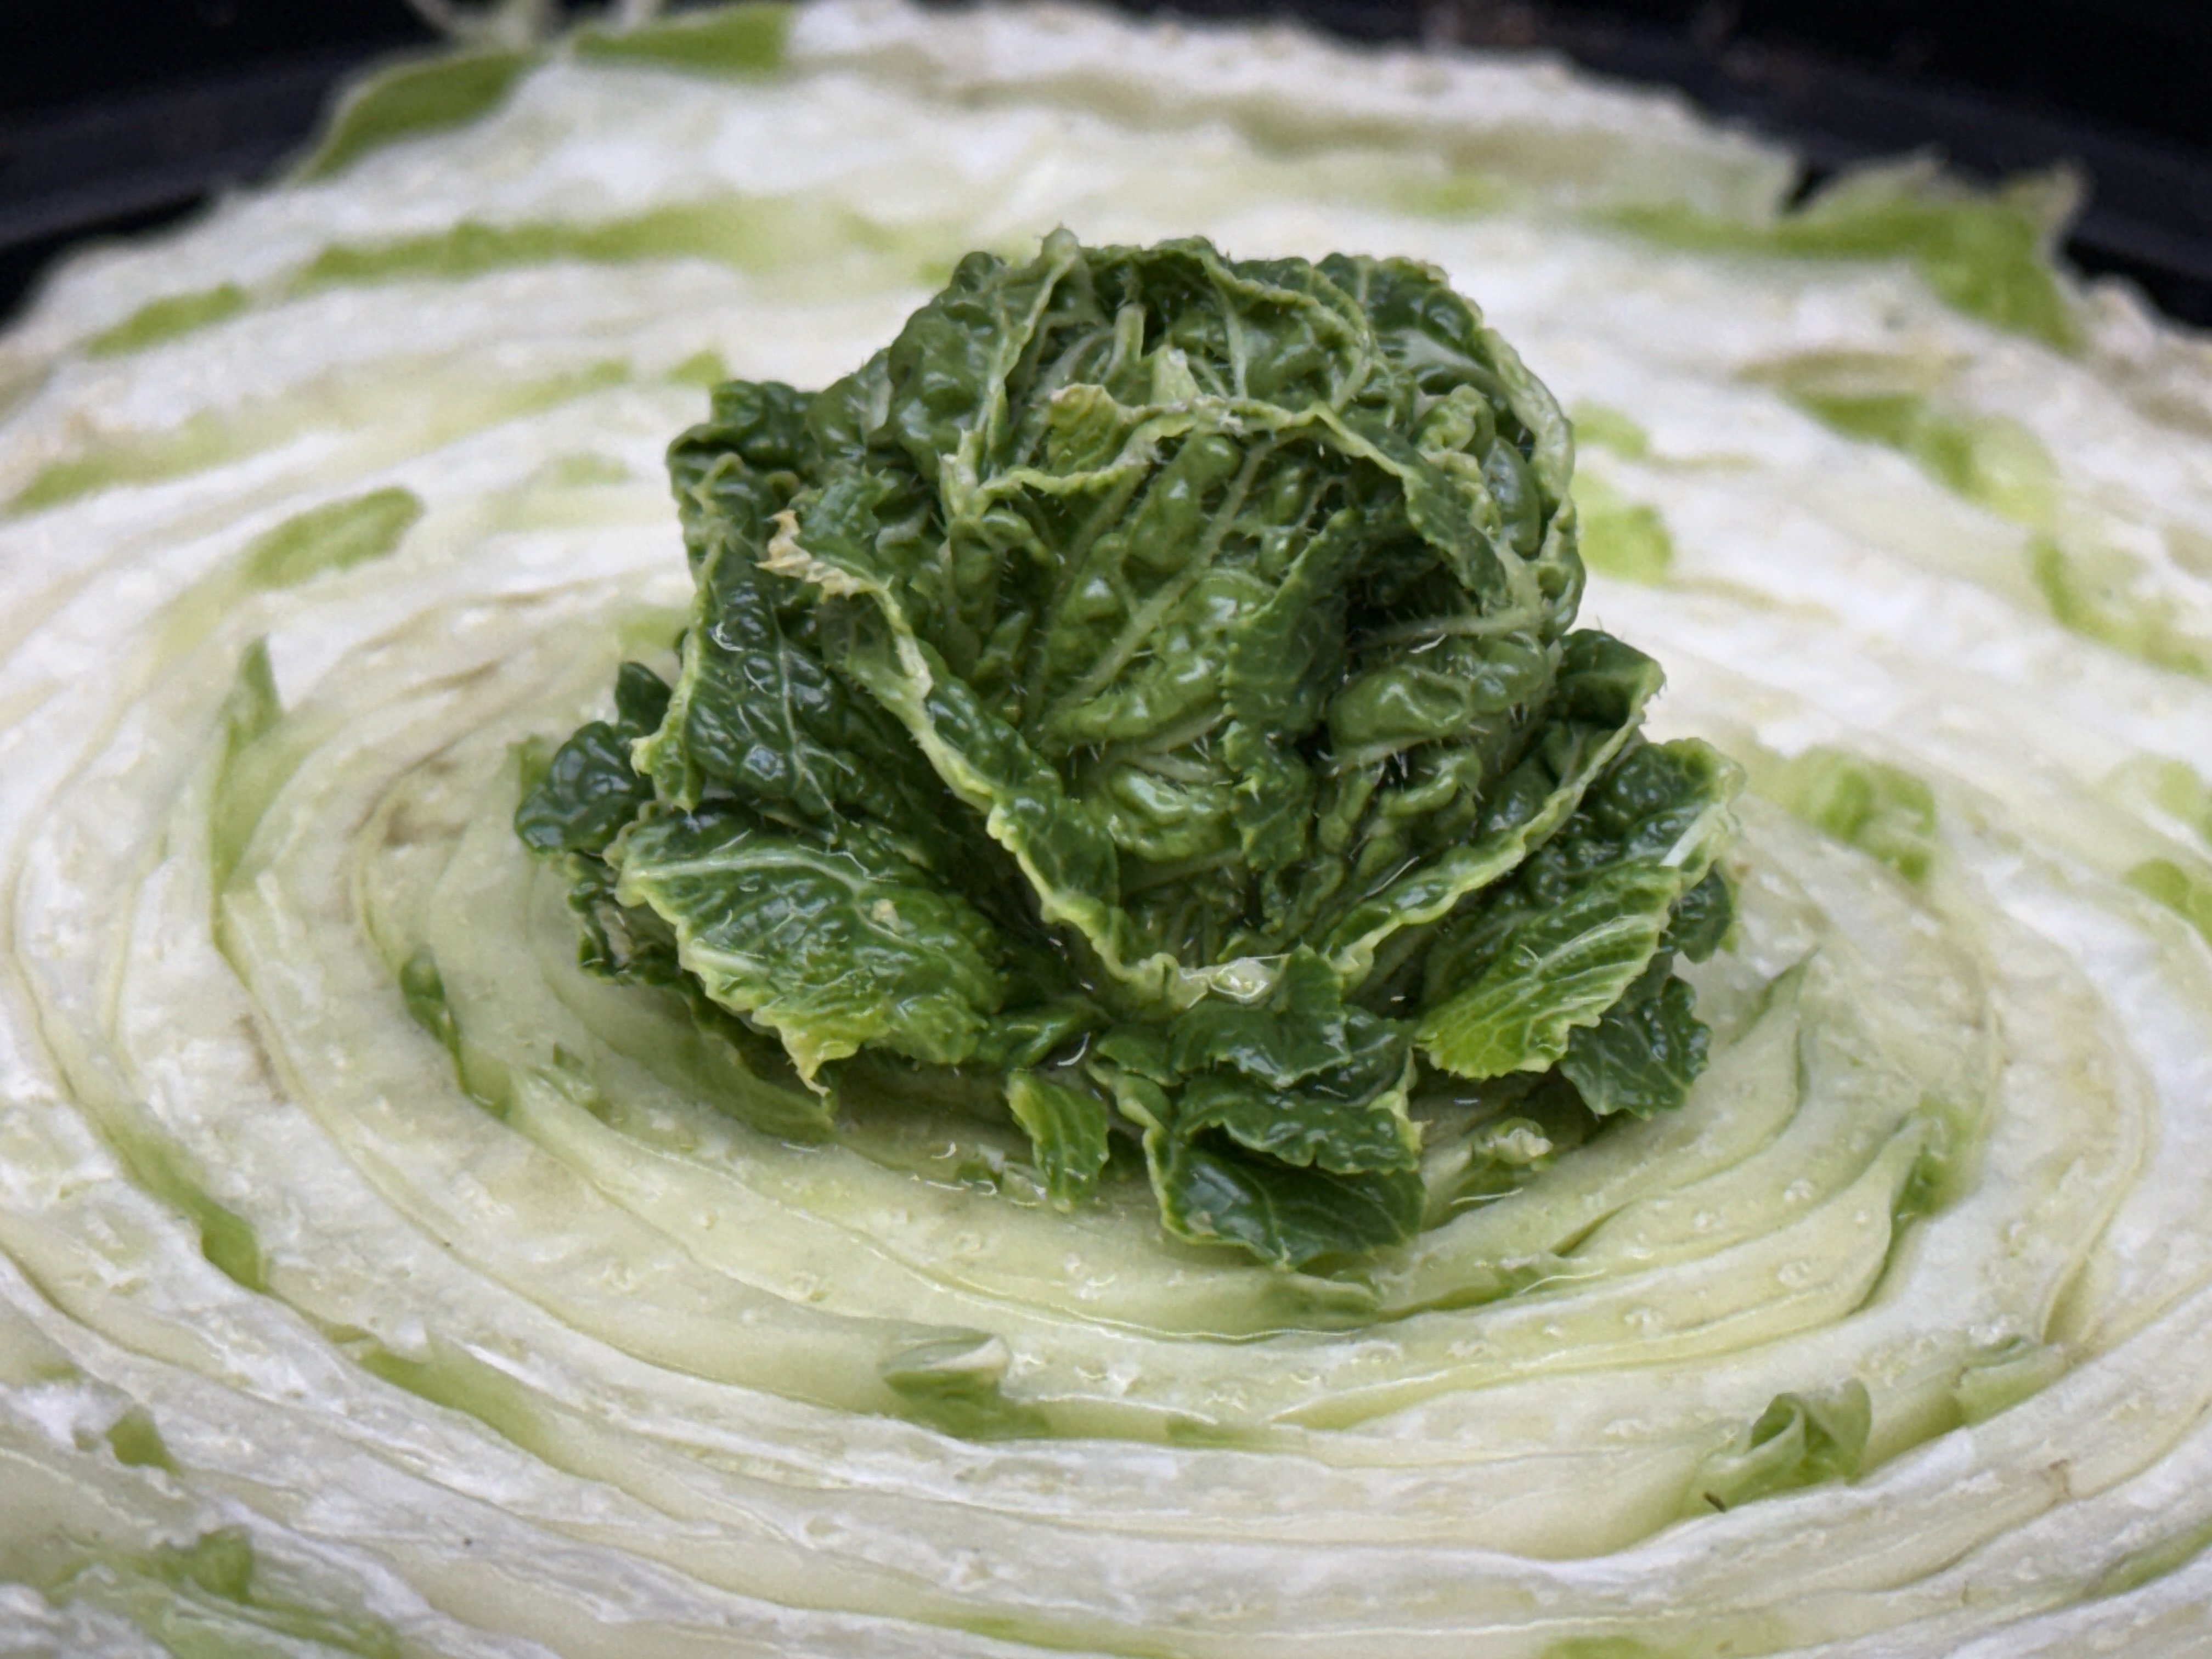 Figure 25. Regrowing romaine five days after planting.
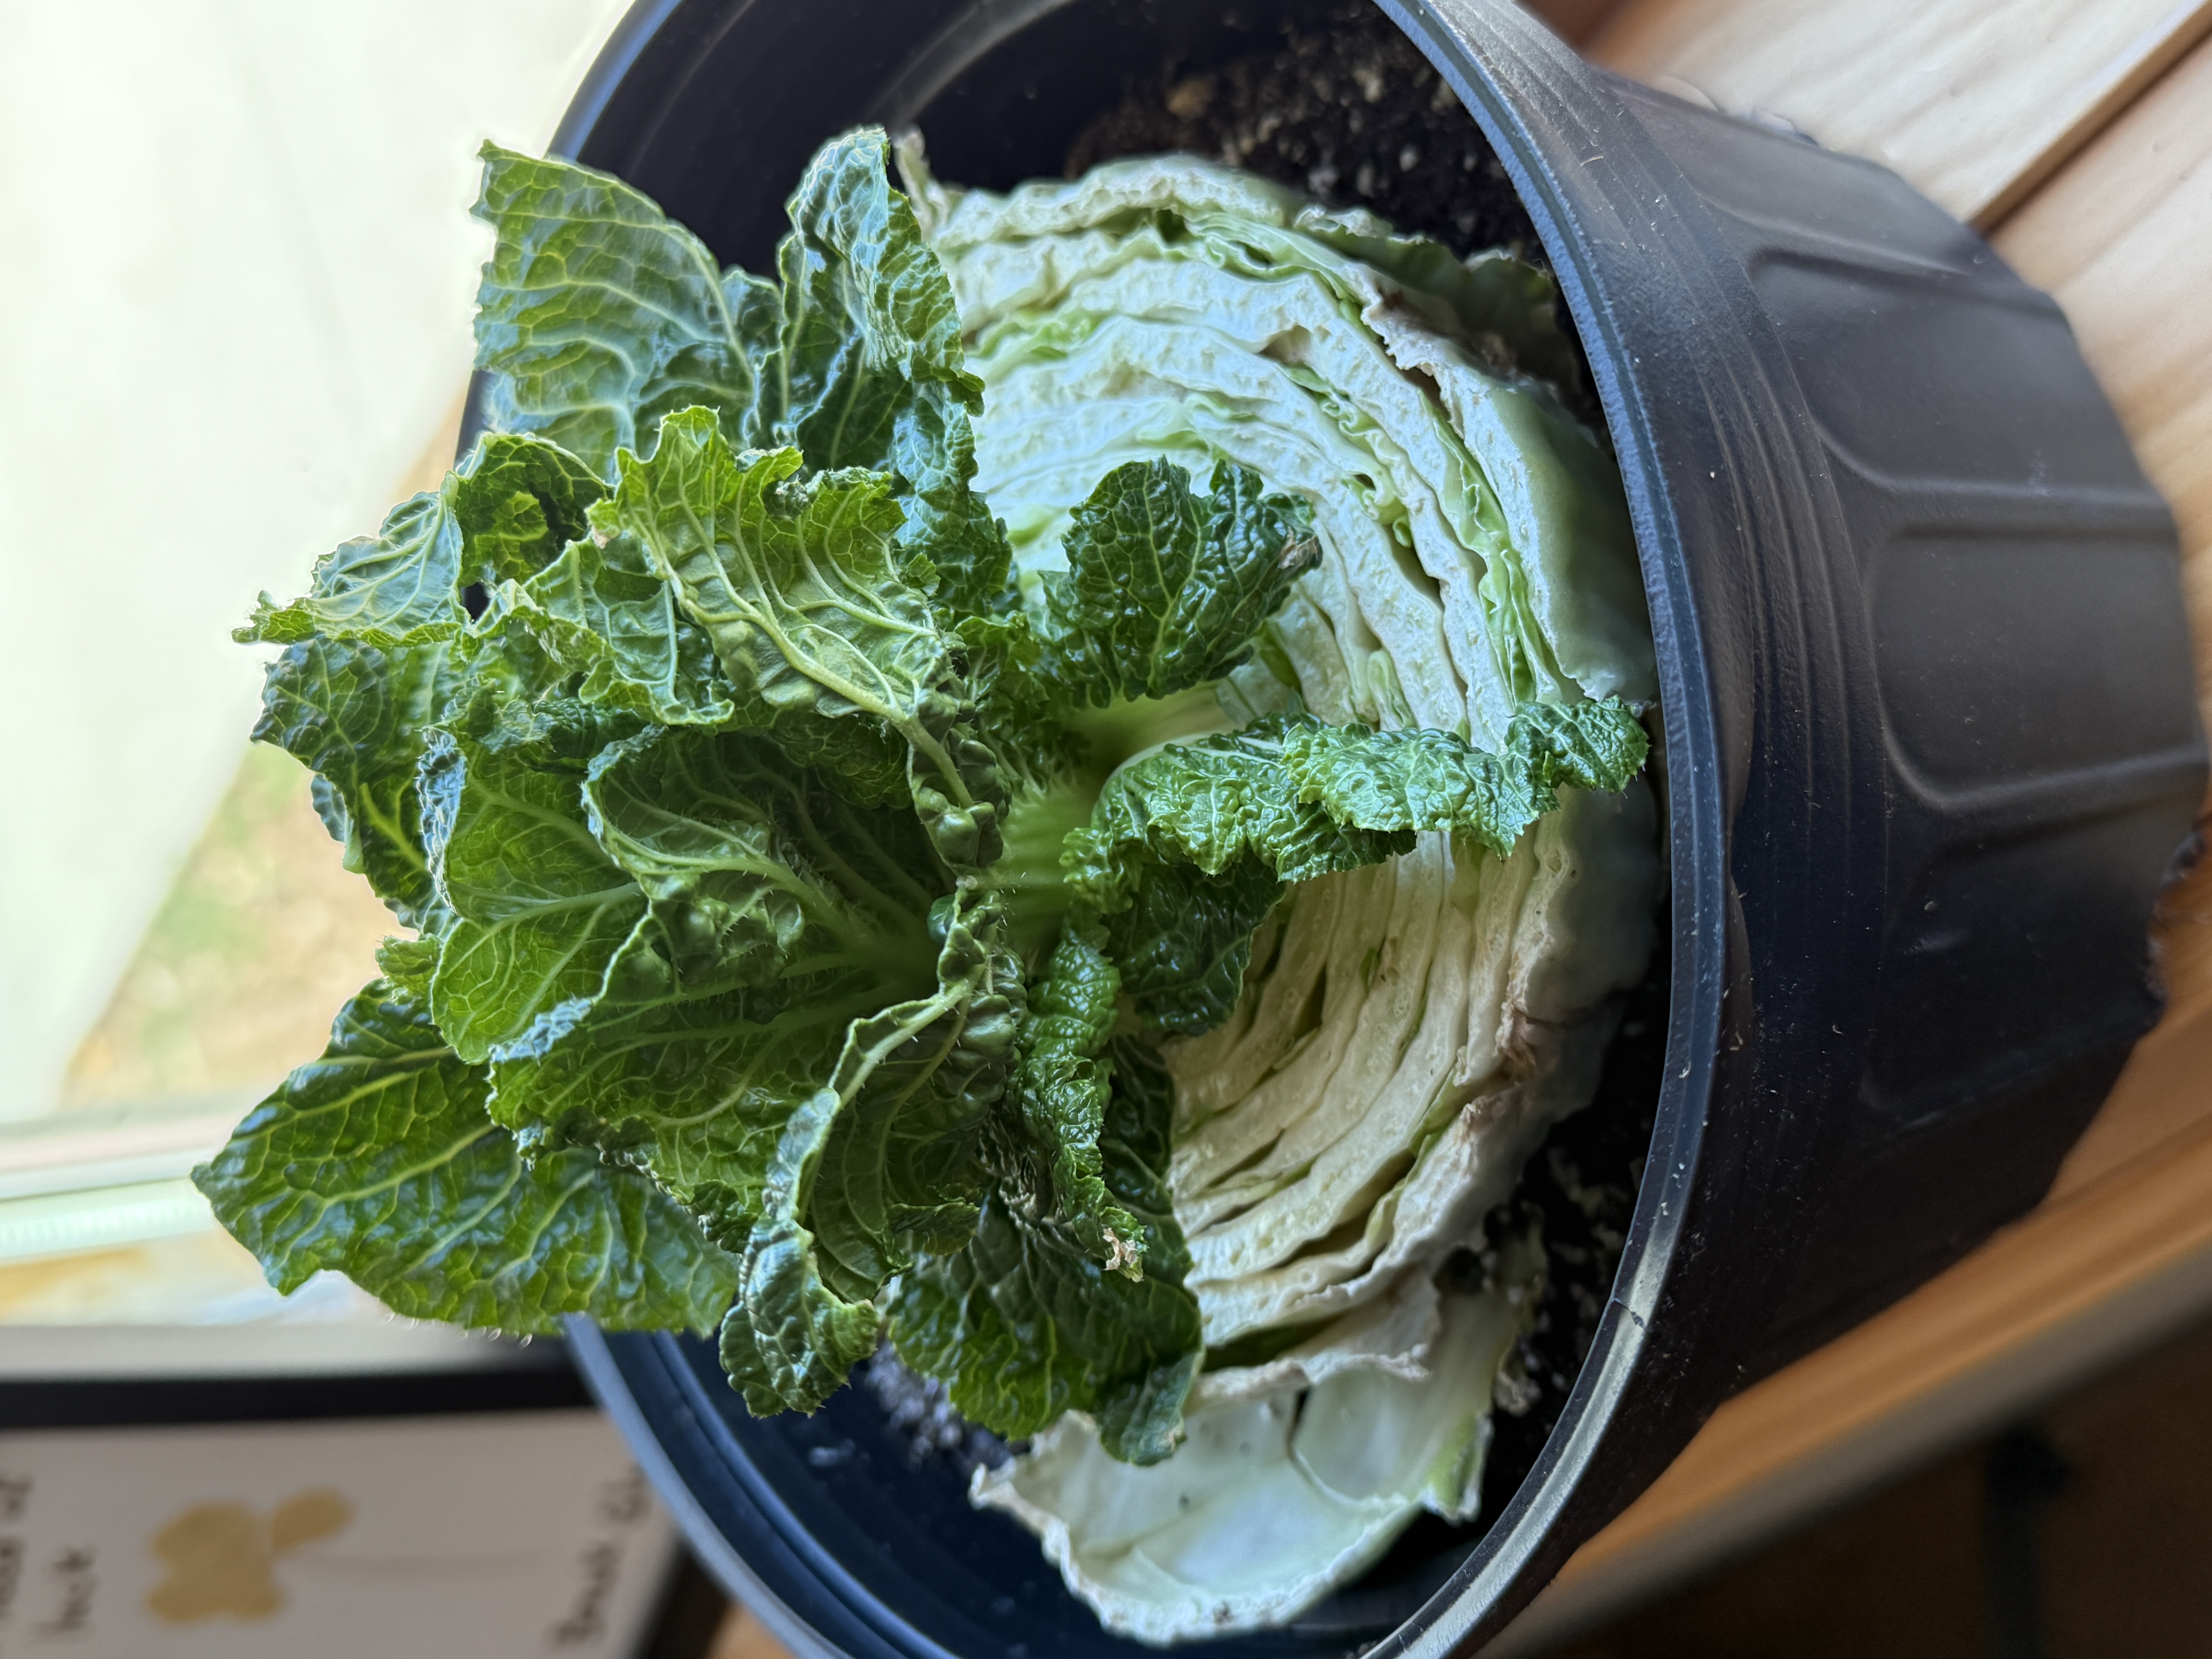 Figure 26. Romaine 12 days after planting.
Radishes, Beets and Carrots
Cut the bottom off carrots, radishes or beets so that you are left with the green leafy top. Place the flat end of the top in a shallow dish of water or a pot of soil. The green leaves will start resprouting. You will not regrow the roots of carrots, beets or radishes; only the tops, which you can use in cooking. If you want to grow a whole radish, carrot or beet, you will need to start from seed.
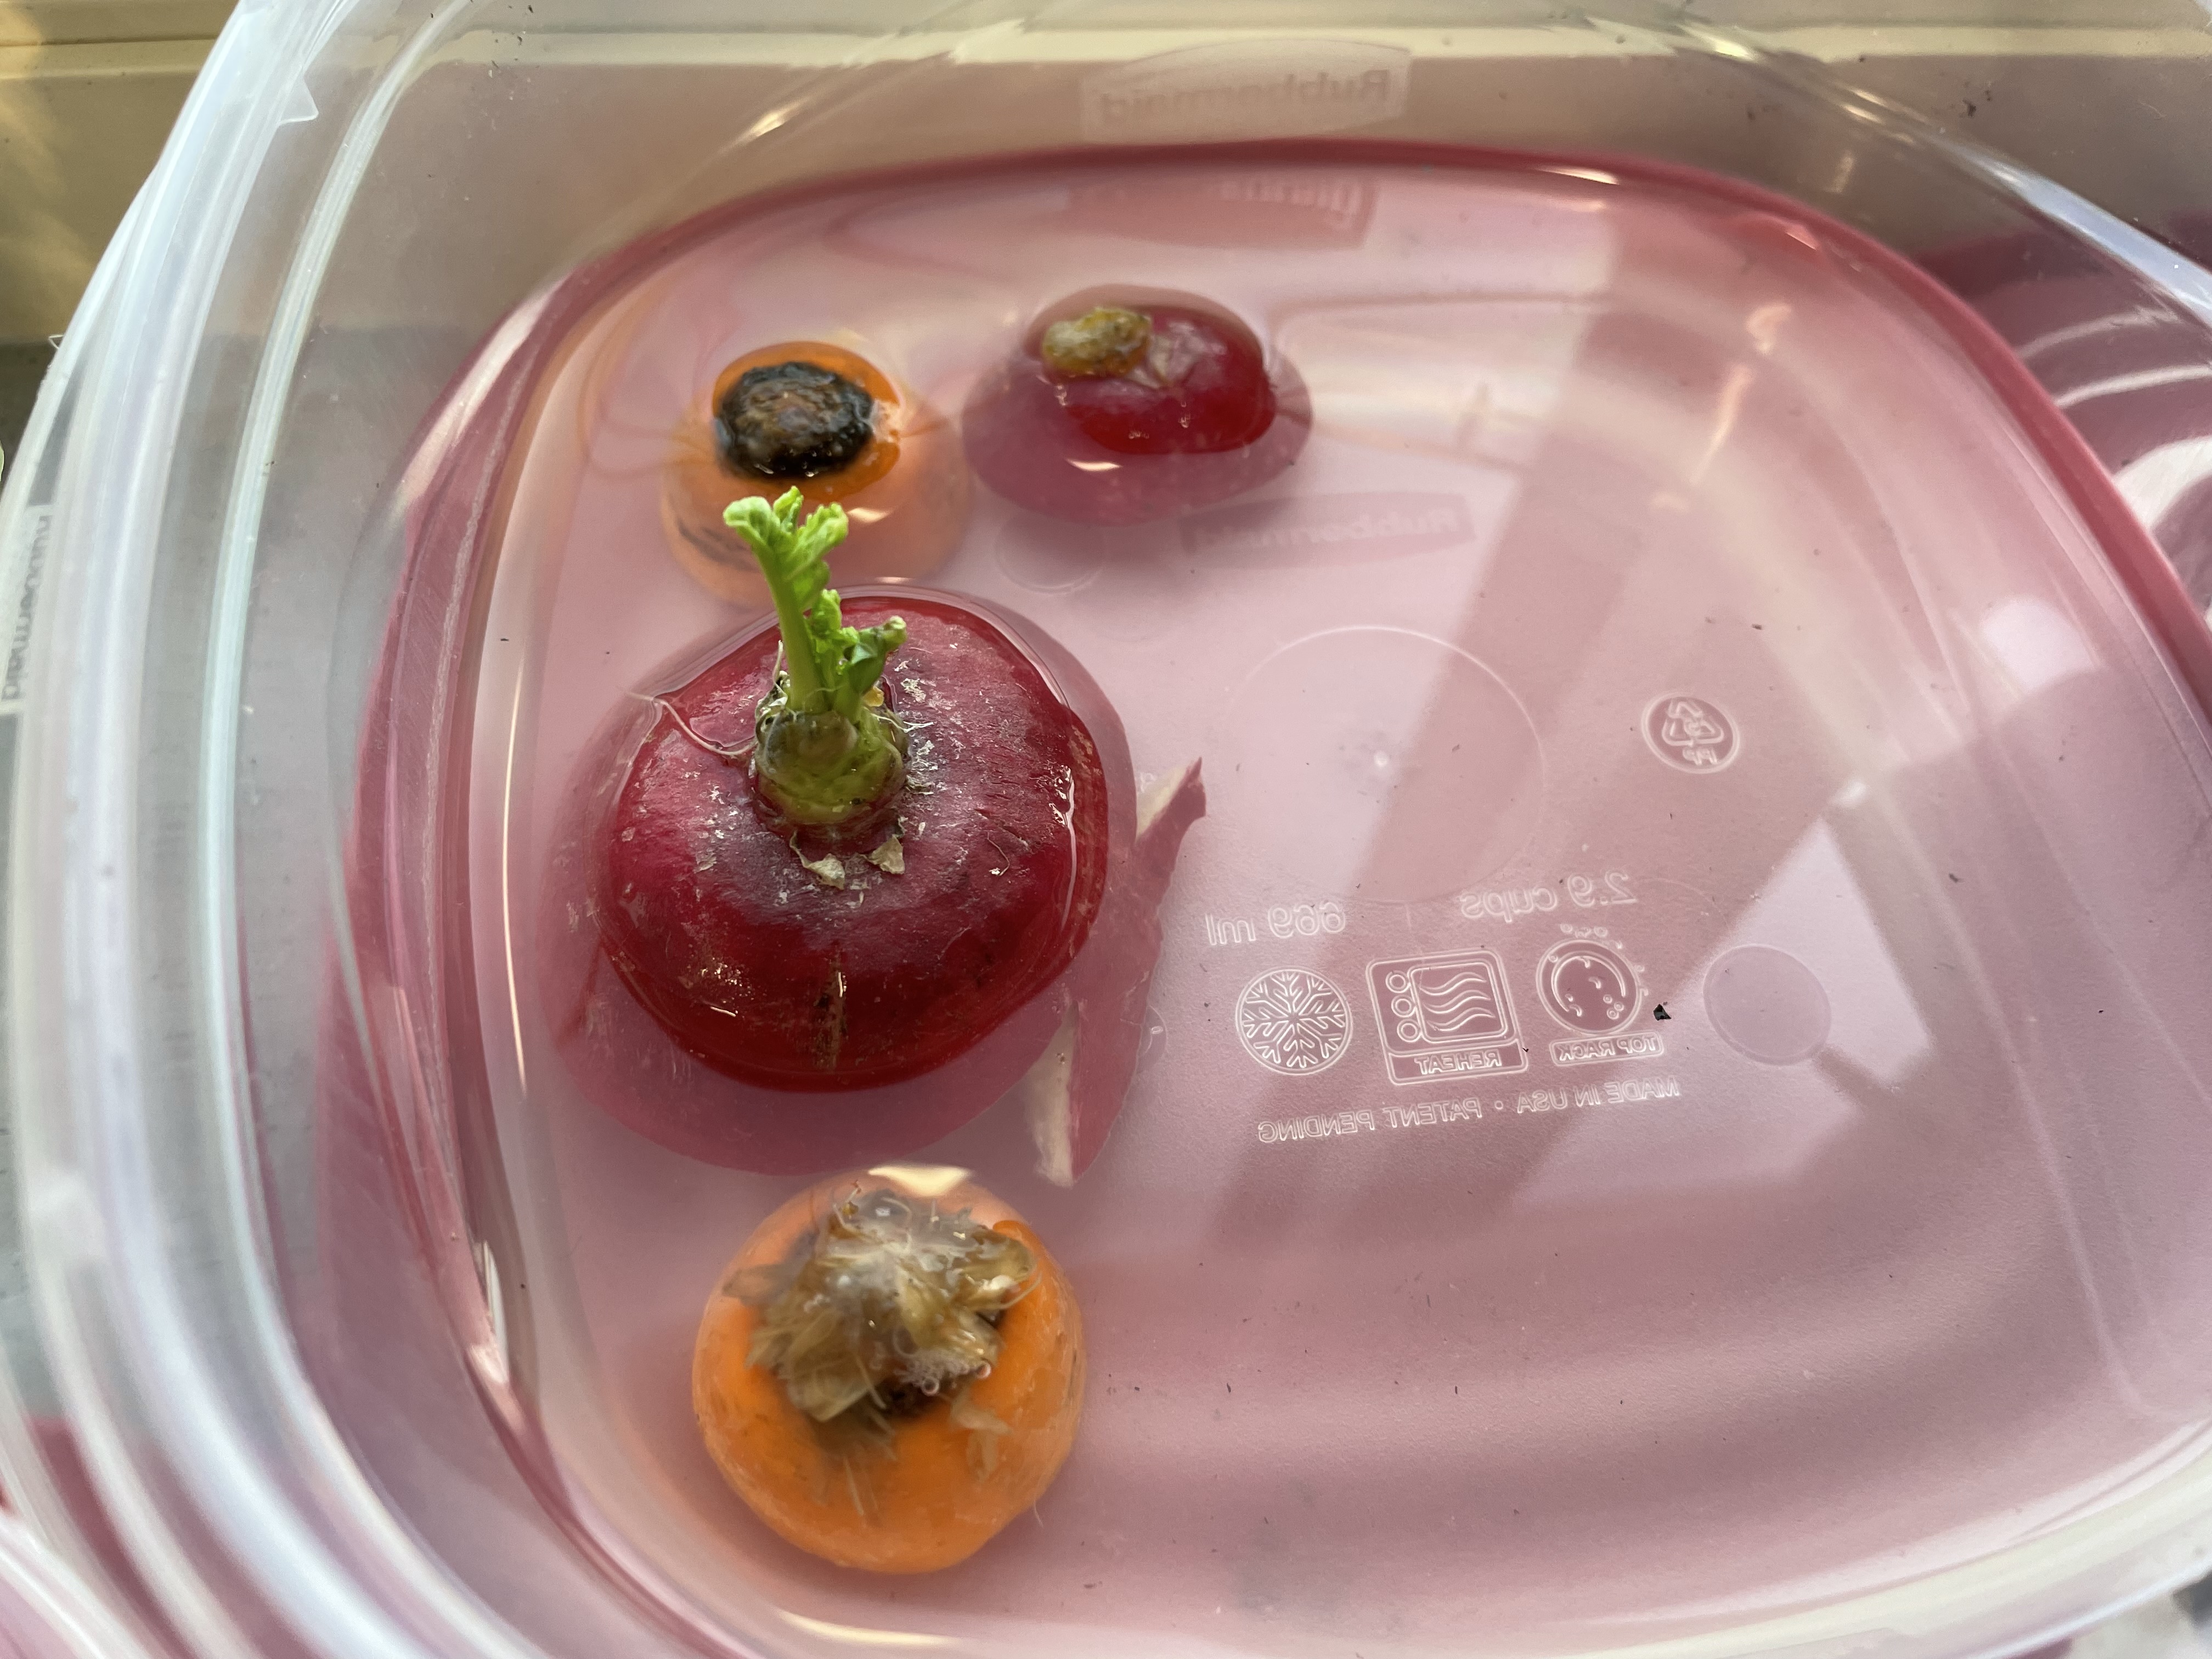 Figure 27. Cut tops of radishes and carrots on day 3.
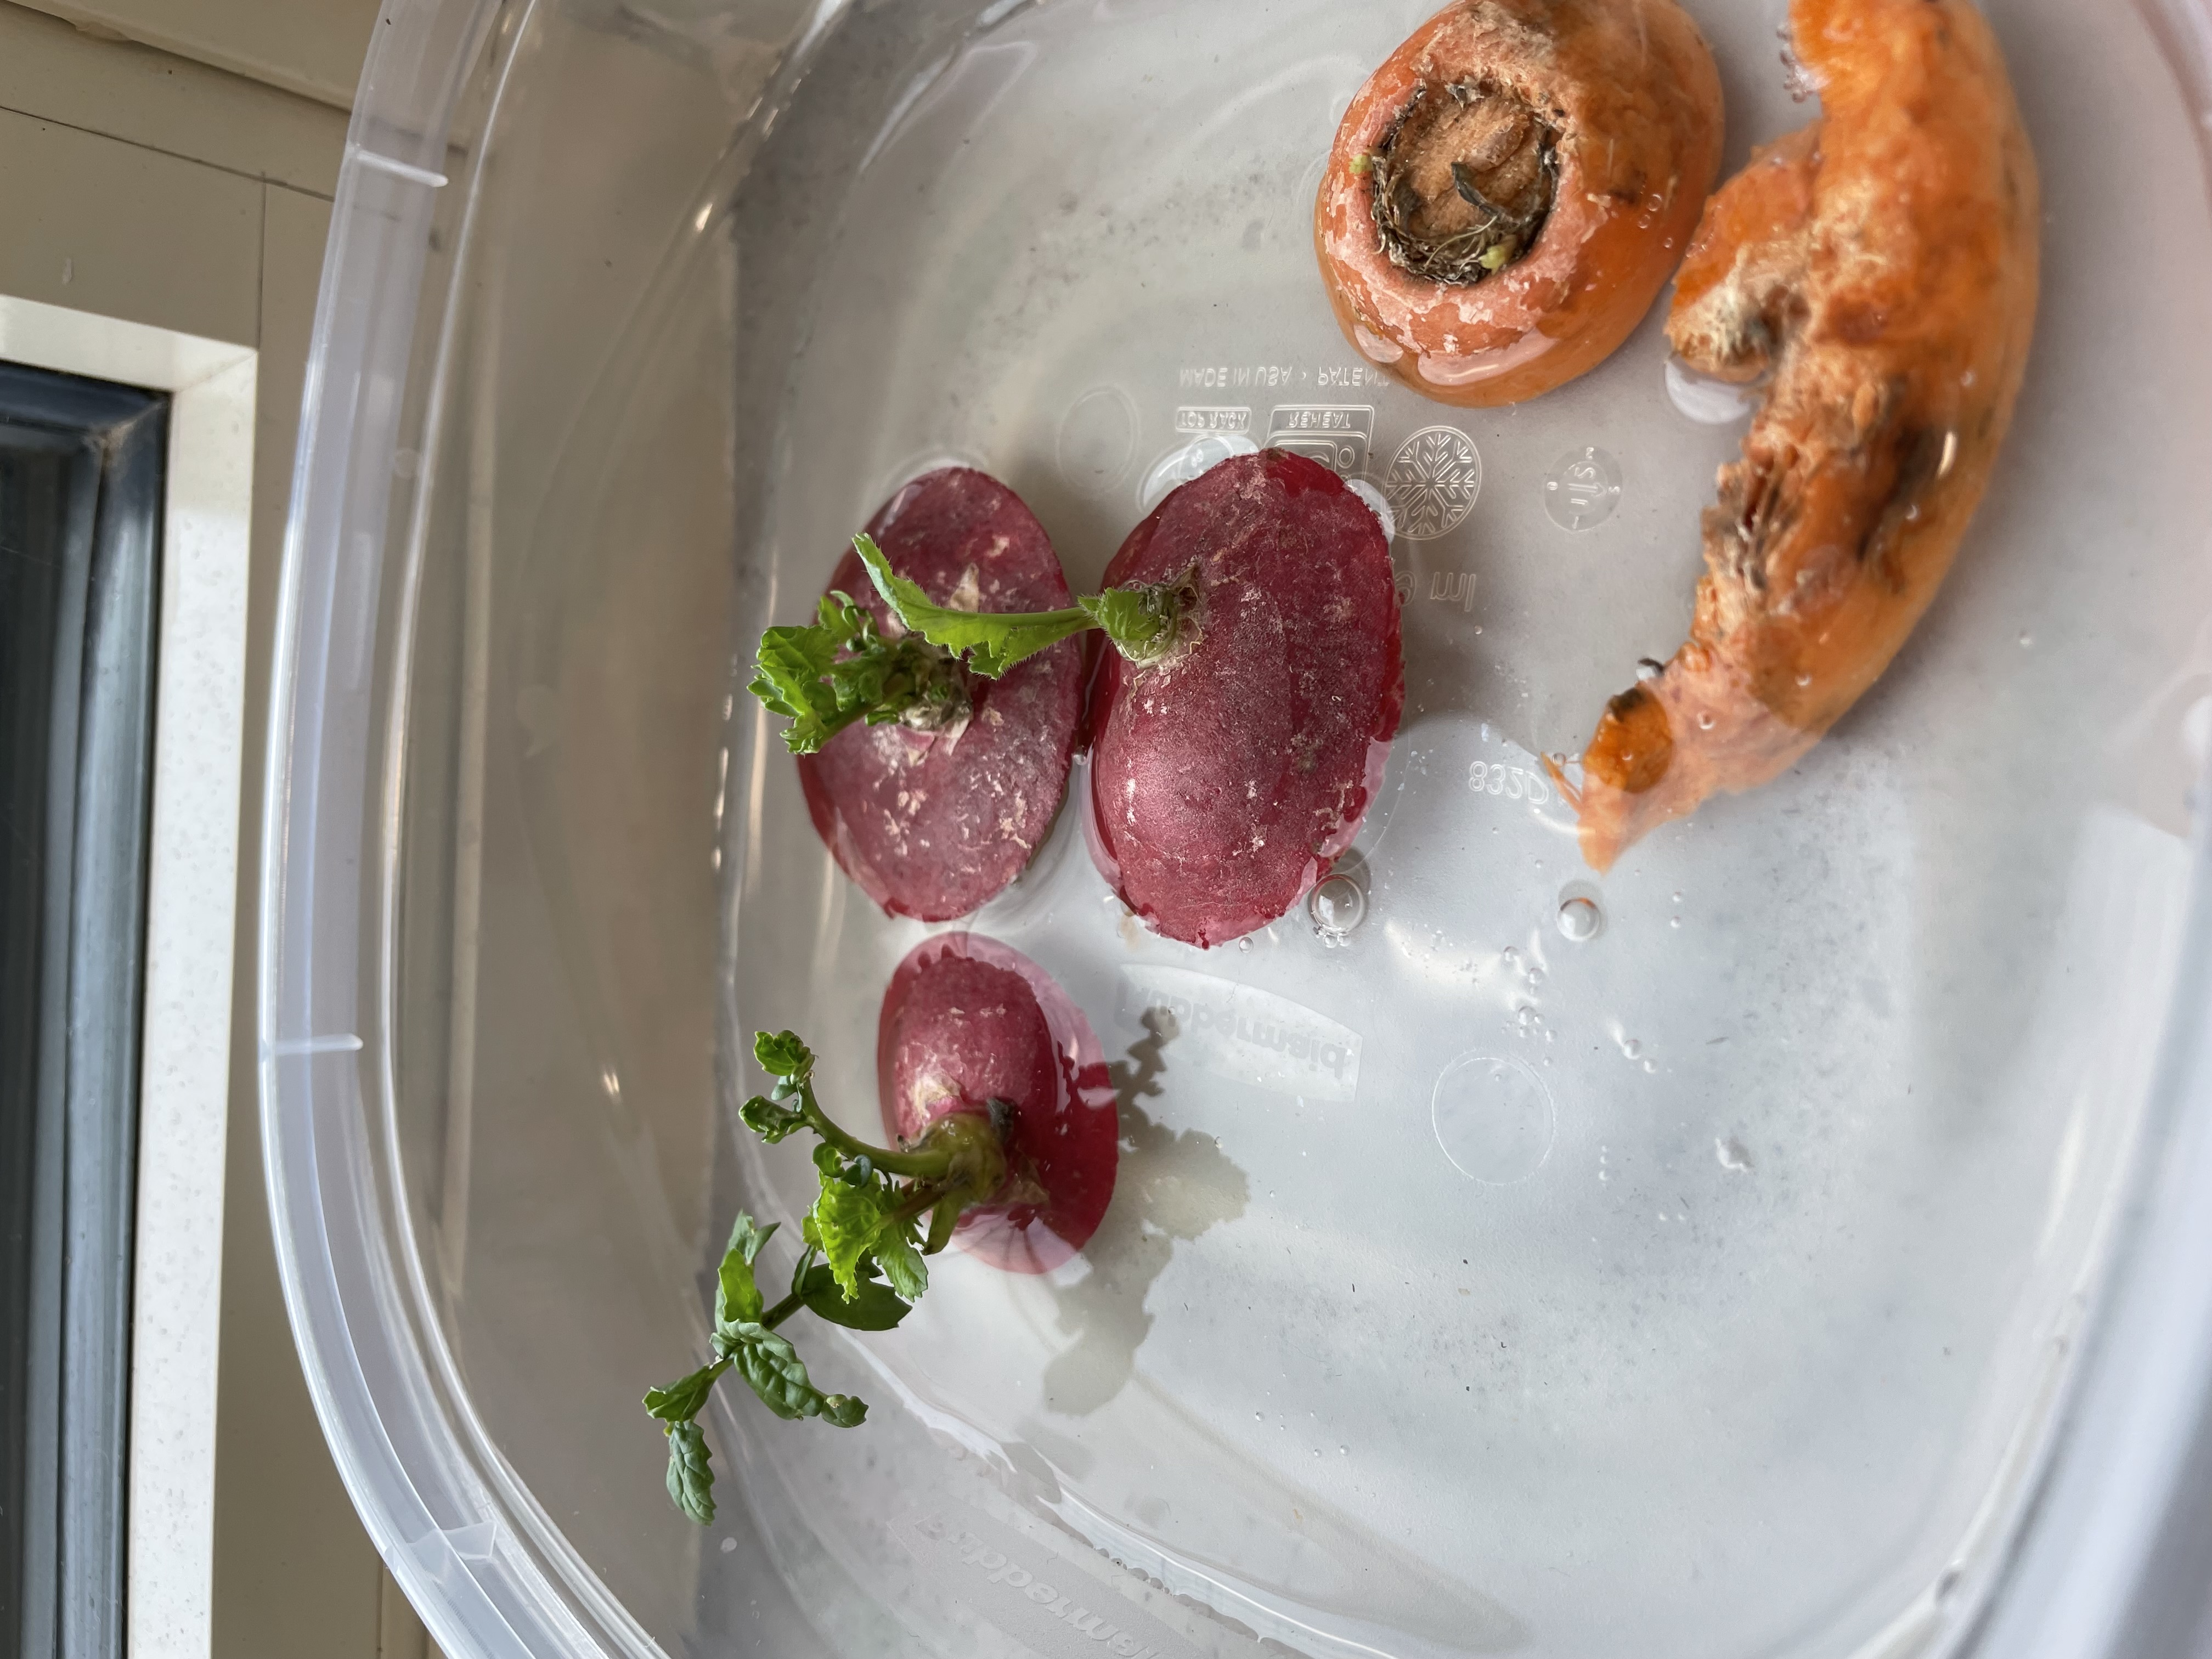 Figure 28. Radish tops sprouting new greens on day 5.
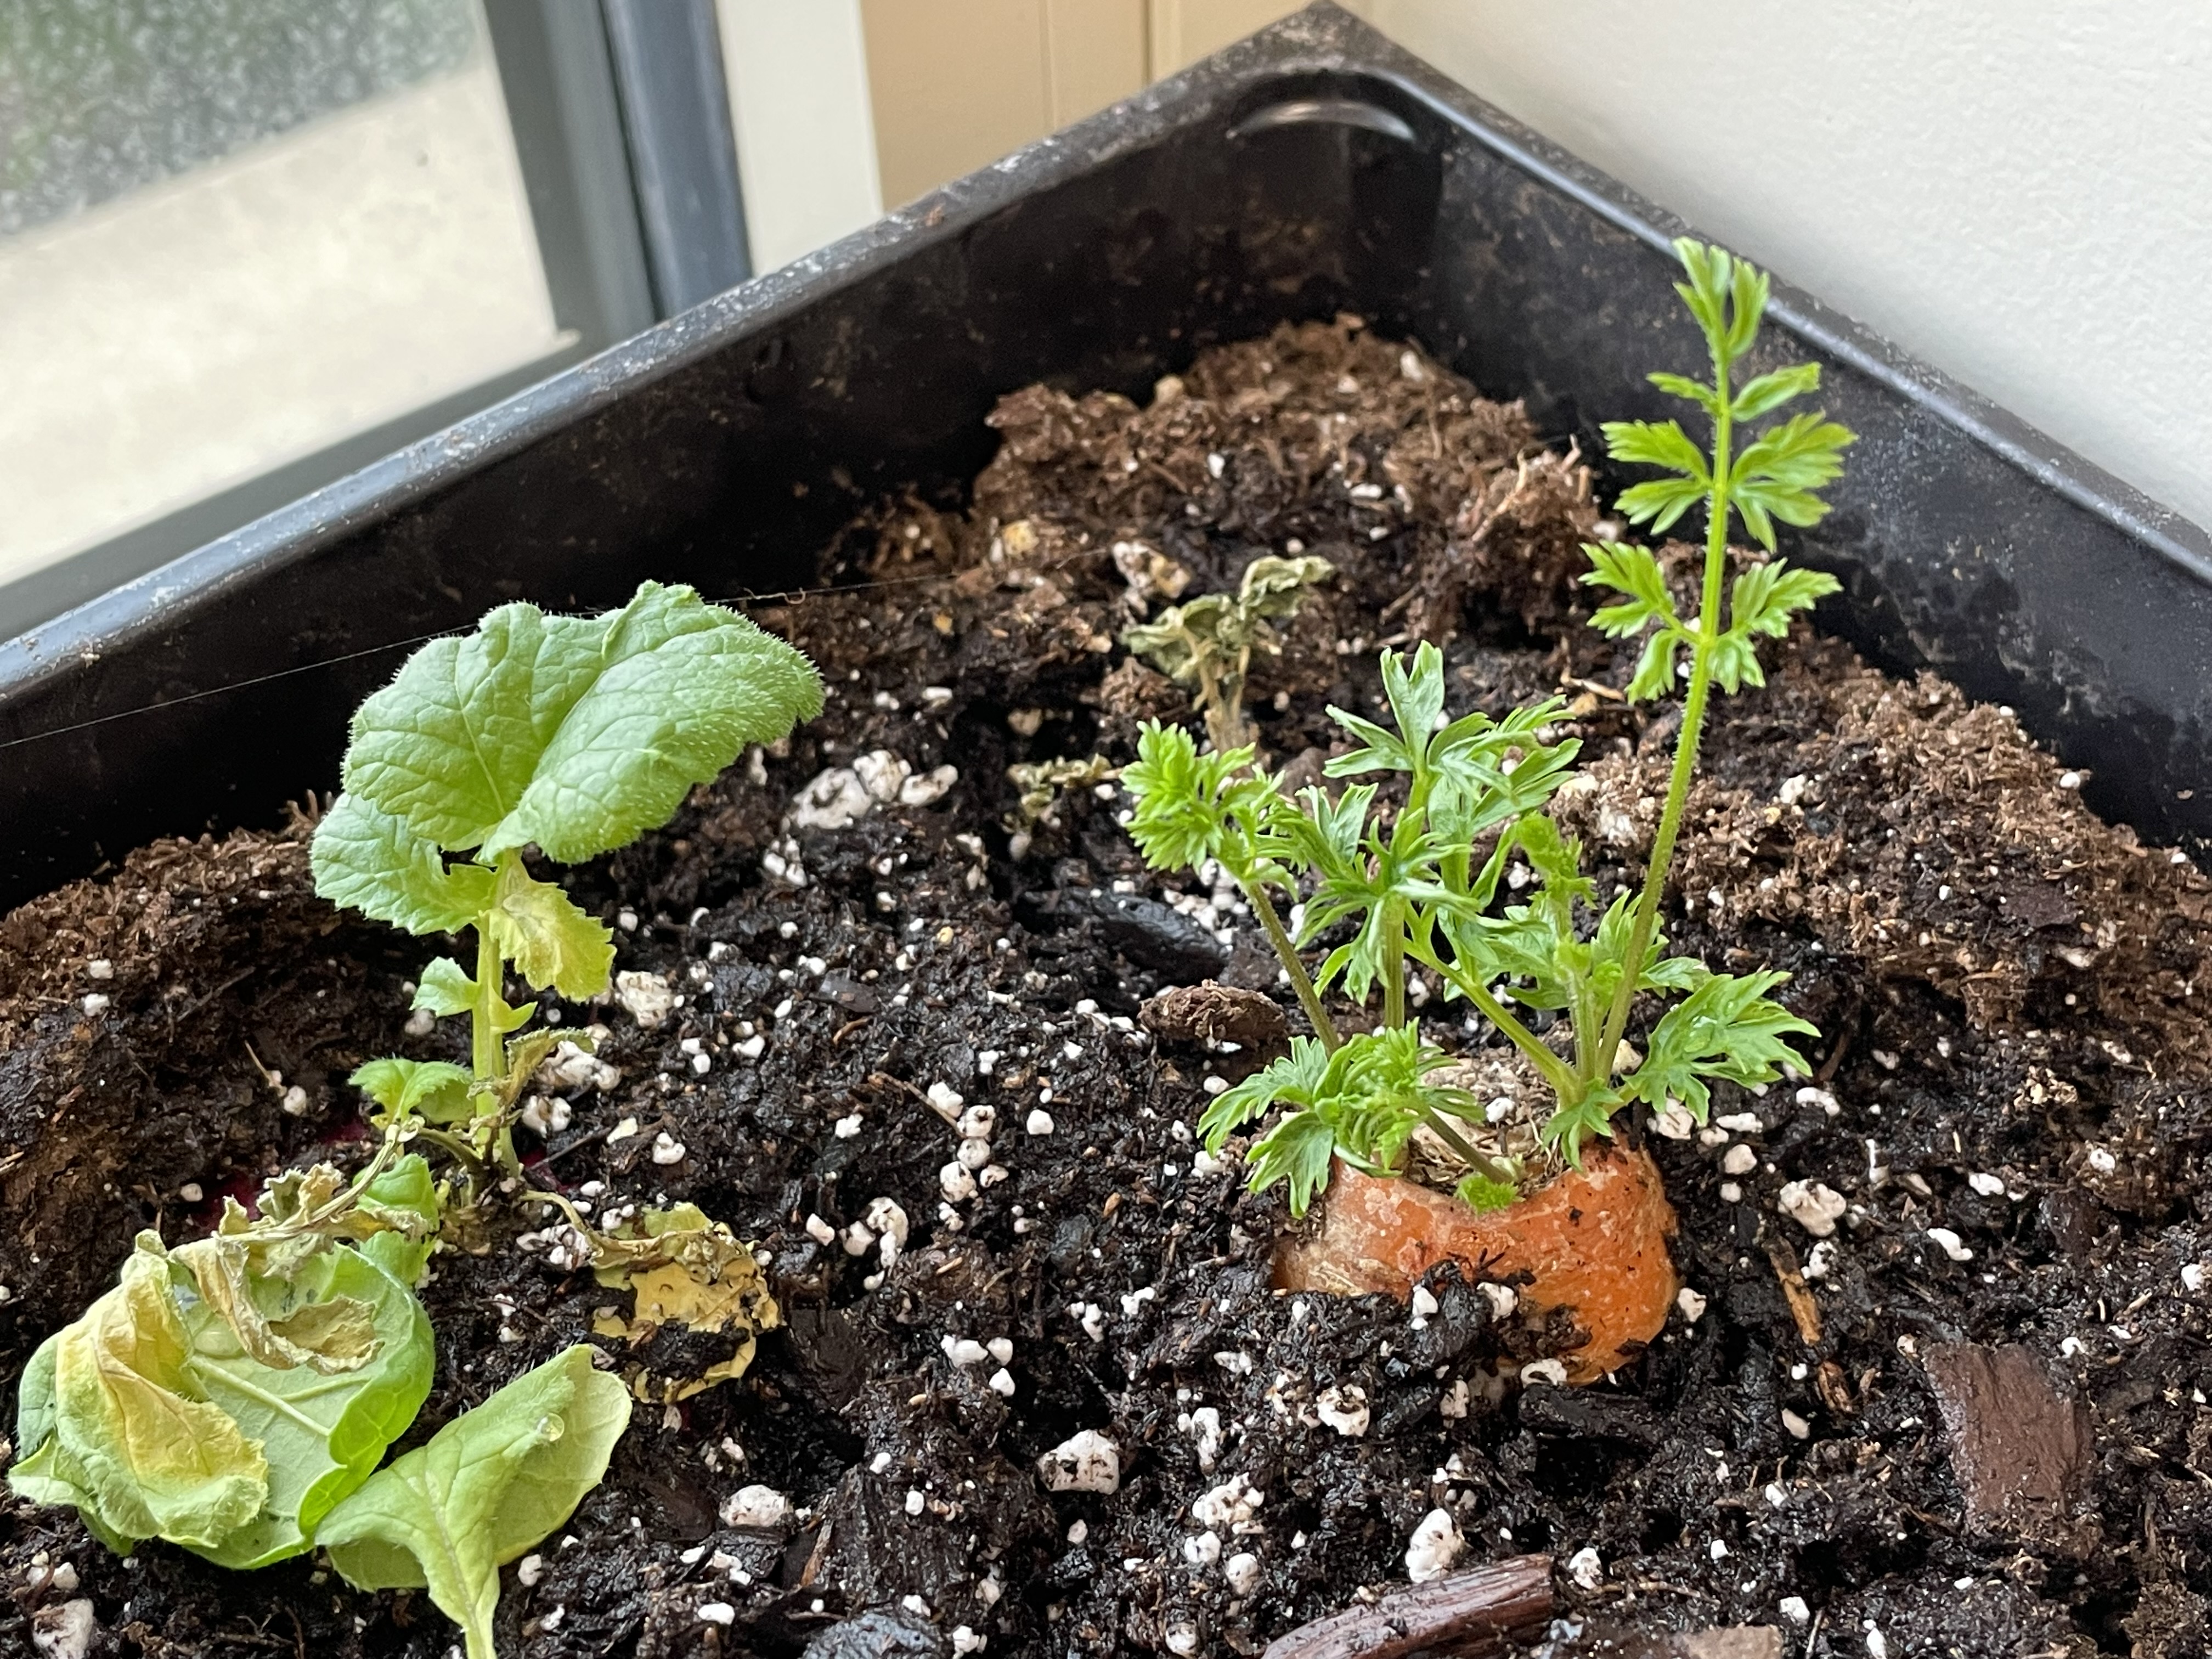 Figure 29. Carrot top regrowth on day 22.
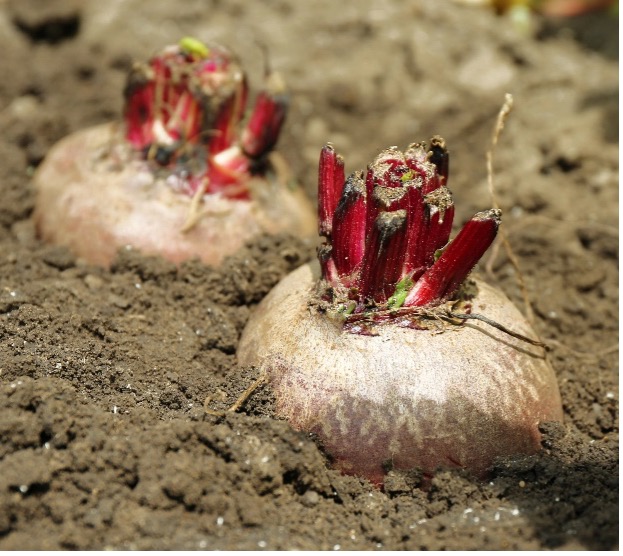 Figure 30. Beet tops regrowing in soil.
Avocados
You will need to be very patient to grow your own avocados. To start, save the pit (seed) in the middle of the fruit. Be careful not to cut into the seed when you cut the avocado open. Rinse any fruit flesh from the pit before planting. You can just plant the pit, since it is a big seed, or you can keep the pit slightly lowered into water until roots emerge (and then you can plant it).
To try the water technique, find the seed’s bottom. An avocado seed is not usually a perfect sphere. It is often teardrop-shaped. The flattest part of the seed is where the roots will emerge. That is the end that needs to touch the water.
Keep only the root end of the pit wet so that it does not rot. Push three or four toothpicks down into the pit at an angle. Use the toothpicks to suspend the pit in a cup. Fill the cup until the bottom half-inch or so of the pit is in the water. You will have to keep adding water as it evaporates to keep the bottom of the pit wet. Replace the water with fresh water every day or two to prevent rotting (if the water gets cloudy, it needs to be changed immediately).
You will have to be very patient. It can take anywhere from five to 13 years to grow an avocado pit to a fully mature, fruit-bearing avocado tree.
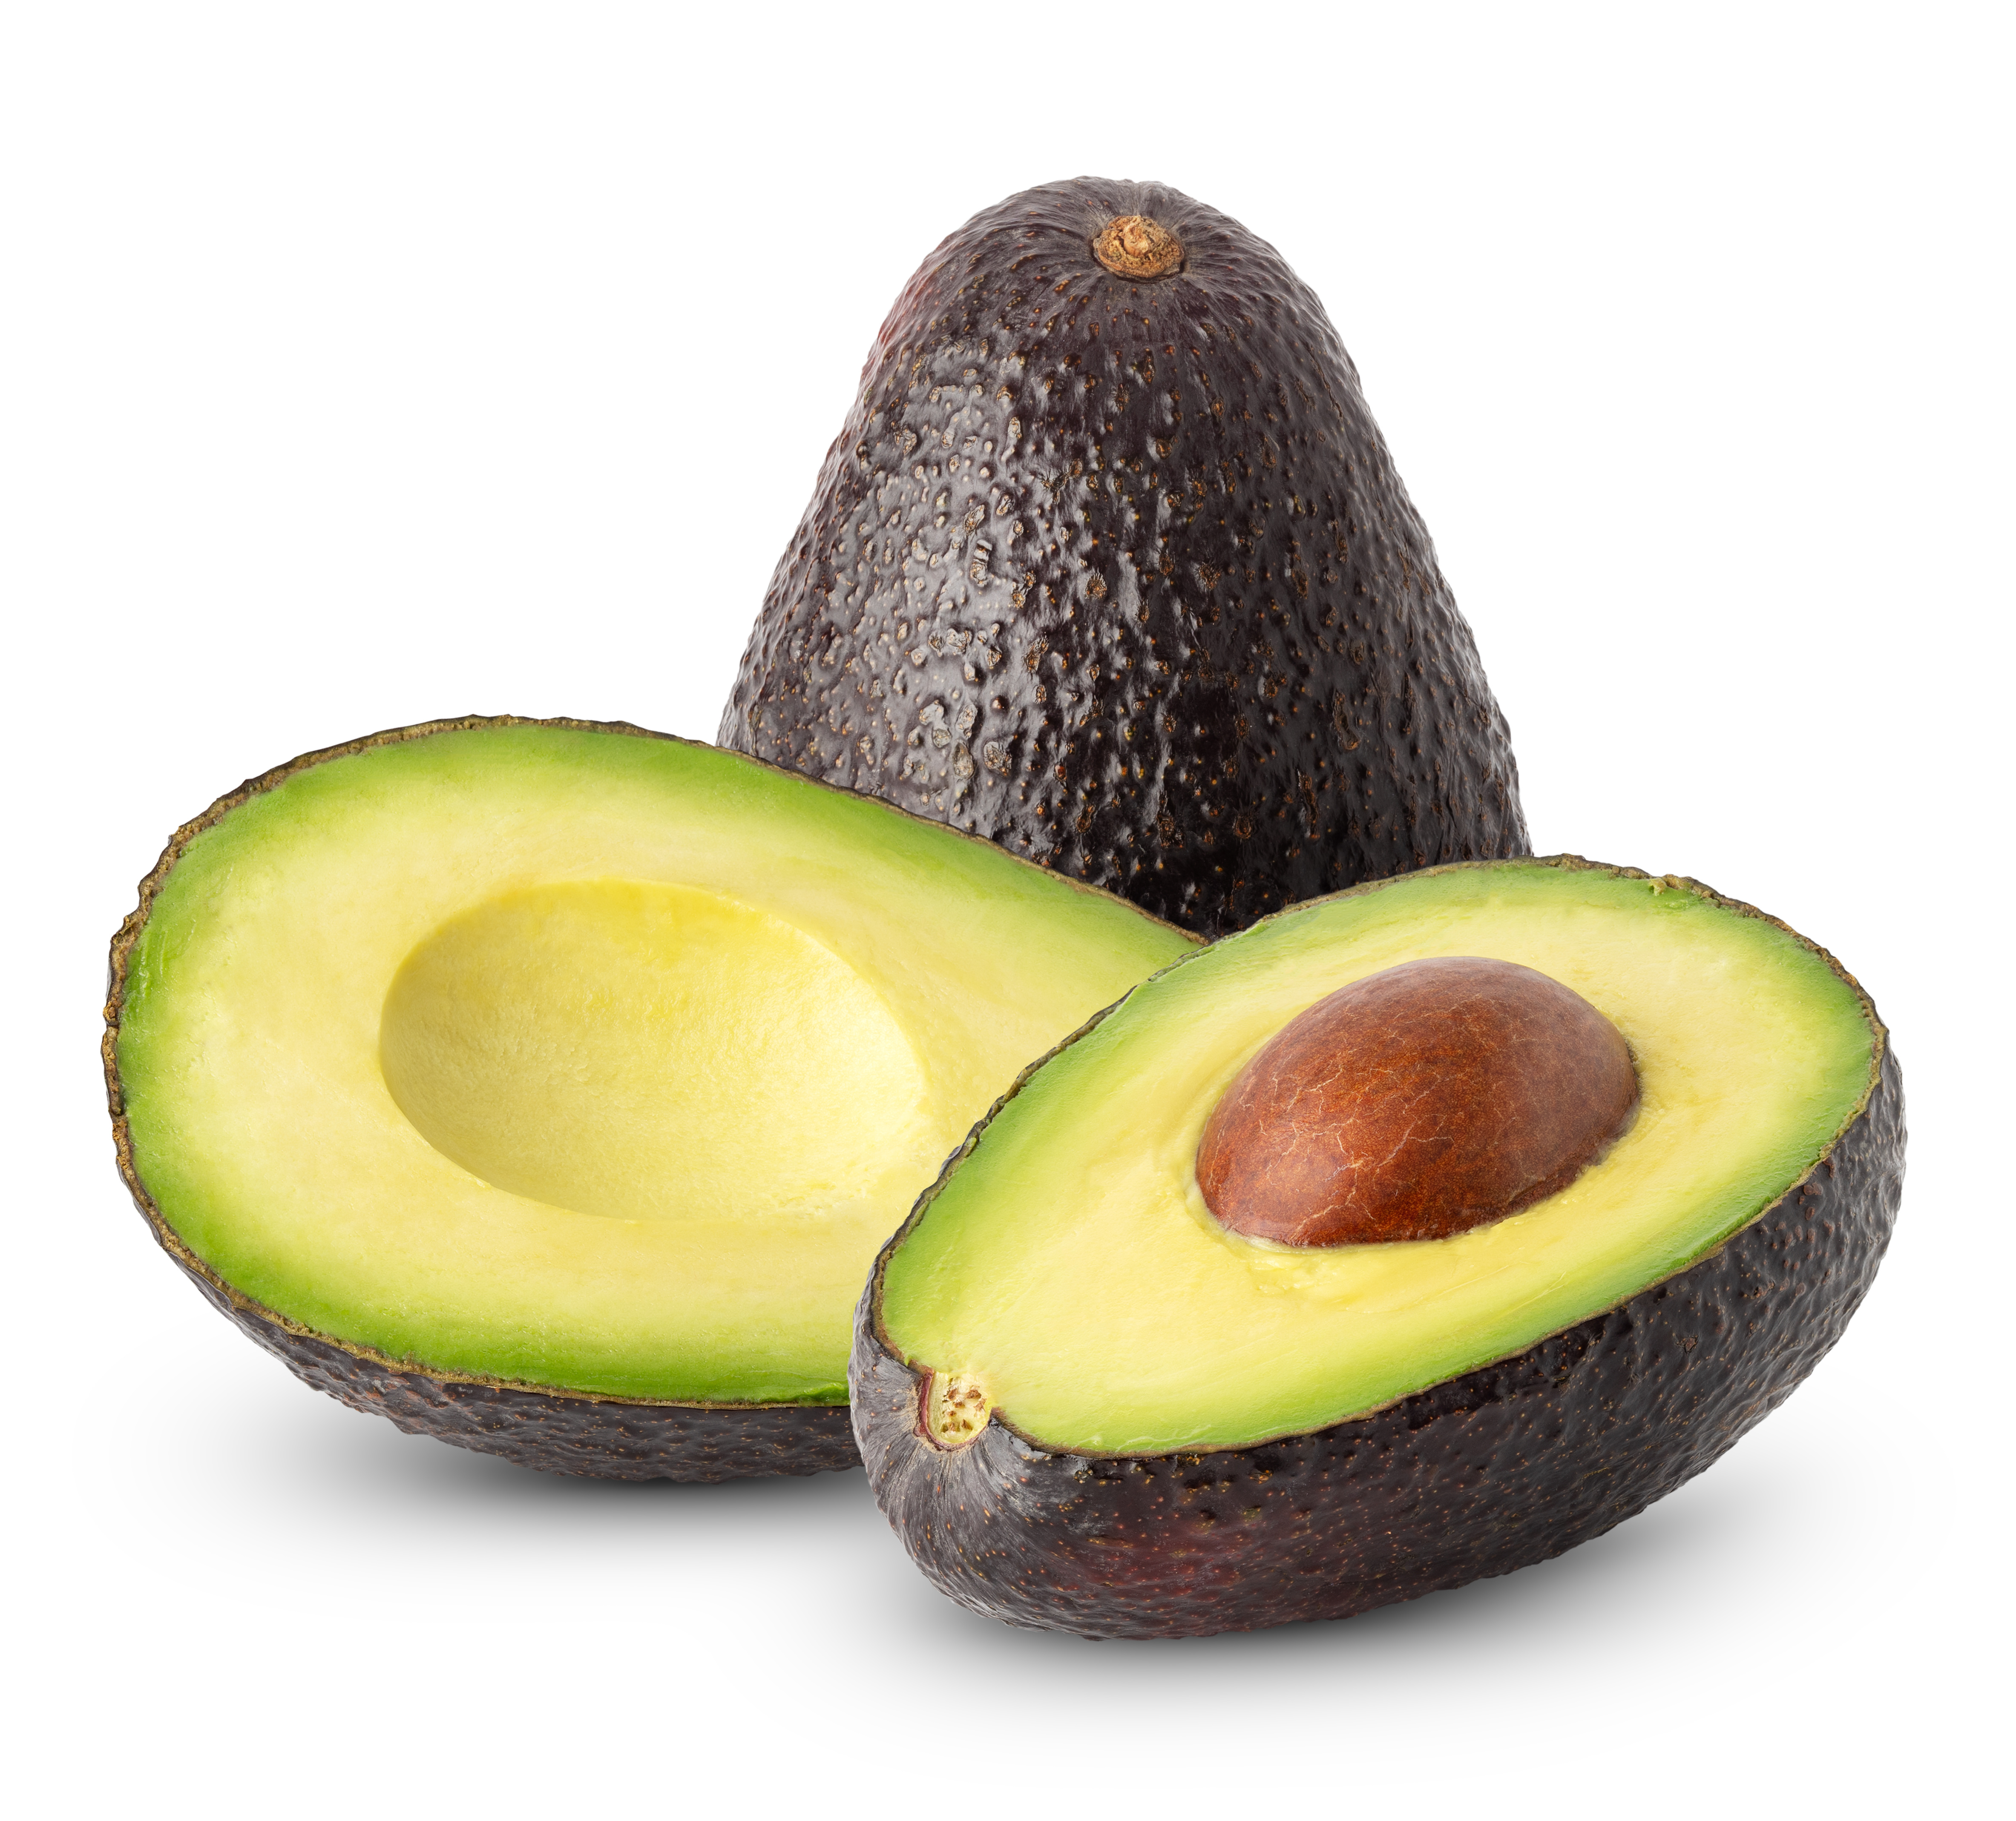 Figure 31. Pit in the middle of an avocado.
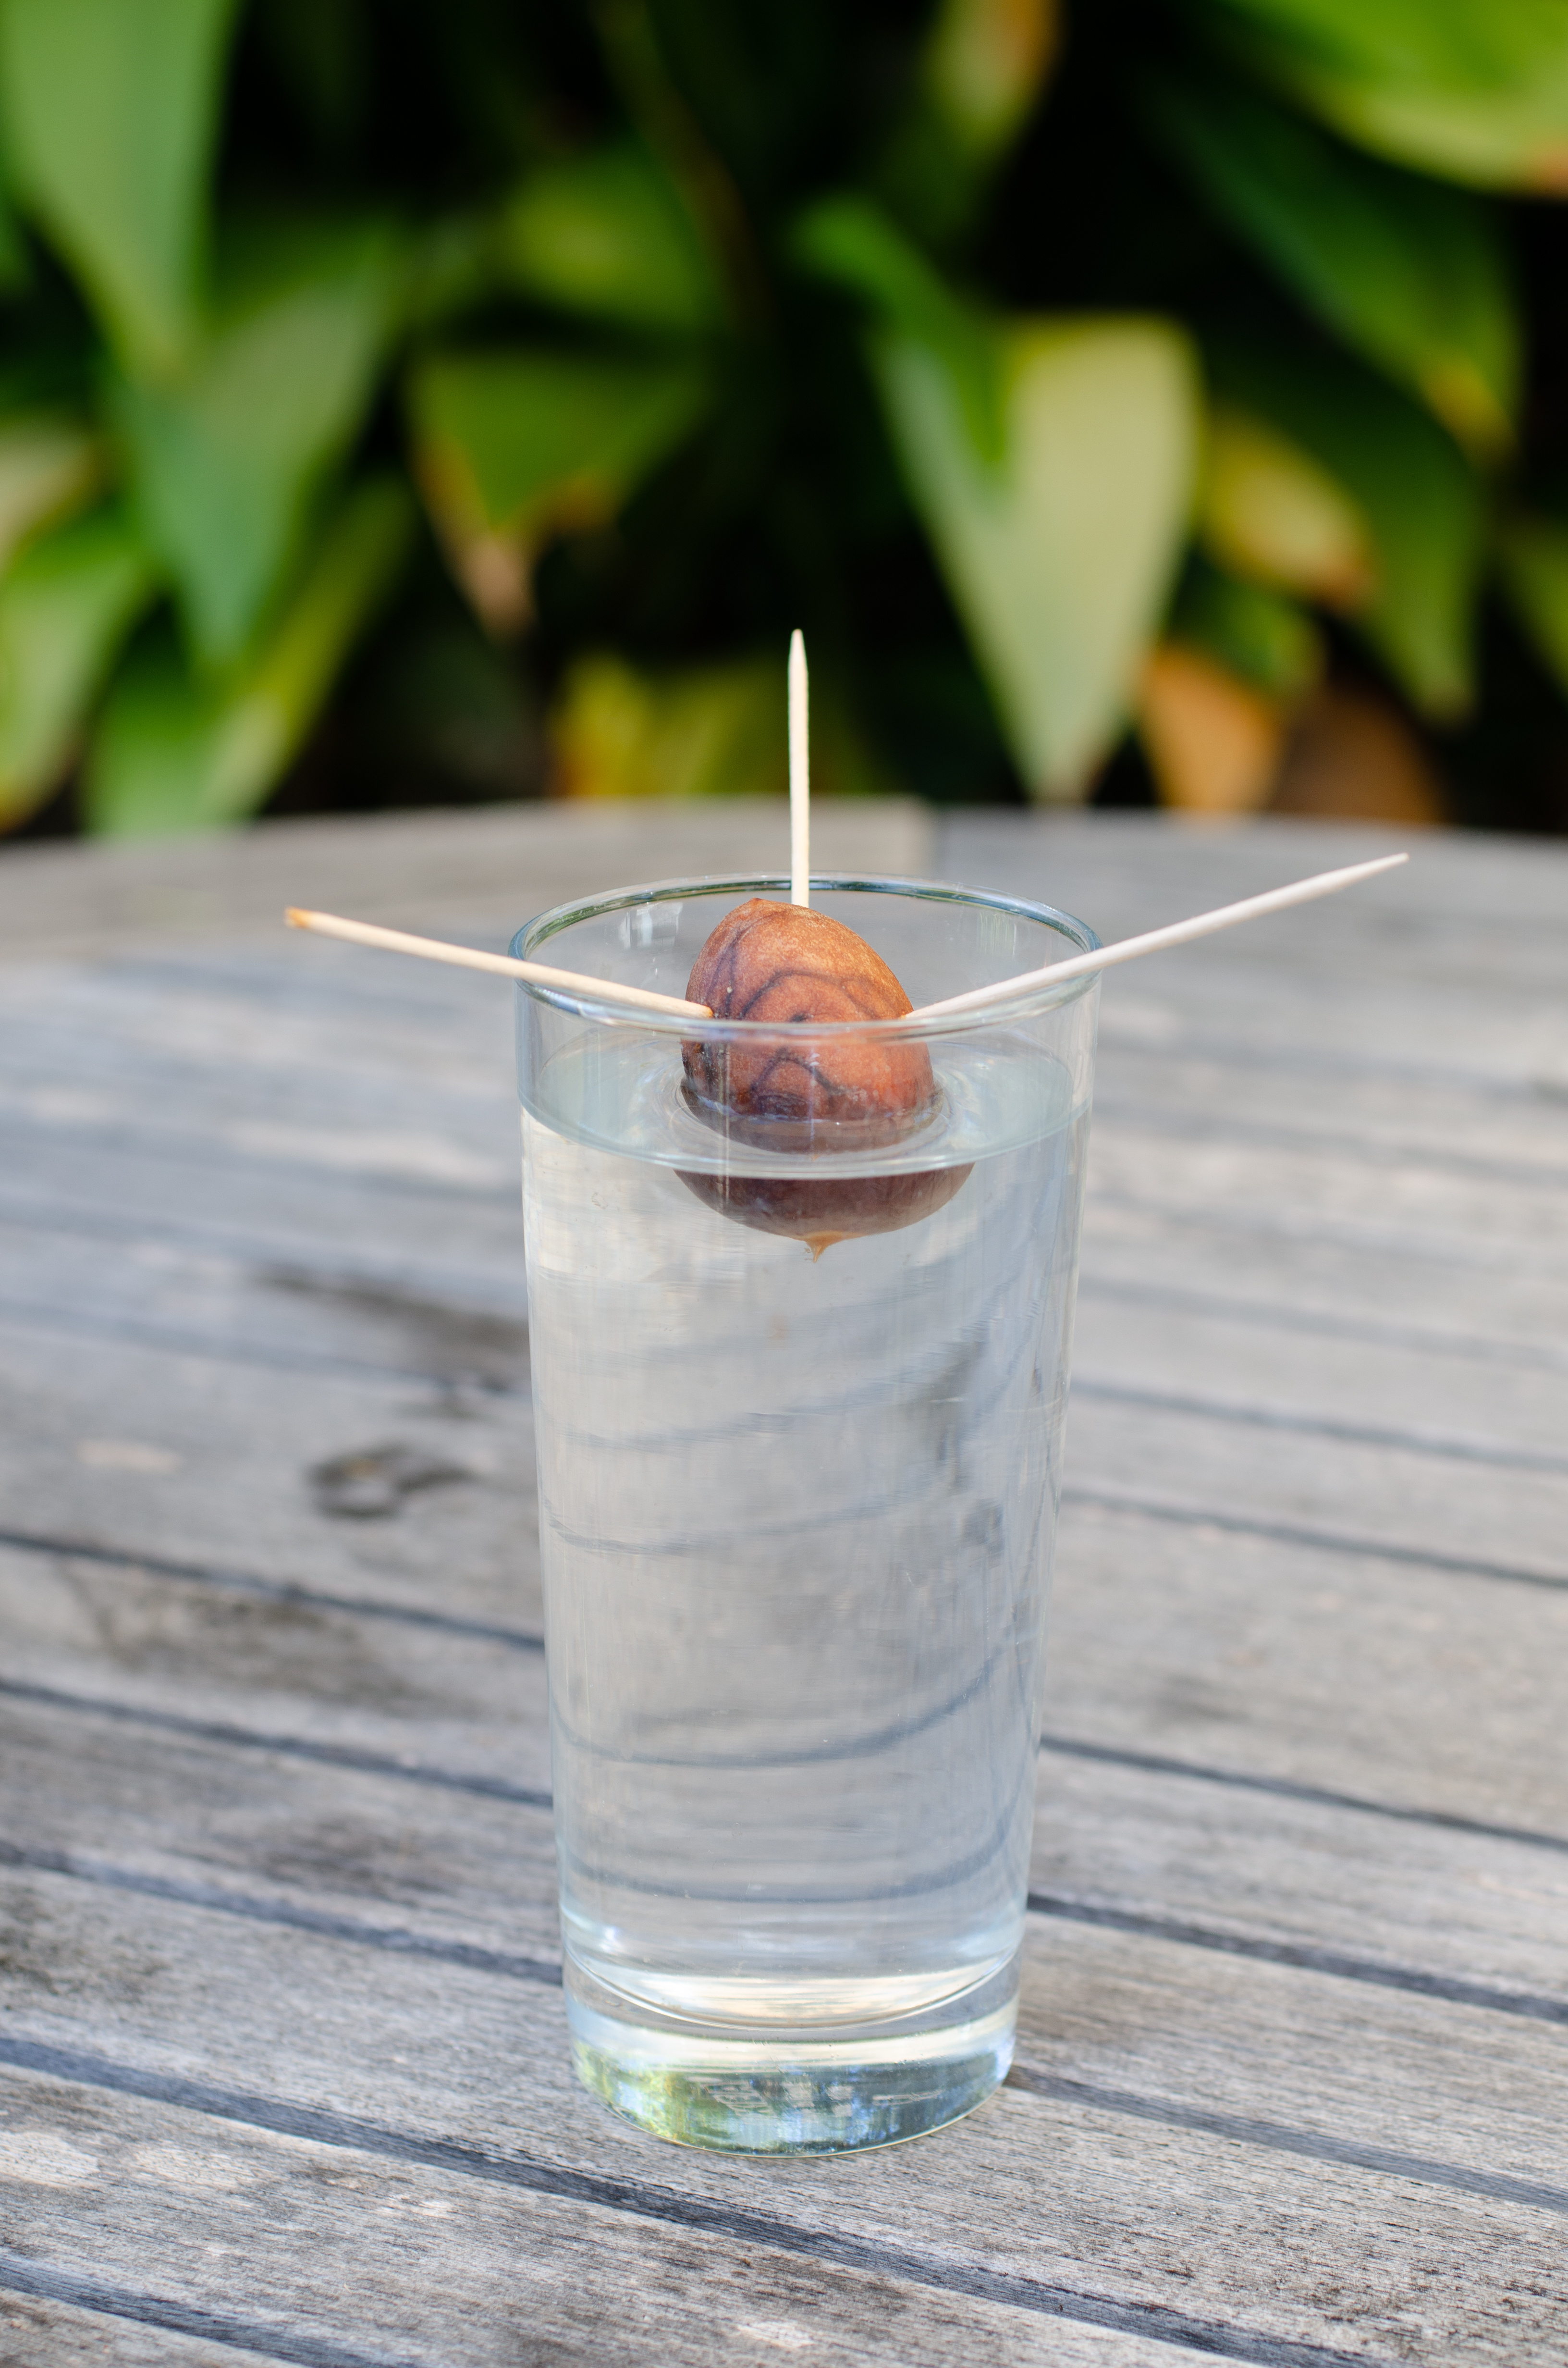 Figure 32. Pit suspended so that the bottom end touches the water.
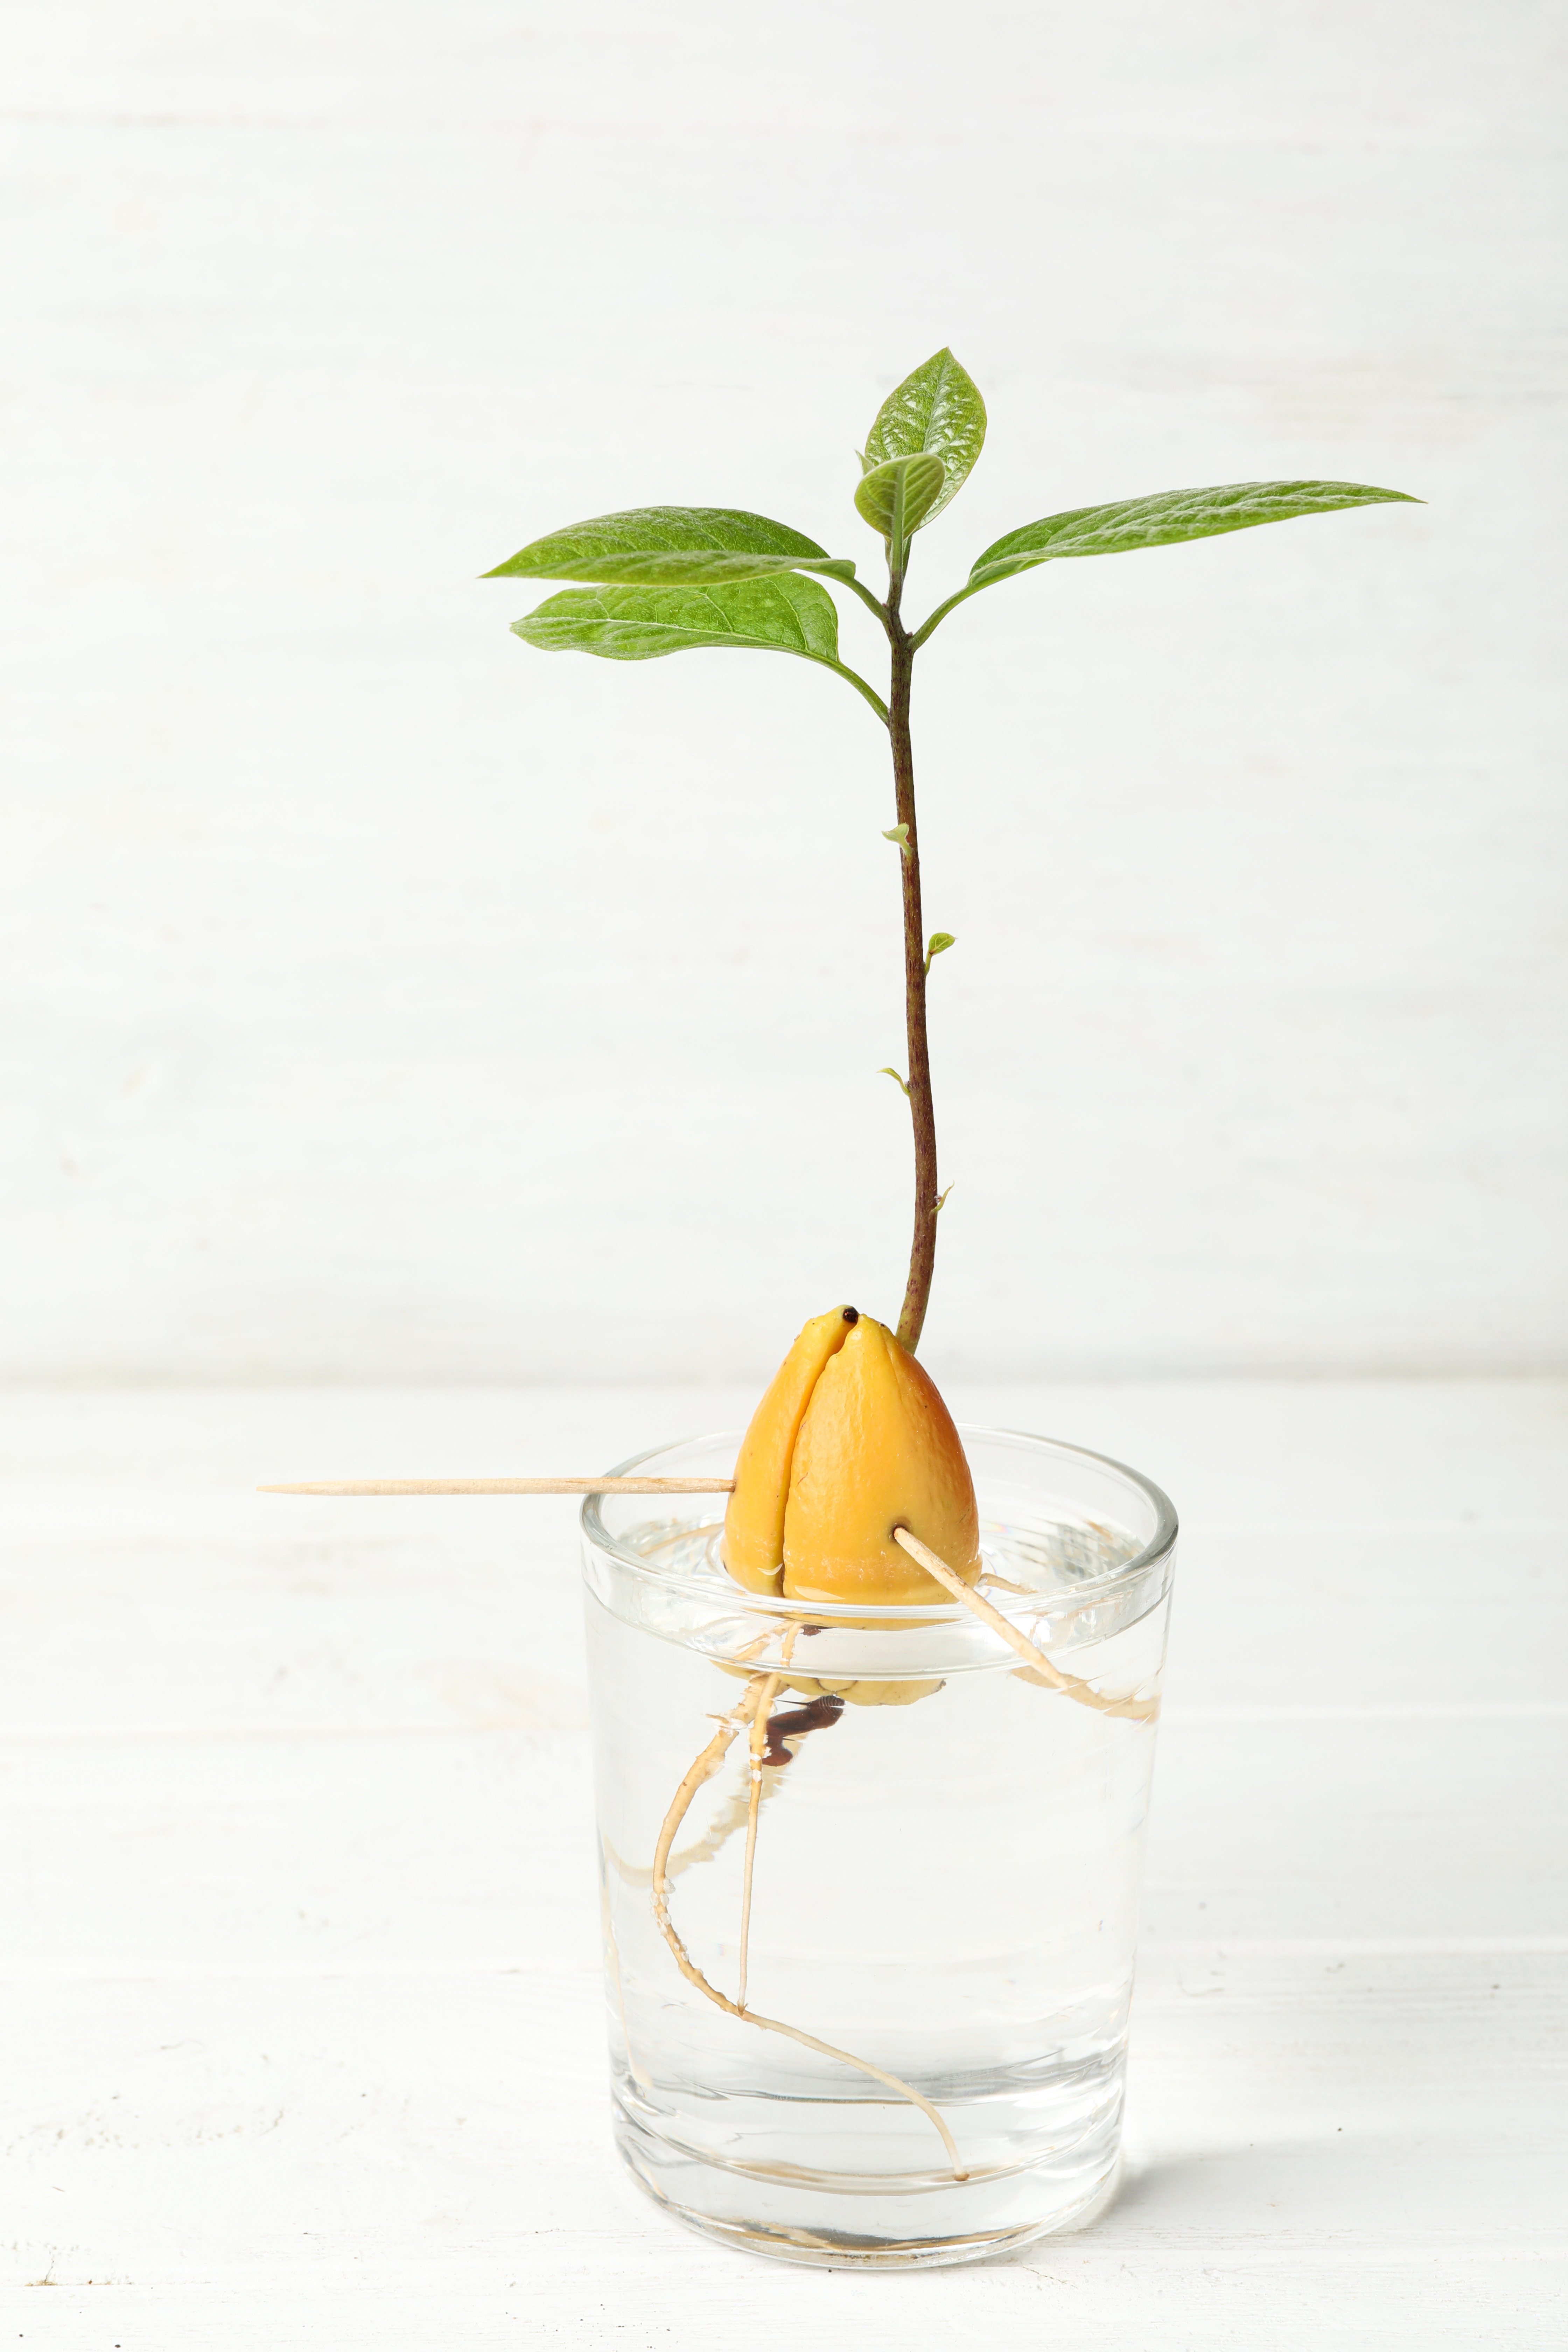 Figure 33. Avocado tree starting to grow.
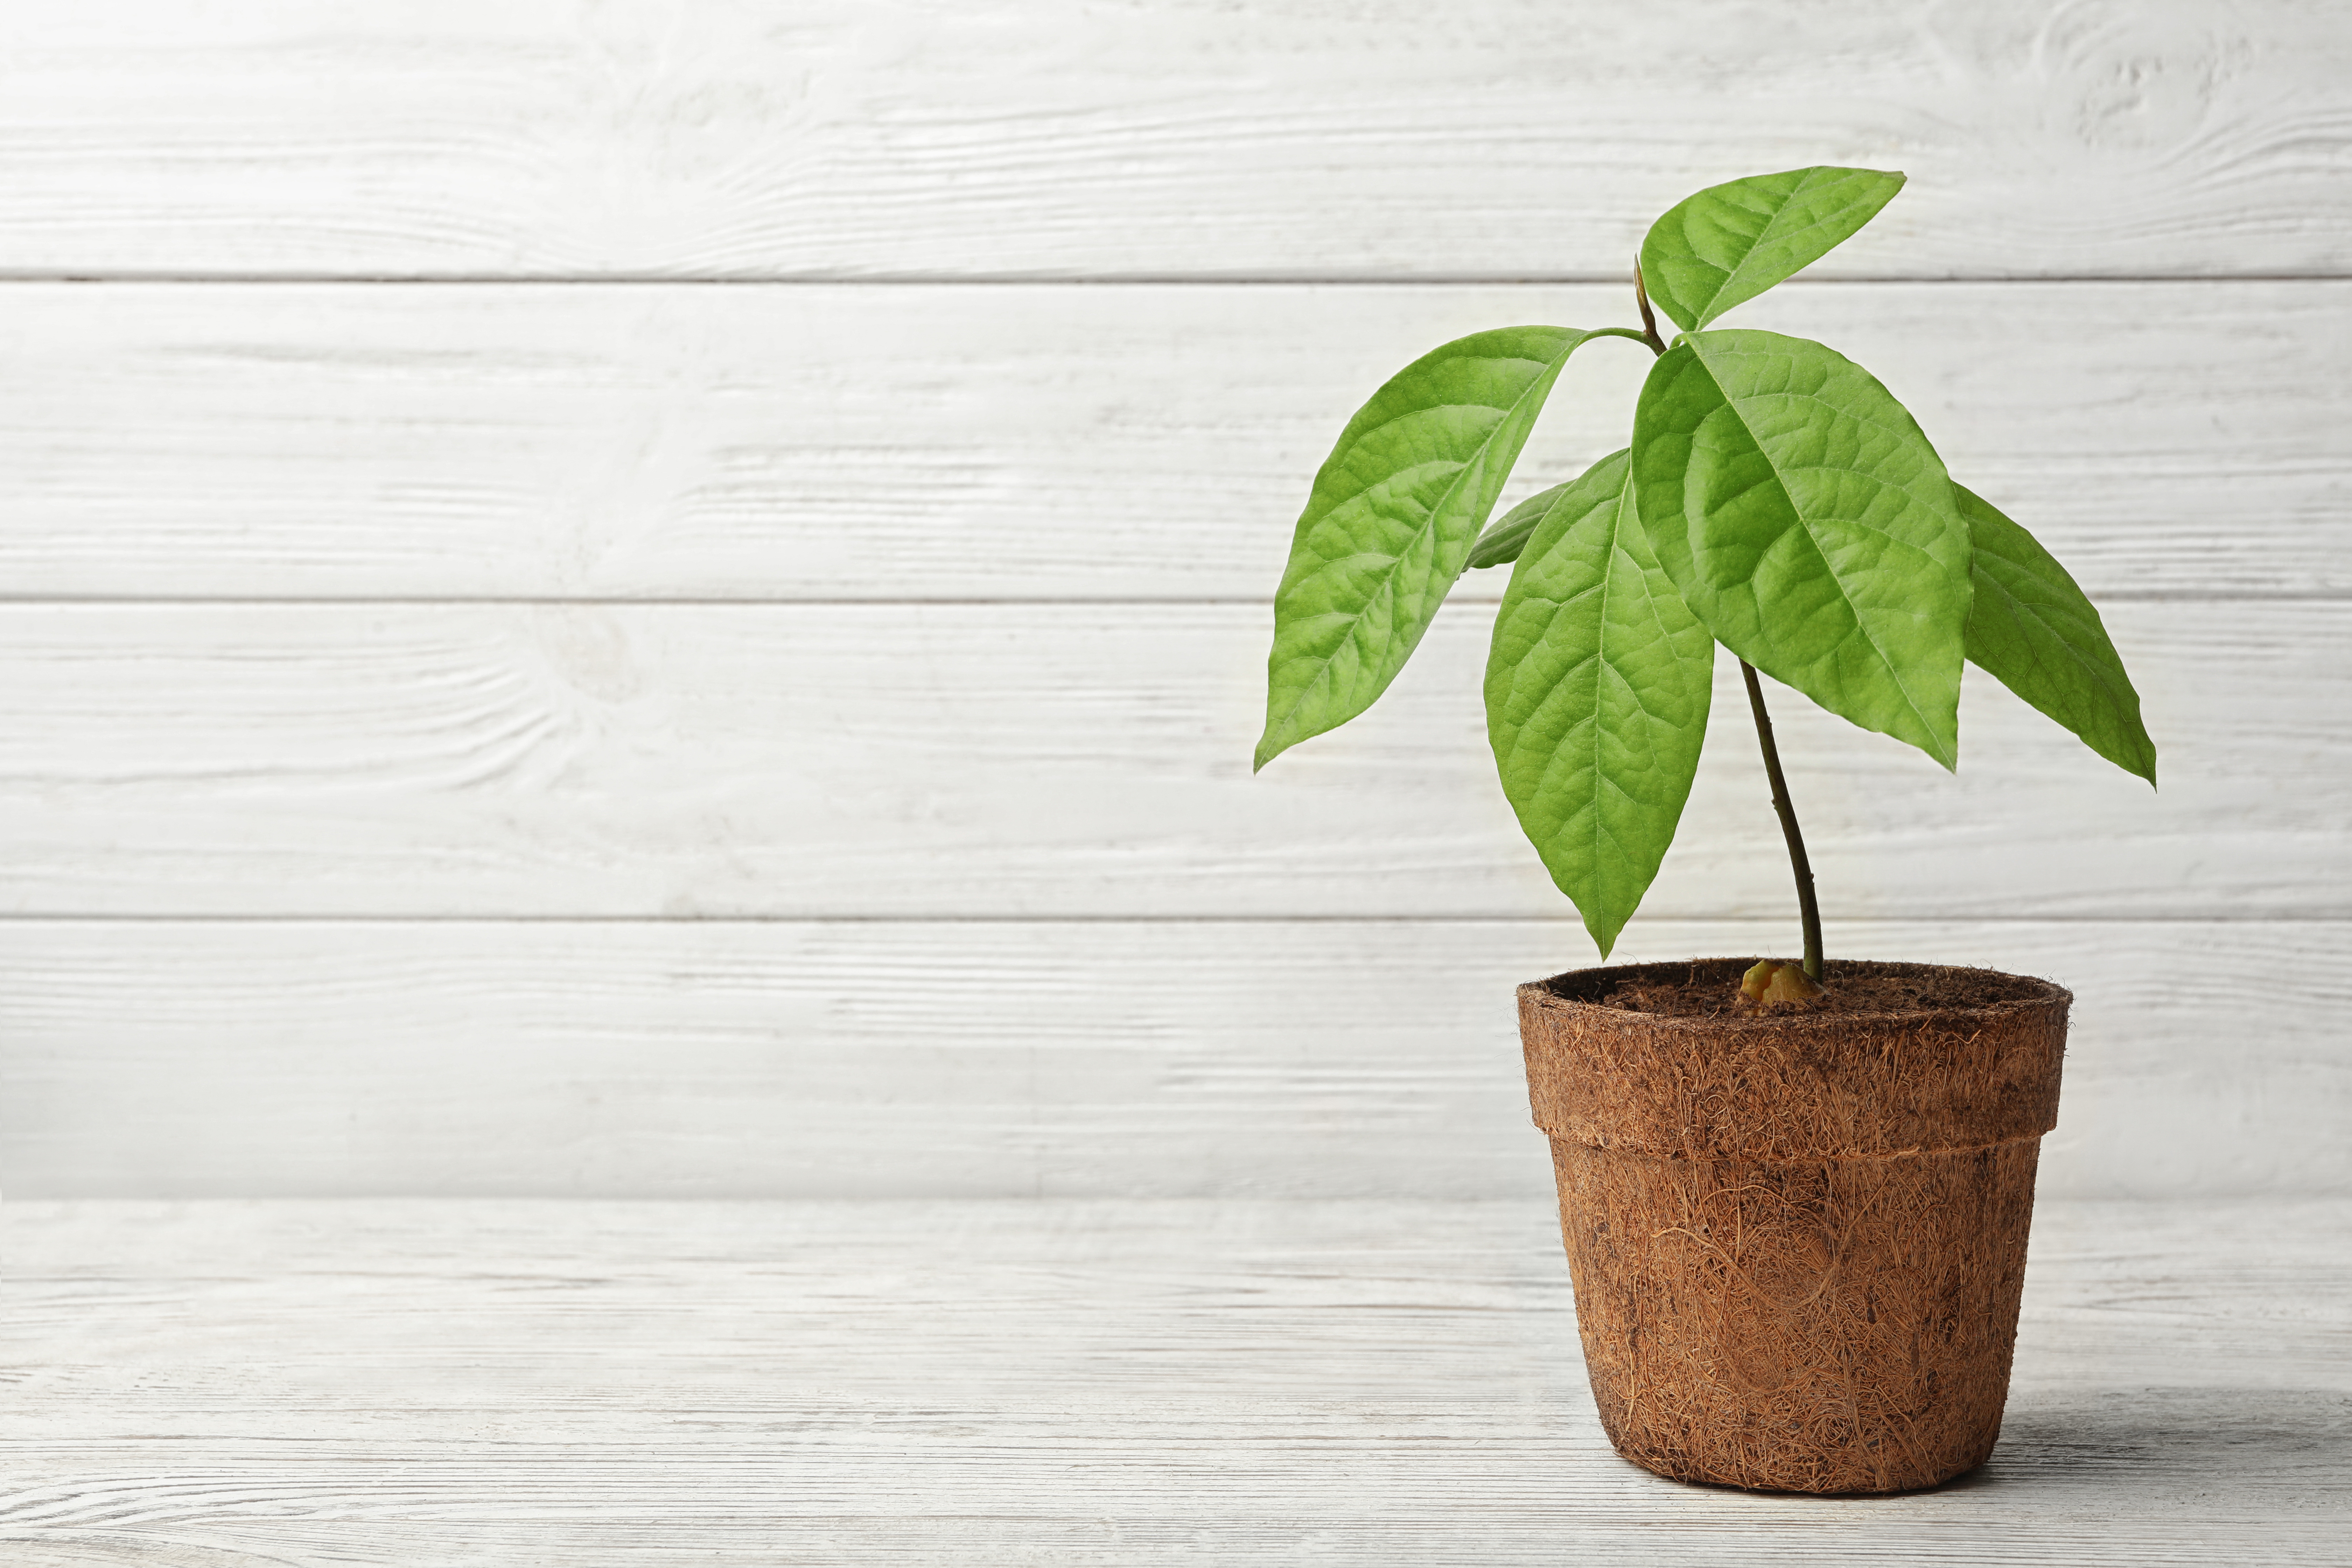 Figure 34. Avocado tree seedling.