Container Gardens
Container Garden 101
Step by Step Instructions

Step 1
One hole is drilled in the recycled cattle feed tub side wall, 6 inches up from the
bottom of the tub. No holes or cracks in bottom. The diameter of the hole should be
½ or so, use the bit you can find. This is the drain hole for the container.
For watering, you pour water into the PVC pipe, until water runs out of this hole
in the side. That’s how you know the water reservoir is full! Do NOT fill until
you put this where you want it. It will be heavy! If it rains, it will still drain
out of this hole.
Step 2
Five or six recycled cafeteria size cans (gallon) are placed in the bottom  of the tub, leaving the center empty. These are open on one end, with two holes in
the other end. Clean plastic gallon milk jugs will also work.
Remove the lids and make several holes in the bottom of the jug. These hold the space
for the water and air to move. The holes are needed so you don’t get a vacuum. You
want the air and water to move through these.
Step 3
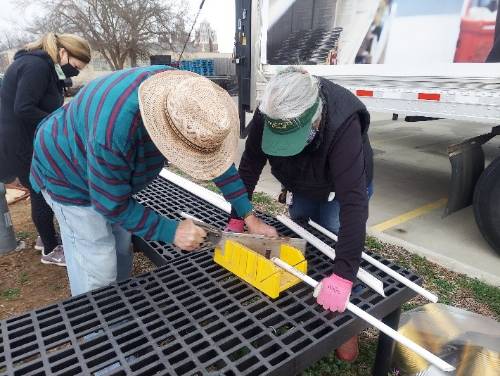
PVC pipe (or use another option) is cut to 24” lengths. This works much easier if
it is 1 to 1 ½  diameter or larger. In some photos, a swim noodle was used, but that would crumble
during the season. PVC was not available, so it was my stand in.
This is placed between the landscape fabric and the wall of the tub.
Step 4
The 3 x 3 piece of landscape fabric (the good woven kind works best) is used (like
a coffee filter)  to separate the water and the soil. It needs to be able to let water and air move
through. This is put down into the very center of the bottom, all the way to the
floor.
This center area only is then filled with good quality potting soil. Do not over
pack the soil. This column of soil will serve as your wick and will soak up the water
from the water reservoir you just created, and move the water to the root zone of
the plants.
Step 5
Continue to fill with potting soil, keeping the landscape fabric up on the sides.
This works much  like a coffee filter. Let the sides fall down, and you have grit in your water! You
can fold down the points so it looks neat.
Mix slow-release fertilizer in the soil. (Like Osmocote or Shake and Feed.) Follow
the rate on the label. Use vegetable formula for vegetables and ornamental formula
for flowers.
Step 6
Plant in rows or circles. Follow square foot gardening spacing. One tub is two square
feet. Use  seed for varieties for containers. Look for Bush or Compact types of plants. One tomato
plant will work. It works best with Better Bush, Roma, or other smaller more compact
plants. Cucumbers will work, you can trellis if you want them to grow vertically.
Tomato cages work for sugar snap peas and pole beans too.
Plant at the right time, follow HLA- 6004, OSU Oklahoma Planting Guide, for when to plant!
Step 7
For frost protection, a large trash bag will fit snuggly over the top! Clear ones
make a mini greenhouse. This was done with the late freeze in April 2021. 
Plant Spacing Tips
| Size | Extra Large | Large | Medium | Small |
|---|---|---|---|---|
| Number of plants | 1 plant | 4 plants | 9 plants | 16 plants |
| Spacing | Placed 12 inches apart | Placed 6 inches apart | Placed 4 inches apart | Placed 3 inches apart |
| Examples | Broccoli Cabbage Pepper |
Leaf lettuce Swiss Chard Marigold |
Bush Bean Spinach Beet |
Carrot Radish Onion |
The information given herein is for educational purposes only. Reference to commercial products or trade names is made with the understanding that no discrimination is intended and no endorsement by the Cooperative Extension Service is implied.
