May 2025 Hort Tips
Thursday, May 1, 2025
What are the Horizontal Holes on My Trees?
Sap suckers, a close relative of woodpeckers, cause damage to trees that is often attributed to wood boring insects. They visit a tree many times, feeding on sap accumulated in the holes they have drilled. Sap sucker damage appears as rows of holes circling or running vertically on the trunk or larger limbs of the tree. This contrasts with emergence holes of borers that occur in a random pattern on the trunk or in limbs of a tree. Contrary to popular belief, these birds rarely, if ever, dig through bark to capture wood-boring insects, but rather feed on cambium and sap in the phloem. The tree species most attacked by sap suckers are pine, sugar maple, birch, willow, magnolia, apple, and pecan.
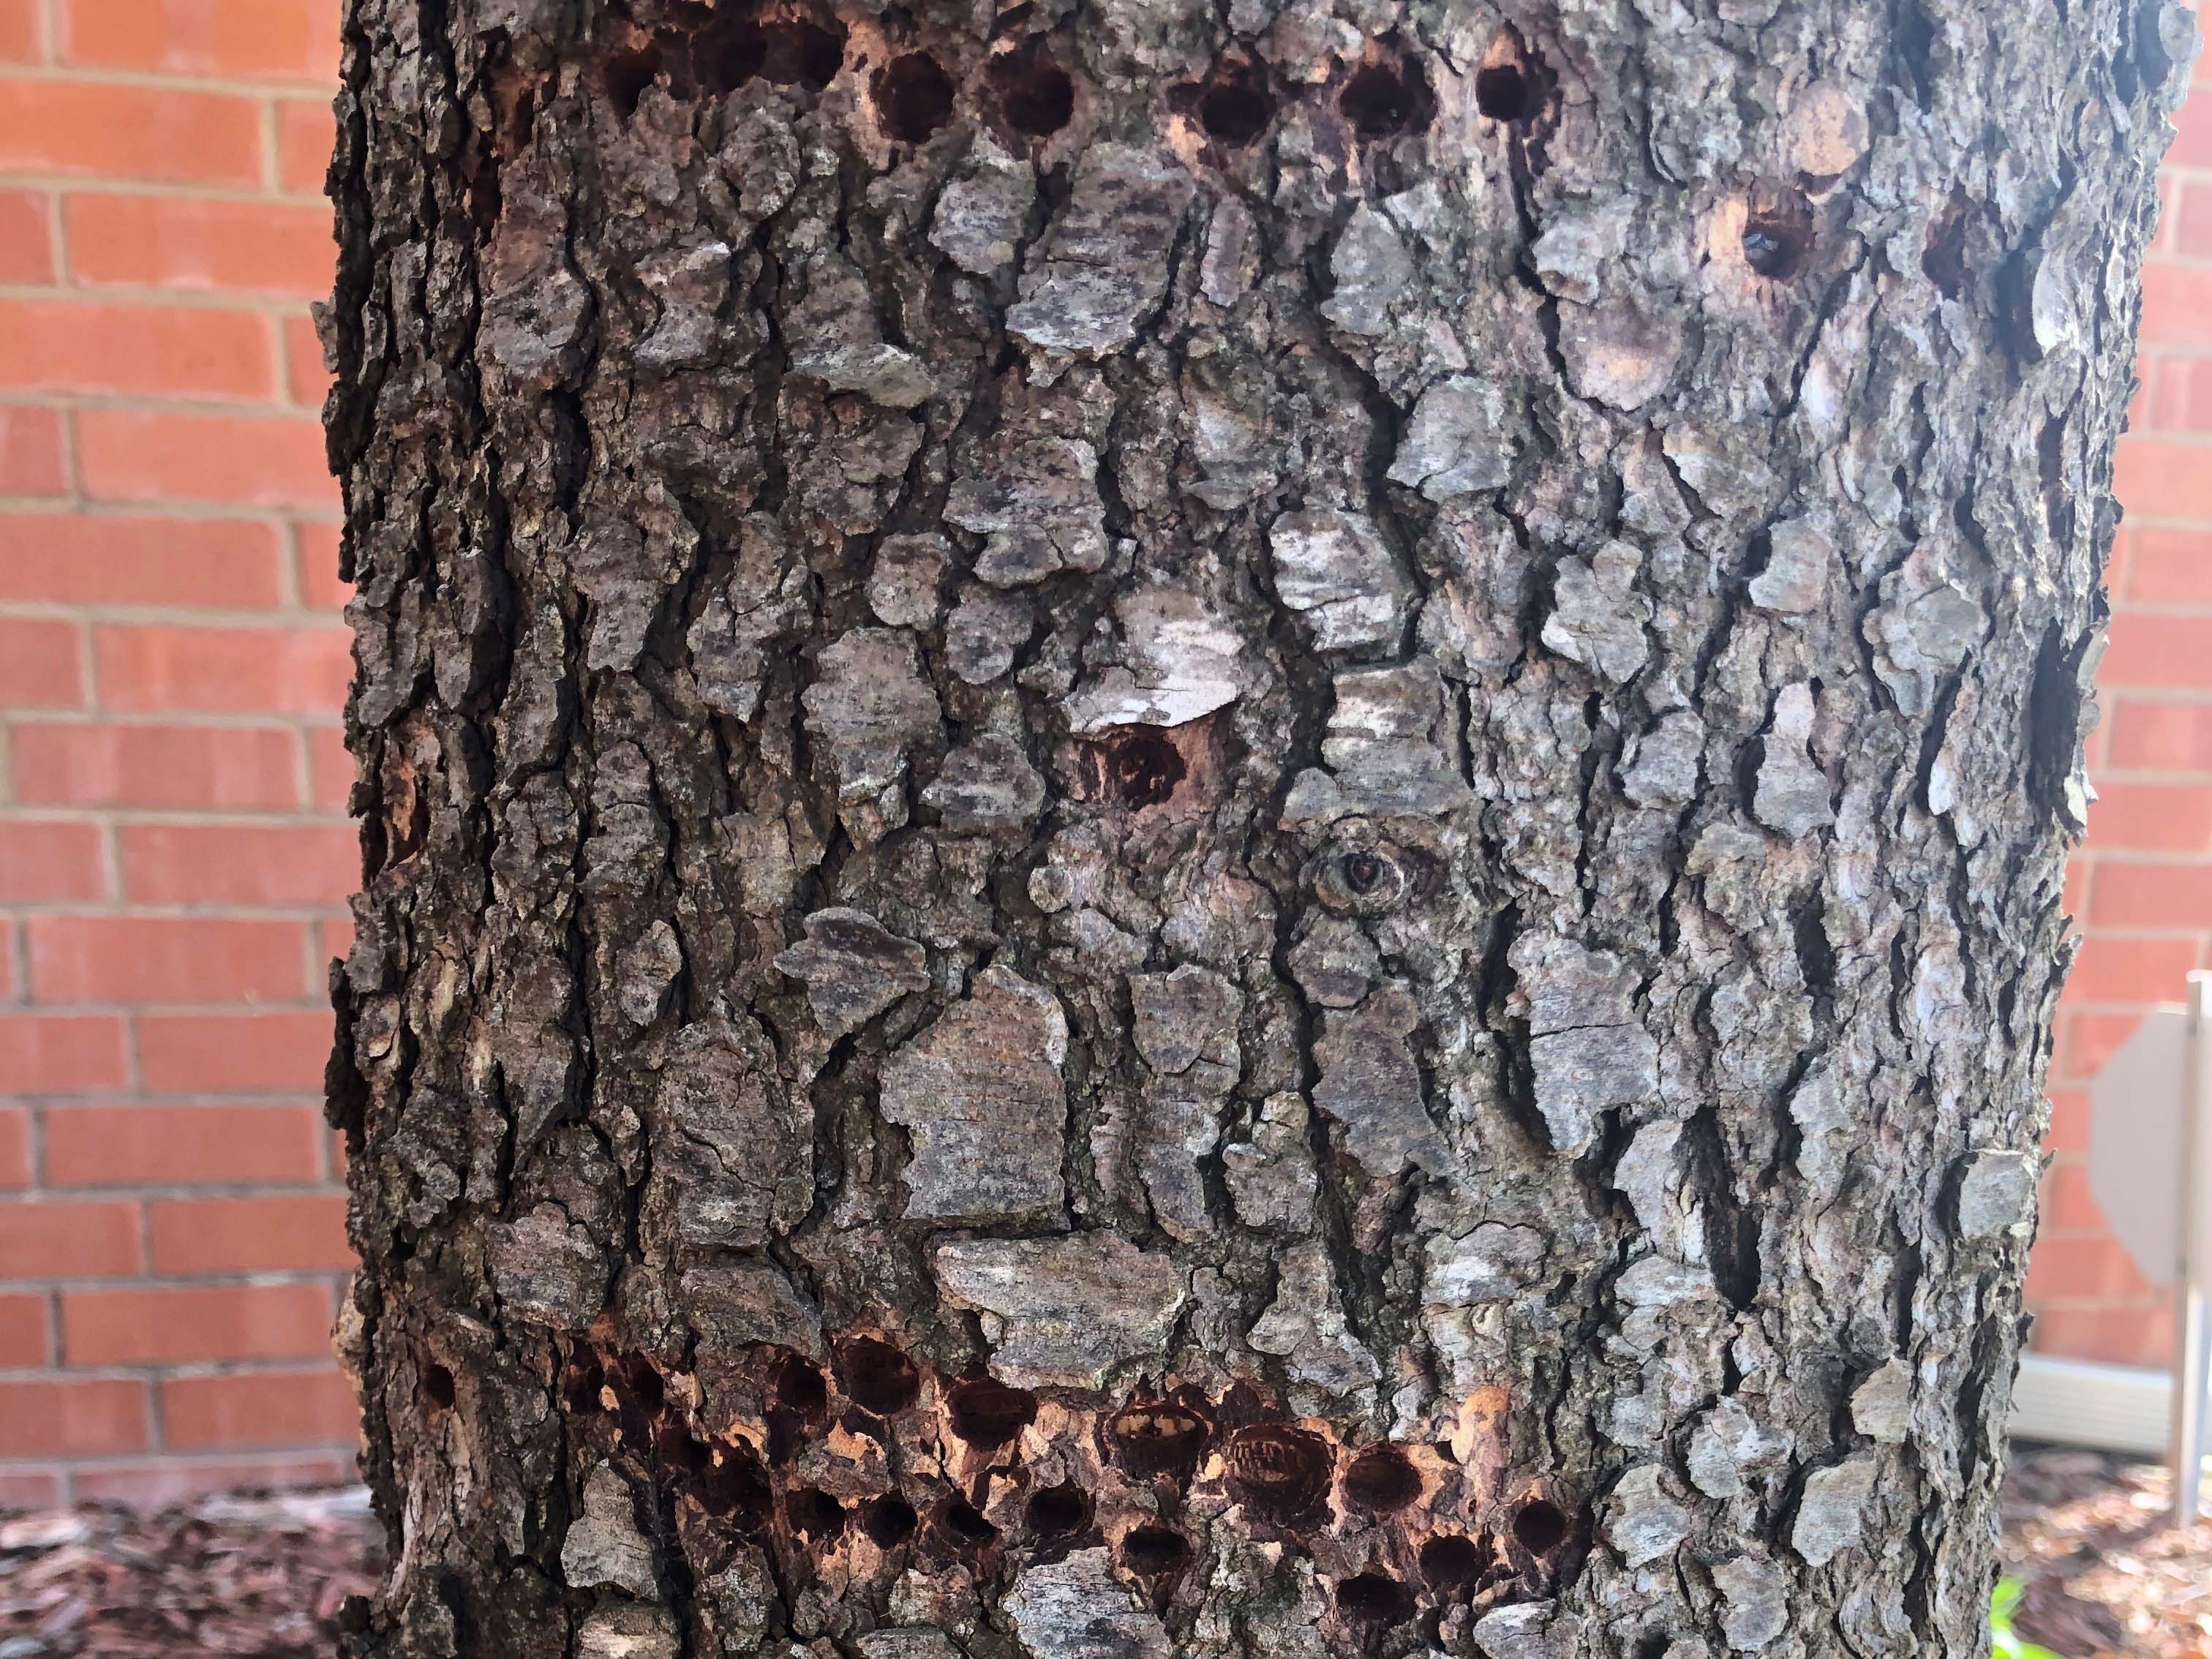
Figure 1. Horizontal holes in a tree.
In Oklahoma, the yellow-bellied sap sucker is the most common species that damages trees. They winter in the South and spend the summer in the northern part of the United States. Thus, they often cause damage during their migrations in the spring through early summer, and again in fall in Oklahoma.
Control
Woodpeckers are classified as migratory, non-game birds and are protected by the Federal Migratory Bird Treaty Act, so killing them is out of the question. To protect trees from sapsuckers, wrap barriers of 1/4-inch (0.6-cm) hardware cloth, plastic mesh, or burlap around injured areas to discourage further damage. This method may be practical for protecting high-value ornamental or shade trees. In orchards and forested areas, it may be best to let the sapsuckers work on one or more of their favorite trees. Discouraging them from select trees may encourage the birds to disperse to others, causing damage to a greater number of trees.
Frightening Devices
Visual. Stationary model hawks or owls, fake and simulated snakes, and owl and cat silhouettes are generally considered ineffective as repellents. Toy plastic twirlers or windmills fastened to the eaves, and aluminum foil or brightly colored plastic strips, bright tin lids, and pie pans hung from above, all of which repel by movement and/or reflection, have been used with some success, as have suspended falcon silhouettes, especially if put in place soon after the damage starts. The twirlers and plastic strips rely on a breeze for motion. Large rubber balloons with owl-like eyes painted on them are included in the recent array of frightening devices used to scare woodpeckers. A good deal of attention has recently been given to round magnifying-type shaving mirrors installed over or adjacent to damaged areas to frighten woodpeckers with their larger-than life reflections. Success is sometimes reported by those using the method and this encourages further testing.
Sound. Loud noises such as handclapping, a toy cap pistol and banging on a garbage can lid have been used to frighten woodpeckers away from houses. Such harassment, if repeated when the bird returns, may cause it to leave for good. Propane exploders (gas cannons) or other commercial noise-producing, frightening devices may have some merit for scaring woodpeckers from commercial orchards, at least for short periods. Because of the noise they produce, they are rarely acceptable near inhabited dwellings or residential areas. Around homes, portable radios have been played with little success in discouraging woodpeckers. Expensive high-frequency sound-producing devices are marketed for controlling various pest birds but rarely provide advertised results. High-frequency sound is above the normal audible hearing range of humans but, unfortunately, above the range of most birds too. Woodpeckers can be very persistent and are not easily driven from their territories or selected pecking sites. For this reason, visual or sound types of frightening devices for protecting buildings — if they are to be effective at all — should be employed as soon as the problem is identified and before territories are well established. Visual and sound devices often fail to give desired results and netting may have to be installed.
Repellents
Taste. Many chemicals that have objectionable tastes as well as odors have been tested for treating utility poles and fence posts to discourage woodpeckers. Most have proven ineffective or at least not cost-effective.
Odor. Odors such as from naphthalene (mothballs) and wood treatments, such as creosote and pentachlorophenol, are of doubtful merit and do not resolve the woodpecker problem.
Tactile. Sticky or tacky bird repellents such as Tanglefoot®, 4-The-Birds®, and Roost-No-More®, smeared or placed in wavy bands with a caulking gun on limbs or trunks where sapsuckers are working, will often discourage the birds from orchard, ornamental and shade trees. These same repellents can be effective in discouraging birds if applied to wood siding and other areas of structural damage. A word of caution: some of the sticky bird repellents will discolor painted, stained or natural wood siding. Others may run in warm weather, leaving unsightly streaks. It is best to try out the material on a small out-of-sight area first before applying it extensively. The tacky repellents can be applied to a thin piece of pressed board, ridged clear plastic sheets, or other suitable material, which is then fastened to the area where damage is occurring.
Trapping
Live traps have been tried in attempts to capture woodpeckers for possible relocation rather than killing the birds. None of those explored were very successful, and more research is needed to develop an effective woodpecker live trap.
Controlling Caterpillar Pests
Caterpillar pests are common on many landscape plants and can cause mild to severe damage depending on plant species and number of caterpillars present. Control of caterpillars may not be necessary in some instances because their numbers are kept in check by numerous natural enemies such as parasitic flies and wasps, disease, predator insects and birds.
On shade trees, even if the caterpillars become numerous, a healthy tree can withstand a complete defoliation early in the growing season. New transplants or trees weakened by weather or other factors may require control.
Hand-picking caterpillars from flowering plants and vegetables is also an effective method. Most caterpillars are very susceptible to products containing Bacillus thuringiensis, such as Javelin®, Dipel® or Thuricide®. This product is less effective on older larvae because they must consume it for effective control. Young and older caterpillars can also be controlled with the naturalyte ingredient spinosad that is found in Conserve® and some retail insecticide products as well as other insecticides that are labeled for these pests in ornamentals. Control is best achieved before caterpillars become full-grown, and it is essential to get thorough coverage, since they are often slightly protected within their "nest". Of course, it is important to select the right product for the given situation and to always read and follow product labels directions.
Reference to commercial products or trade names is made with the understanding that no discrimination is intended and no endorsement by the Cooperative Extension Service is implied.
Thrips can Wreak Havoc on Flowers and Plant Foliage
A small insect, often showing up in the spring and when present in great numbers, causes problems to flowers in the garden, is the thrips. A thrips has mouth parts like rasps, which is used to scratch the surface of flowers, buds or young leaves and then lap up the plant juices. This causes distorted and discolored flowers or buds and gray or silvery, speckled areas on the leaves.
Thrips are small cylindrical shaped yellowish/orange insects with wings that sort of resemble feathers. They can’t fly very well but move about in the wind. They only live about 40 days, but can have up to 8 generations per year, so they can be present all through the growing season. Thrips may or may not do significant damage in the garden. They may only be present for a period and then blow away. They can do enough damage to warrant control, however. Insecticidal soaps are a good means of treatment. There are several other labeled chemicals, check with your local extension office or garden center professionals for additional recommendations. Sprays may need to be applied 2 to 3 times at 7-day intervals. Thrips have several natural enemies as well. Damsel Bugs, Pirate Bugs and Lacewing Larvae feed on thrips.
How to Produce High Quality Tomatoes
- Select or prepare soil high in organic matter and sufficiently loose to allow for extensive vigorous root growth.
- Apply needed fertilizers and mix into the soil prior to planting.
- Obtain husky plants of recommended nematode and wilt resistant varieties. Set them into the garden as early as weather and recommended planting dates permit.
- Water in newly set plants with a starter solution.
- Provide protection from cutworms and other possible pests of the transplanting season.
- Use mulching materials around plants within one month following planting.
- Apply supplemental water as needed, drip irrigation being preferred.
- Control insects and spider mites as well as leaf and fruit diseases if numbers are increasing week to week.
- Windbreaks may be especially desirable as hot, dry weather develops.
- Maintain the identity of different varieties to evaluate their qualities and thus determine the more appropriate kinds for future plantings.
For more information on growing tomatoes see OSU Extension Fact Sheet HLA-6012 Growing Tomatoes in the Home Garden.
Growing in Raised Garden Beds
Raised bed gardens are an ideal way to grow vegetables and small fruit. They are elevated a few inches or more above the soil level, and just wide enough to reach across by hand. Plants can be grouped together in a bed with permanent walkways on either side. The soil does not get compacted, since the soil in which plants are grown is never walked on.
The idea of growing plants in single file or “row crops,” started with the use of a horse and plow to cultivate crops on a large scale. The straight rows, far enough apart to drive a horse between, made plowing easier. Wider spaces later accommodated tractors and their implements. Not knowing the reasons behind growing crops in rows, many home gardeners plant single row vegetable gardens. However, foot traffic on each side of a single row can severely compact soil by the end of a growing season. The excessive row spacing also wastes garden space that can be planted with crops.
Raised bed gardens can range from a simple rectangular plateau of soil to a more elaborate bed framed in wood, stone and mortar, straw bales or modern snap-together plastic blocks. Although more expensive and time consuming to build, permanent structures will keep soil in place during heavy rains and will look nicer in the landscape. However, for a large garden, several beds of mounded soil are very adequate to achieve desired results. Just make sure plenty of mulch is used on the soil to hold it in place during drenching rains.
Benefits of Raised Beds
Higher Yields. Raised beds allow more garden space for growing plants, with less space utilized for walking paths. Individual plant yields may be slightly less with less space per plant than in traditional rows, but more plants can be grown in a given space.
Better Soil. Amendments such as compost and fertilizer are only spread on beds and not wasted on pathways. Looser (non-compacted) soil also drains better. Frequent tillage of the garden can be eliminated.
Water Conservation. Plants grown close together shade the soil, decrease evaporation and keep roots cooler. Water is only provided to the beds and not the pathways.
Fewer Weeds. Closely planted crops keep weeds crowded out. Pathways can be covered in landscape fabric or mulch to choke out weeds.
Extended Season. Soil in raised beds can be worked earlier in the season, because it warms up faster than soil in traditional in-ground gardens. Rainy weather is less of a hindrance to working in the garden, since mud is not an issue.
Better Pest Control. Raised bed gardens are easy to cover with insect screening fabric. Crops are easy to rotate from bed to bed — preventing a buildup of pests.
For more information about using raised beds see our fact sheet HLA-6033 Raised Bed Gardening.
‘Captivation’ – a Seedless Watermelon
Tyler Mason, Assistant Extension Specialist
‘Captivation’ is a seedless, triploid watermelon (Citrullus lanatus) known for its consistent performance and high quality. It produces medium to large fruits 89 days to maturity; the fruits are typically between 13-17 pounds each. Keep in mind that you’ll need to plant a pollenizer, diploid cultivar spread evenly across 30% of your field to get a good fruit set. Triploid watermelon seed is more costly than diploid seed, so some transplant the crop after they’ve started the seed in a greenhouse. Watermelon is a member of the cucurbit family, which can have poor establishment rates if the roots are overly disturbed. One way around that is to use peat pots or peat pellets for seed establishment. This technology allows one to plant the entire biodegradable pot or pellet in the ground without disturbing the watermelon roots at transplanting time. Typically, these pots/pellets are made from sphagnum peat moss, wood pulp, and/or other fibrous materials. Some contain binding agents or glues.
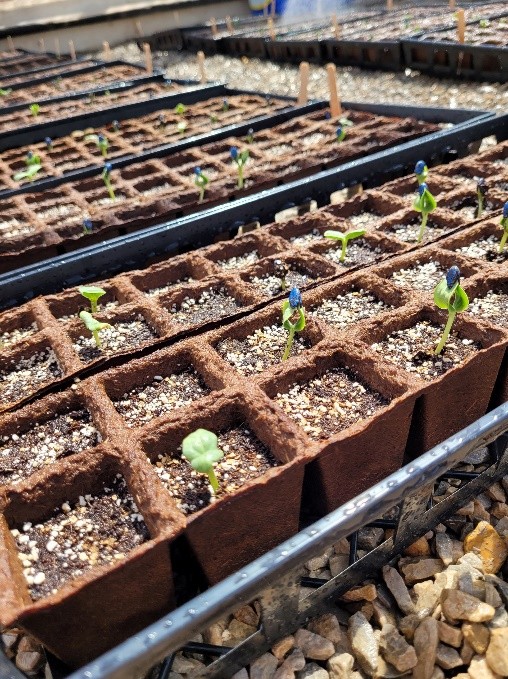
Figure 2. Watermelon seedlings.
There is a relatively new technology called FertilPots® that is OMRI-approved for organic production. The pots are made from spruce fibers without glues or binders. Pictured here is the 18-cell count strip. Each pot measures 2.33” tall and 2.33” wide. Before sowing seeds, it is advisable to water the soil in the strips, so the cells can wick up moisture. Try to keep the cells from drying out. At transplanting time bury the entire cell, or it will wick moisture from the soil. Tear off the top of the pot, if your transplant will be lower than the soil level.
Regrow Your Food
Shelley Mitchell, Extension Specialist
You don’t always need seeds or transplants, or even a garden, to grow your own food. You can grow a lot of food from table scraps, even inside the house.
Celery – If you buy the whole bunches of celery that are still together at the base, you can just chop the bottom couple of inches off and place the base in some water. Soon you will see roots growing and you can plant it in a pot of soil. You can also just put the base into a pot of soil to begin with. The base of celery has tiny roots that help regrow stalks. Make sure to keep the soil moist. If you will be gone over a weekend, you can put plastic wrap over the pot to keep it moist.
Pineapples – Cut the top off a pineapple and grow more to harvest later! Either twist off the top or cut below the greenery. Place the top in soil up to the bottom of the greenery. Keep moist. Keep the pineapple in bright light and warmth (a greenhouse is ideal, or as close to making one as you can). New growth will come out of the middle, and soon there will be a large spiky fruit form.
A pineapple is a “multiple fruit.” Each individual piece of a pineapple is a fruit, which formed from its own flower. When the pineapple grows to full size and all fruits are fully yellow (no green lines around the edges), it is ready to be harvested. If ripe, it will take very little pressure to remove (you can use your hands). After harvesting, you can grow the top of the harvested pineapple and just keep growing pineapples!
Green Onions – Save the bottom of the green onion (the white bulb with the roots on it). Plant the bottom root-side down. The new growth will come from inside the shoots. Green onions have one of the fastest plant-to-harvest cycles. Keep the bulbs planted and snip off as much of the top as you would like. It will keep growing.
Onions – Save about ½ inch off the bottom part of an onion (the flatter side, with little roots attached). Place it roots down into a pot of soil (you can also start in a dish of shallow water). New growth will sprout from the cut surface.
Sweet Potato – Suspend a sweet potato over a container of water using toothpicks. Make sure the end with the small roots is in the water. This is usually the more pointed end. Keep the water level high enough to submerge a couple of inches of sweet potato. Change the water if it starts looking cloudy or starts to smell. In time, the sweet potato will grow ‘slips’, which are new shoots. When the slips are several inches long, you can pull them off the sweet potato and put their bottom ends in water until roots emerge. At that point you can plant them in the soil.
Potato – Potatoes are very easy to grow. If you aren’t quick to eat all the potatoes you buy at the store, the ones being stored will start sprouting on their own! Potatoes can be cut so that each piece has at least one ‘eye’ (the eye is where new sprouts form). Set the pieces aside for a few days so that the cut sides can dry. Plant them in soil, ‘eye’ side up. If you want to plant potatoes in the ground, you usually can around mid-March. If you want to get a head start on the growing season, start the potatoes in pots inside before that. Bury all but a little of the leaves. As potato plants grow, keep adding soil to cover up most of the leaves. Potatoes grow underground, and by adding soil over most of the potato plant, you are making space for more potatoes to grow. Potatoes are harvested when the top leaves die and turn brown. Just reach in and pull them out as you feel them.
Lettuce – Just like with onions and celery, to grow more lettuce you just save the bottom couple of inches of the head and put it in some soil. It will start making more leaves.
Radishes and Carrots – Cut the tops of the carrots and radishes, so that you are left with the green leafy end (even if there is no greenery still attached, but you can see where it was). Place the flat end of the carrot or radish in a shallow dish of water or a pot of soil. The green leaves will start resprouting. You will not regrow the roots of the carrot or radish, just the top greens, which you can use in cooking.
Avocado – You can sprout your avocado seed and watch it grow into an avocado tree, although it will take years to produce fruit. Use toothpicks to suspend the flatter end of the seed in water. Make sure the flat end is always in the water. When it roots, plant it in soil. You can also just put the seed into soil. Put it pointed end up.
May Pecan Management
Becky Carroll, Senior Extension Specialist
Pecan trees — among the last native trees to break bud in spring — are now leafing out and preparing for pollination, which typically begins in early May.
- Protandrous cultivars (e.g., Pawnee) will have catkins developed earlier, while female flowers lag behind.
- Protogynous cultivars (e.g., Kanza) show more advanced female flowers, with delayed catkin development.
Things to consider for the pollination timeframe:
Fertilize Newly Planted Trees: When growth has started, apply approximately 1/3 pound 19-19-19 in a band about 18 inches long 12 inches from the tree. Apply the second fertilizer application to bearing trees if a split application is planned. Areas with sandy soils or sites with spring flooding conditions may benefit from the split timing. Consult HLA-6232: Fertilizing Pecan and Fruit Trees.
Continue Propagation: Finish bark and four-flap grafting during the month. Suitable small trees may be patch budded. Additional information is available on the HLA-6206: Patch Budding Pecans fact sheet.
Insect Control:
- Set out pecan nut casebearer pheromone traps in early May.
- Monitor daily for male moths. Use the biofix (first two consecutive days of male moth capture) to begin egg scouting.
- Start checking for eggs or damage 12–16 days after biofix.
- Spray when 2 eggs or damage are found in 310 clusters.
EPP-7189: The Pecan Nut Casebearer
Use the Oklahoma Mesonet Casebearer Advisor (requires budbreak date)
Maintain Weed Control: Mow areas not pastured and/or apply post emergent herbicides in tree rows.
Continue with Zinc Sprays: Add zinc to insecticide or fungicide sprays. For mature trees, apply three foliar zinc applications at 6 lbs./acre. Other commercial zinc materials are available; follow label instructions or use rates that provide equivalent zinc amounts to the recommended zinc sulfate rates. For young trees - apply foliar sprays of zinc every 14 days until mid-July. Apply 2 lbs. of 36% zinc sulfate in 100 gallons of water.
Disease Control: Continue scab spraying if scab model indicates need. Oklahoma Mesonet Pecan Scab Advisory.
Irrigation: Apply supplemental irrigation as needed.
Training: Continue with training young trees. Select a central leader and continue pruning out bad crotch angles and crow’s feet. Maintain a central leader structure until the tree becomes too tall to prune. Refer to Fact Sheet HLA-6245: Training Pecan Trees.
Register to Attend the Oklahoma Pecan Growers Association Annual Meeting
Date: June 5–7, 2025
Location: Glenpool Conference Center, Glenpool, OK
Highlights:
- Mini Pecan class
- Educational meeting with industry updates
- Field tour at Frazier’s Pecan Farm near Leonard, OK
- Equipment and vendors
- Networking opportunities
- Pecan show & pecan food competition
- New this year: Sporting clays tournament & Kid’s Club
More info: Oklahoma Pecan Growers
For additional information, videos, and webinar recordings on specific management topics go to Oklahoma Pecan Management.
May Lawn Fertilization Tip for Oklahoma Homeowners
Mingying Xiang
May is the ideal time to begin your first fertilization of the season if you have warm-season turfgrasses like bermudagrass, zoysiagrass, or buffalograss. These grasses are actively growing now and will benefit from a well-timed nutrient boost.
If you have cool-season grasses such as tall fescue, perennial ryegrass, or Kentucky bluegrass, May is your last chance to fertilize before pausing through the summer heat. These grasses perform best when fertilized in the fall (major fertilization) and spring. Applying excessive nitrogen fertilizer during the summer can increase the risk and severity of turfgrass diseases.
Helpful Resources
For more detailed fertilization guidelines, check out OSU’s lawn care fact sheet:
Soil Testing Recommended
If you haven’t done a soil test in the last 2–3 years, now is a great time. A soil test will help you apply the right amount of fertilizer based on your lawn’s needs.
Don’t Forget to Water In
Always water in fertilizer after application (unless rain is expected shortly) to help nutrients reach the root zone and prevent runoff or product loss.