March 2025 Hort Tips
Saturday, March 1, 2025
Training Young Shade and Ornamental Trees
David Hillock
Proper pruning when a tree is young will ultimately result in a tree that is structurally stronger, longer-lived, and less costly to maintain.
Training a tree early in its life may prevent storm damage when the tree approaches maturity in 15 to 20 years. Training young trees should help reduce storm damage and expensive pruning operations when the tree is mature.
There is no need to prune a newly planted tree unless branches have been damaged. It has been found that removing tips and buds of young trees slows root growth. If trees are left unpruned, expanding buds and new leaves help root expansion and tree establishment. Damaged branches can be removed at their point of origin, or they can be cut back to a lateral branch that will yield foliage and bolster establishment in the first season.
Training begins the year after transplanting, continues through the next three to five years, and should be completed within eight to 10 years. Following the training period, only maintenance pruning should be needed.
At planting, decide on the system of guidance or training you will follow based on the tree species’ growth habits. For instance, most oaks and sycamore develop a central leader, whereas species such as elm and mulberry will always fork somewhere in the main trunk. For these species, develop a modified central leader. The modified central leader is the most desirable system for fruit trees doubling as yard trees.
Walk around the tree before making any cuts and inspect the overall branching structure. Remove branches that are rubbing, shooting inward, or competing too closely to another branch.
Narrow branch angles may also need to be removed as they can be weak joints susceptible to breakage. However, some species have narrow branch angles and still have strong joints such as zelkova.
Early in the tree’s life, decide which closely spaced scaffold branches to keep. Scaffold branches are large branches that form the main structure of the tree. Try to visualize how the tree will look as it thickens in years to come. Know the natural form of the species. Remember — branches do not slowly rise above the ground! As a tree grows, branches retain their position on the trunk, though they increase in diameter and become more crowded. Spacing scaffold branches radially and vertically allows growth to be channeled where it will be more effective. No more than 1/4 of the canopy should be removed at any one time.
During the training years, frequent inspections must be made to channel growth in desirable directions. The more vigorous species require closer attention. At the end of the season after leaf fall, inspect the tree and make any necessary corrective cuts.
The tip of the main trunk of a young shade tree should not be cut back. Heading back, as is practiced, is not beneficial to most trees and often results in undesirable forks in the main trunk. This is especially true of species that already fork, such as elm and maple.
For more information about training shade and ornamental trees see OSU fact sheet HLA-6415 – Training Young Shade and Ornamental Trees.
Hellebores
David Hillock
Hellebores include some 20 species of herbaceous perennials belonging to the genus Helleborus. Many hellebores are evergreen. The plants have beautiful dark green, leathery foliage year-round and a winter flowering habit. The exact flowering time is variable by species and has given us the common names used for this group, which includes Christmas Rose (Helleborus niger) for those species flowering near the Christmas season, and Lenten Rose (Helleborus orientalis) for the late winter, early spring bloomers.
The flowers are indeed rose-like in appearance and nod toward the ground; however, breeding work has lifted the flowers more upright so we can appreciate them more when in flower. Flowers of hellebore hybrids come in a rainbow of colors in both single and double forms. Flower color ranges from pure white to a plum color bordering on black, with clear red, pink, yellow, green or cream; others speckled, spotted and mottled on the inside of the flower; and some with picotee edges (narrow margins of a darker color).
One of my favorites is a unique form called stinking hellebore (Helleborus foetidus). Stinking hellebore is an interesting plant to grow in a shady garden. The leaves are deeply divided, giving it a more fine-textured appearance compared to other species. It also blooms in late winter to early spring, with unusual yellow-green pendant, cup-shaped blossoms with a maroon rim that are surrounded by pale green bracts. Although 'foetidus' means fetid, or smelly, the plant as a whole is not unpleasant smelling. The leaves, when crushed or bruised, give off a smell that many describe as unpleasant or strange.
Some hellebores can readily seed and each spring you may find many seedlings near the base of your mature hellebores. However, most of the seedlings are outcompeted for light and water by the parent plant, as such, hellebores do not become weedy. If you wish to multiply the plant, it is best to transplant seedlings away from the parent plant where they will not be shaded or smothered by the heavy foliage.
Hellebores, in general, require little care. They do well in the shade garden, prefer slightly alkaline soil, and only need a little pruning in early spring to remove old, tattered leaves. Hellebores are also unpalatable to deer, rabbits, gophers and moles.
Control Peach and Nectarine Leaf Curl Now!
David Hillock
It is common to get calls in early summer by homeowners wanting to know what is wrong with their peach or nectarine tree. Infected leaves pucker, become deformed, and turn yellow or reddish-brown. Unfortunately, by that time, when symptoms are most evident, it is too late to spray anything. Leaf Curl is the culprit and is one of the most encountered diseases in unsprayed orchards and home yards during cold, wet springs. Diseased leaves eventually wither and fall from the trees. Although new leaves emerge from dormant buds, their growth requirements reduce yield and may weaken the trees.
To prevent leaf curl disease, spray peaches and nectarines with a fungicide before bud swell (EPP-7319 – Home Tree Fruit Production and Pest Management). Apply when the trees are dormant and temperatures are above 40 degrees F, usually mid-February through March depending on weather and location in the state. Bordeaux mixtures, copper flowable fungicides, chlorothalonil, and lime-sulfur sprays are commonly used for control of leaf curl.
Cutting Back Ornamental Grasses
David Hillock
Ornamental grasses should be cut back in late winter before new growth emerges. It can also be done in fall, but the seed heads provide nice winter interest, and some birds will also feed on the seed. To make the job easier, tie up the stalks with string. Depending on the size and density of the grass, the following tools might be used: house scissors, shears or hand pruners, and electric hedge trimmers (for very large clumps). For smaller grasses, trim to about 2 to 3 inches from the ground; for larger grasses cut 6 to 8 inches from the ground. One exception is with the species Nassella (Stipa) tenuissima, Mexican Feather Grass, it does not respond well to heavy pruning and prefers to only be cut back by 1/3 to ½ its height.
Applying Dormant Oils for Winter Insect Control
David Hillock
For home gardeners and fruit growers an important insect management tool is dormant oil application. Dormant oil is a refined petroleum product formulated for use on trees and shrubs. This refers to the time of application which should be late winter or early spring. Applications should be made when temperatures are above freezing and before bud swell and bud break before new growth forms. Ideal temps are between 40 and 70 degrees.
If applied too early, before hardening off, the trees can sustain winter injury. Also, if the temperature is too low the oil will not mix well in solution, and you will not get adequate coverage needed to control overwintering insects. Late February through March should be a good time to make these applications, although check the weather and make sure there will not be any freezing temperatures or rain for a few days after applications.
Dormant oils control scale insects, aphids, and mites that are overwintering on the trees. The oil must be applied with enough water to get thorough coverage (read label recommendations). Coverage is very important so that the spray can reach in between the cracks and crevices of the bark where many insects hide. The oil coats the insects and fills the spiracles. Insects use their spiracles to breathe so when they are blocked, they smother. Dormant oils will suppress insects by killing overwintering adults and eggs which will slow the seasonal build up in the spring. This is well worth the extra time. Some insects controlled by dormant oils include aphids, scales, and mites.
Applications should be made to apples, pears, plums, pecans and crabapples. Peaches, nectarines, apricots and plums often do not require dormant oil sprays, but if certain insect pests have been an issue in the past, it could be beneficial. Dormant oils can also be beneficial for shade trees and woody ornamentals. Consult your label before application to make sure the plant is listed. Some plants are sensitive to dormant oil applications.
Precautions: Do not apply too early or too late. Avoid temperature extremes. Avoid using on plants that are oil sensitive. There will be a list on the label.
Dormant oils will kill annual flowers; do not make applications to trees close to annuals. Do not apply in combination with sulfur containing pesticides such as captan. This will cause plant injury.
Benefits far outweigh the negatives. It is inexpensive and less toxic than other sprays used to control these pests with little toxicity to birds and mammals. This will provide your plants with a jump start into spring.
Dormant oils can be purchased at any garden center and are relatively inexpensive. Remember to read the label and follow all label recommendations!
Pruning Roses
David Hillock
Some rose plants need pruning to tidy up their appearance; control size; and improve their vigor, growing habits and bloom. Pruning methods vary according to the type of rose plant. To keep them in bounds, spring pruning usually is more drastic. Prune about 3 to 4 weeks before the average date of the last killing frost in your area. In most of Oklahoma that would be around the 15th of March. An exception to this rule involves climbing roses, which need to be pruned after flowering in early spring.
Probably no other aspect of growing roses has aroused as many questions as has the subject of when and how to prune roses. By following a few simple rules, you can improve their appearance and vigor and control the quality and quantity of flowers. Some fundamental practices of pruning roses correctly in all gardens, regardless of type, are: 1) remove any canes that have been damaged by insects, diseases, or storms; 2) remove one of two canes which may be rubbing one another; or 3) remove canes that are spindly or smaller in diameter than the size of a pencil. After pruning, according to these general recommendations, cut hybrid teas, floribundas, grandifloras, and polyanthas back to 12 inches for large flowers and 18 to 24 inches for many smaller sized flowers.
Climbing roses generally are pruned to renew plant vigor by removing the old canes since the most productive and finest blooms on climbers are produced on canes that arise from the bottom of the plant the previous year. These newer canes produce more desirable growth and flowers. Since the canes may become quite long, it is necessary to prune them back, so they are maintained in the desirable area.
Old fashion or antique roses require much less pruning than modern roses. Left unpruned old fashion roses will naturally obtain a rounded shrub shape. Pruning of these roses should be confined to some shaping of the plant, removal of damaged branches, and judicious trimming back to encourage growth.
On all roses, consider the cutting of the flowers as a form of pruning. When gathering roses, always leave at least two sets of leaves on the branch from which you cut the flower to insure plant vigor. When removing faded, spent flowers, cut only as far as the first five-leaflet leaf. Make cuts on the ends of branches at 45-degree angles just slightly above an outside facing bud with the lowest point on the side opposite the bud, but not below the bud itself. Never leave stubs when removing branches, since these die and can cause problems on the plant later. Always remove branches by cutting them to a lateral branch or bud, or back to the base of the rose plant.
For more information on growing roses in Oklahoma see fact sheet
LA-6403 Roses in Oklahoma.
Assessing Winterkill on Bermudagrass and Zoysiagrass
Mingying Xiang, Assistant Professor, Turf and Dennis Martin, Professor, Turf
The recent freezing events in mid-January and February 2025 have raised concerns about winterkill in bermudagrass and zoysiagrass. We will discuss winter injury in more detail and how to assess damage before the soil warms up.
Unpacking the term “Winterkill”
Winterkill has several definitions. In its simplest form, winterkill means death from or during winter. The term references death of individual tissue of leaves, stems, or roots which are individual plant parts, and its occurrence during winter. However, the term can also be used to describe an event occurring at a turfgrass stand-level, such as over a single lawn, a single putting green, or a whole golf course. Furthermore, the term can broadly describe death during winter of turfgrass stands over a larger geographic region. In each of these illustrations, the term references death during a season of the year and not from a definitive cause. Environmental conditions during winter could have been very cold but wet or very mild in terms of temperature but very dry, or worse yet, very cold and very dry. And the weather during winter could have been remarkably different across the region, yet the same term is being applied to turfgrass at the various locations. So, winterkill of bermudagrass and zoysiagrass is not necessarily due to how low temperatures were or how long the cold conditions persisted but rather from potentially a number of different, highly influential and interactive environmental conditions.
Parts of the Bermudagrass and Zoysiagrass Plant
Bermudagrass and Zoysiagrasses are comprised of their intermingled system of leaves, stems, and roots. In this discussion, we ignore flowering stems and seed since we are discussing turfgrass stand regeneration by vegetative regrowth means following the winter. Shoots can describe a stem with or without leaves and it can be either a vertical aerial stem, a horizontal aerial stem called a stolon, or a below thatch/soil level stem called a rhizome. Stems contain noticeable segments called internodes (between nodes) and nodes. There is at least one lateral bud on each node. A lateral bud can generate a new shoot stem system, and it is the source of investment for the future regeneration of the turfgrass stand. Remember, these nodes with their lateral buds can be located on vertical aerial shoots, horizontal aerial shoots (stolons), or buried shoots (rhizomes).
Winter Injury Overview
Winterkill can result in partial or complete death of these warm-season grasses, with severity influenced by environmental conditions. In milder winters, the upper most leaves and shoots die, but those closer to the soil survive. It is surviving shoots that lead to earlier greenup. Regrow following winter is initiated from dormant lateral buds on nodes, so the fewer nodes that die, the more that survive and the earlier and more effectively stand regrowth occurs. Also, the more developed the dormant lateral bud and the less its deepness of dormancy, the more quickly the bud breaks dormancy, initiating stand regrowth. During severe winters, the death of nodes/dormant lateral buds extends deeper into the layers of stolons and rhizomes. This leads to less recovery capacity or greatly extends the time needed for the stand to suitably regrow.
Severity of winterkill is not only influenced by how low temperatures were or for how long or how dry the conditions were in winter but also the health of the turfgrass stand going into winter. Stand health that was already compromised by drought, soil compaction, excess wear, disease, severe insect feeding, or herbicide injury is more likely to suffer severe winterkill. Stands that were chronically or severely stressed during the growing season may have failed to generate adequate rhizomes which are the ultimate final vegetative storage parts for regeneration capacity following very severe winters.
The timing of regeneration of warm-season turfgrasses in late winter or early spring can be highly variable over years and locations due to severity of the winterkill event, stand health prior to the winter events, geographical locations, differences in sunlight, soil temperature, accumulation of heating units and setbacks by tissue-killing late-winter or early-spring freezes. Allowing us to generalize, we state that green shoots should start to be visible in bermudagrass and zoysiagrass stands by mid-March in far southern Oklahoma and mid-April in far northern or northwest Oklahoma. For certain, by mid-May, large areas of tan or brown turf without green shoots indicates poor recovery. Such areas are unlikely to produce adequate new shoots for timely recovery. Such areas should be renovated to restore turf health and density. Early assessment of winterkill is critical, as it enables timely recovery and renovation decisions, supports informed herbicide planning for early-season herbicides program, and helps develop proactive strategies to prevent future winterkill issues.
Techniques for Assessing Winterkill
- Identifying Healthy Nodes/Internodes
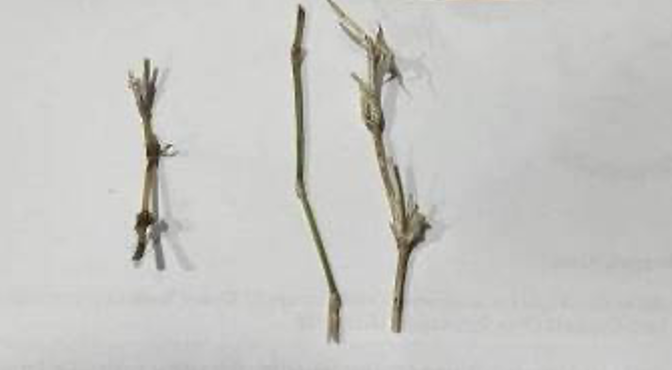
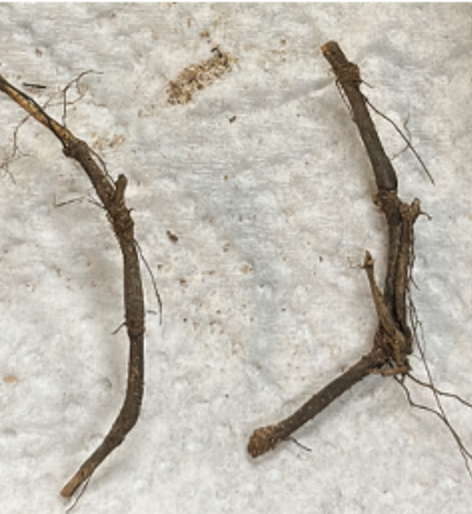
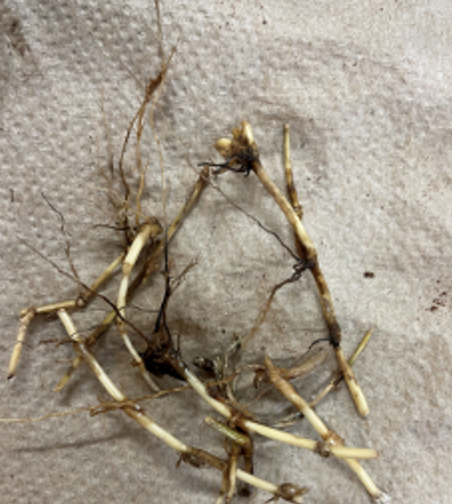
Healthy internodes are firm in texture and may appear green, white, red, or purple (Figs. 1-1 and 1-2). These characteristics indicate viable tissue and potential regrowth. In contrast, unhealthy internodes are soft or mushy and typically brown or straw tan in color, indicating dead or damaged tissue. - Canopy Brushing Technique
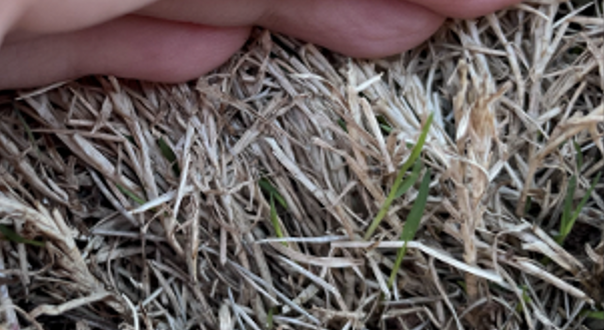
The canopy brushing method assesses the survival of aerial stems and stolons (Fig. 2). This technique involves brushing of the brittle, dead leaves, and searching for living aerial shoots with green, red, purple, or white internode segments. It is important to sample multiple suspect areas and allow sufficient time after a low-temperature damaging event for tissue-decay to become visible. This canopy brushing method helps determine the extent of winter injury and the potential for recovery in the field (in situ). - Windowsill Method
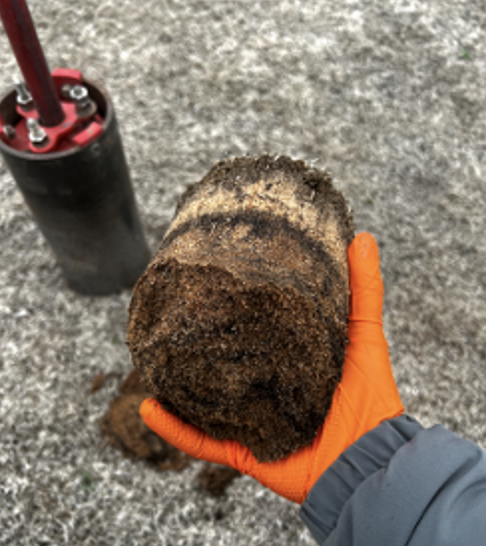
The windowsill method is a simple yet effective way to evaluate regrowth potential. During winter, before green-up, take a plug (at least 3 inches in diameter and 3 inches deep, Fig. 3) and place it in a dish on a warm (70°F or above), sunny windowsill. Keep the soil moist and monitor for regrowth over the next 3–4 weeks. This method helps identify the origin of new shoots and assesses the overall health of the turf. Remember, the more severe the extent of the winter-kill event, the longer it will take to assess recovery. Lateral buds on true rhizomes are often in very deep dormancy and they take the longest time to break dormancy and initiate regrowth.
Mapping Winterkill for Future Preparedness
Mapping areas of winterkill is essential for future planning and prevention. Tools such as note pads, photos, or drone imagery can be used to document affected areas. By creating a detailed map, turf managers can identify patterns of winter injury and develop targeted strategies to improve turf resilience in future growing seasons.
Conclusion
Winterkill can significantly impact bermudagrass and zoysiagrass, but early assessment and proactive management can mitigate its effects. By using techniques such as identifying healthy nodes, canopy brushing, and the windowsill method, turf managers can make informed decisions about renovation and prevention. Mapping winterkill areas further supports long-term planning and helps improve turf health and resilience.
Figure. 1-1: Comparison of healthy green (left two stolons) and unhealthy tan (right-most stolon) internode segments on stolons.
Figure 1-2: Two unhealthy internodes of rhizomes.
Figure 1-3: Healthy internodes of rhizomes.
Figure 2: Canopy brushing technique for assessing stolon survival. Note the new shoots that have already initiated stand regeneration in this image.
Figure 3: Plug size for the windowsill method (photo credit: Binod Pokhrel). Trim plug depth to approximately 3 inches before placing in a container on a windowsill where it will be kept warm, moist, and exposed to intense sunlight.
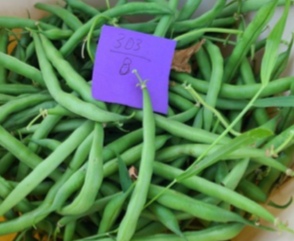
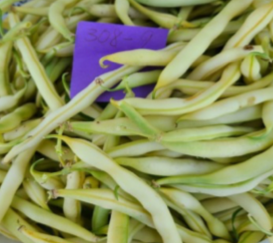
Snap Bean Cultivar Comparison in Oklahoma
Tyler Mason, Assistant Professor, Vegetables
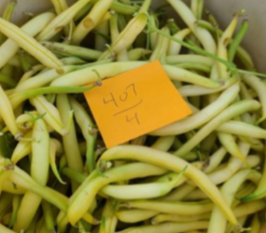
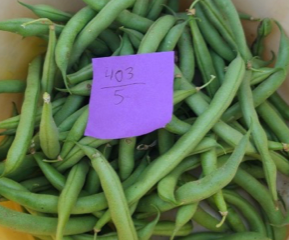
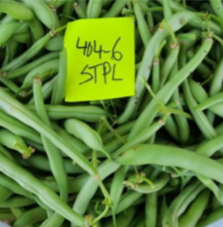
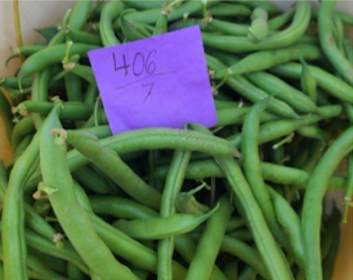
April 15 will be here before you know it. This is traditionally when snap beans (Phaseolus vulgaris L.) are planted (direct sown) in the garden. These are the results of a study on snap bean cultivar performance in terms of yield in Oklahoma. This is the product of Jess Richmond’s master’s thesis, with support from Donna Chrz and Drs: Niels Maness, Lynn Brandenberger, Shivani Kathi, Tyler Mason, Bizhen Hu, and Carla Goad. To read the full published article, visitYield and Quality of Snap Bean (Phaseolus vulgaris L.) Cultivars from Successive Harvests in Spring and Fall Production Seasons in Oklahoma in: HortScience Volume 59 Issue 12 (2024)
Snap beans are a warm season crop that are both cold and heat sensitive. They provide a source of carbohydrates, fiber, vitamin C, vitamin K, and beta carotene. Fresh market snap beans in Oklahoma accounted for 32 acres of production across 84 farms. Traditionally, they are planted in the spring, but there is the potential for a fall crop if planted by August 15. The aim of this study was to evaluate the performance of nine snap bean cultivars.
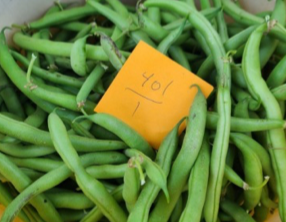
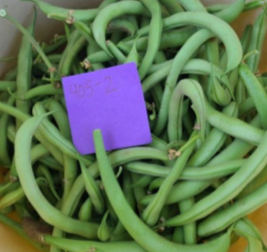
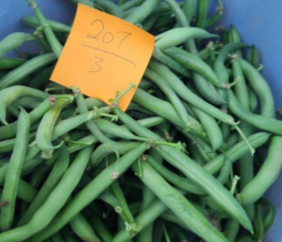
The Southeast U.S. Vegetable Crop Handbook (2024) 2024_SEVEG_final_web.pdf indicates the cultivars: Bronco, Bush Blue Lake 274, Jade, Lewis, Roma II, and Strike are suitable for Oklahoma production. We compared Bronco and Strike (industry standards) to seven other cultivars (listed below). The cultivars were a mixture of early, mid, and late maturing options as well as green and yellow color pods. In short, the snap beans were grown under conventional management with adequate fertilizer and sufficient irrigation provided through drip tape. They were harvested for three consecutive weeks, at the same pod size.
Figure 1: List of Cultivars Evaluated in the Snap Bean Study at the Cimarron Valley Research Station (Perkins, Oklahoma) 2022-2023.
'Bronco' - Mid Maturity days
'Contender' - Heat Tolerance, Mid/late Maturity days
'Momentum' - Heat Tolerance, Mid/late Maturity days
'SV1003GF' - Late Maturity days
'BA099' - Early/mid Maturity days
'Strike' - Continious Setting high yielding, Early/Mid Maturity days
'Sybaris' - High yielding, Early/Mid Maturity days
'Valentino' - Heat tolerance, Mid/Late Maturity days
'Carson' - Late Maturity days
| Cultivar | Kg/Ha | Lbs/Ac | Lbs/16 plants | Statistical grouping1 |
|---|---|---|---|---|
| Sybaris | 4,200 | 3,747 | 0.57 | b |
| Strike | 5,900 | 5,264 | 0.81 | ab |
| Momentum | 6,000 | 5,353 | 0.82 | ab |
| Bronco | 7,000 | 6,245 | 0.96 | a |
| Valentino | 7,800 | 6,959 | 1.07 | a |
| Contender | 7,900 | 7,048 | 1.08 | a |
| Carson | 8,200 | 7,316 | 1.12 | a |
| SV1003GF | 8,500 | 7,584 | 1.16 | a |
| BA099 | 8,700 | 7,762 | 1.19 | a |
Means1 with same letter (statistical grouping) within each individual column are not significantly different (Turkey, a= 0.05).
Summary
In addition to the cultivars recommended (Bronco and Strike) in the Southeast U.S. Vegetable Crop Handbook (2024), for Oklahoma, there appear to be some additional cultivars worth considering, such as Valentino, Contender, Carson, SVG1003GF, and BA099.

