April 2025 Hort Tips
Tuesday, April 1, 2025
Growing Asparagus
Dr. Tyler Mason, Assistant Professor, Vegetables
Asparagus (Asparagus officinalis) is a cool-season perennial crop that thrives between temperatures of 60-80°F. Around April 1st, mow last year’s fronds off. Apply fertilizer based off a soil test, typically this is about 100 pounds of nitrogen per acre a year. Also apply herbicides at this time to manage perennial and annual weeds. Glyphosate is a broad spectrum, systemic nonselective herbicide for controlling grass and broadleaf species in asparagus. Diuron is a pre-emergent herbicide effective at controlling annual and perennial weeds in asparagus. Asparagus is a crop that is productive for 15-20 years, but weed control is the biggest issue. The crop can be started from transplants, which were started from seeds in January in a greenhouse or from crowns. Both are planted in late March or early April. Crowns are vegetative propagules that are one- or two-year-old stock. A big difference between transplants and crowns is the price. On average, transplants are started from seeds which cost about $.40 a seed. Crowns are about $1.40 a piece if purchased in bulk. The other main difference between crowns and transplants is the time to harvest.
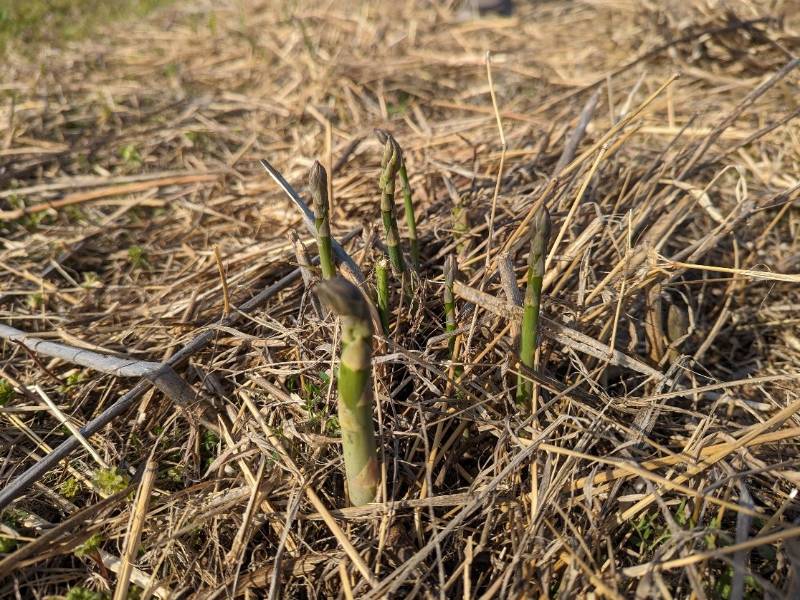
Figure 1. Newly emerged asparagus spears (4 April 2024).
| April 1, 2022 | Plant Crowns | Plant Transplants |
|---|---|---|
| April 2023 | Harvest for two weeks | No harvest |
| April 2024 | Harvest for four weeks | Harvest for two weeks |
| April 2025 | Harvest for six weeks | Harvest for four weeks |
| April 2026 | Harvest for six-eight weeks | Harvest for six weeks |
Some of the newest cultivars include: ‘Guelph Millenium’, ‘Purple Passion’, ‘Guelph Eclipse’, and ‘WB 212’.
Resistance, Our First Defense to Pests
David Hillock, Senior Extension Specialist, Consumer Horticulture
One of our best defenses against common pest problems in the garden and landscape is plants with natural resistance. By selecting varieties of plant species, or species that are inherently resistant to common pest problems, the use of pesticides needed to keep our plants looking good can be reduced.
When buying seeds or plants, try to choose those with built-in resistance to diseases, insects, and nematodes. Sources for this information include OSU Extension Fact Sheets, seed catalogs, and plant and seed packages. It may be better to forego some production capability in favor of the increased pest resistance, if you must make such a choice.
During the growing season, stressed plants can lose their resistance to pests, so be sure the crop has the water and nutrients it needs. When shopping for seeds and plants, check the labels for indications of pest resistance. For example, many garden phlox and crapemyrtles are susceptible to powdery mildew fungal disease; however, several varieties are available that are resistant to powdery mildew. When purchasing vegetables, check labels or packaging for abbreviations like these, used to designate various types of pest resistance or tolerance:
- A—Alternaria stem canker
- ALS—angular leaf spot
- ANTH—anthracnose
- CMV—cucumber mosaic virus
- DM—downey mildew
- F—Fusarium (race 1)
- FF—Fusarium (races 1 & 2)
- L—leafspot
- MDM—maize dwarf mosaic
- N—nematode
- NCLB—northern corn leaf blight
- PM—powdery mildew
- SCLB—southern corn leaf blight
- St—Stemphylium (gray leaf spot)
- SW—Stewart’s wilt
- TMV—tobacco mosaic virus
- V—Verticillium
April Pecan Management
Becky Carroll, Senior Extension Specialist, Pecans
While some areas are experiencing bud break, especially in the southern counties, other trees may still be dormant.
Things to Consider for the Dormant-to-Budbreak Timeframe:
Weed Control: Apply pre-emergence and post-emergence herbicides. CR-6242 Weed Control in Pecans, Apples, and Peaches details the chemicals that will help with weed control. Identify the type of weed—broadleaf or grass—to determine the appropriate herbicide. A multi-approach is often helpful. Also, sprayer calibration is key for effective control.
Continue Pruning: Prune for good structure. A central leader is stronger and can withstand heavy crops, wind, and ice better than a multi-leader trunk. Start training in year one. For details on each stage of training, refer to Fact Sheet HLA-6245: Training Pecan Trees.
Insect Control: If phylloxera was a problem last year, spray only the affected trees when growth begins (bud break to 2 inches of shoot growth). Certain pesticides can control overwintering pecan nut casebearer, hickory shoot curculio, sawfly, leafhoppers, and other pests. Avoid spraying insecticide unless previous history of pest issues to avoid reducing beneficial insects. For further guidance, consult Extension Current Report CR-6209.
Apply Zinc: At bud break, begin applying foliar sprays of zinc every 14 days until mid-July on small trees. Apply 2 lbs. of 36% zinc sulfate in 100 gallons of water. For mature trees, apply three foliar zinc applications at 6 lbs./acre. Producing trees will benefit from one to three additional zinc applications at two- to three-week intervals. Other commercial zinc materials are available; follow label instructions or use rates that provide equivalent zinc amounts to the recommended zinc sulfate rates. Zinc may be included with pesticide sprays.
Disease Control – For Improved Varieties: Spray scab-susceptible varieties when leaves are about half of their normal size, typically from April 25 to May 10, at the pre-pollination or parachute stage and then again with the first casebearer spray. Then, consult the Mesonet Oklahoma Pecan Scab Advisory to determine the next spray timing. For native varieties, apply the first spray with the casebearer spray and then consult the model to decide whether additional sprays are needed. For further guidance, consult Extension Current Report CR-6209.
Apply Fertilizer if Needed: For producing trees, apply soil-applied fertilizers based on the leaf analysis results from the previous July sample. If leaf sampling was not done or for pre-production trees consult HLA-6232: Fertilizing Pecan and Fruit Trees for recommended fertilizer application rates. When applying phosphorus and potassium, band the application instead of broadcasting it to improve tree uptake.
Whip and Tongue Grafting: Whip graft small trees in early April. The procedure is outlined in HLA-6205: Whip and Tongue Grafting Pecans.
Bark or Four-Flap Grafting: Begin grafting when the bark slips easily, usually late April in southern Oklahoma and early May in the northern part. These two grafting methods are detailed in Extension Fact Sheets HLA-6204: Bark Grafting Pecans and HLA-6230: Four-Flap Grafting of Pecans. When livestock grazes in the grove, place grafts at least 6 to 7 feet above the ground.
Pre-germinate Seeds: Remove seeds from stratification and pre-germinate them before planting, after the frost-free date. For directions on growing seedling container trees, refer to HLA-6207: Starting Pecan Trees.
For additional information, videos, and webinar recordings on specific management topics go to OSU Pecan Management.
Tomato Cages
David Hillock, Senior Extension Specialist, Consumer Horticulture
Tomato cages are very beneficial to the production of your tomatoes. Not only do they provide support for indeterminate types to sprawl upon, but they also keep the fruit off the ground and provide better air circulation through the plants thereby reducing chances of disease development. By encouraging vertical growth, you can also grow more in smaller spaces.
Though manufactured cages are available for purchase, you can build your own. Any strong material can be used including wooden stakes or wire fencing/mesh. Wooden stakes about 6 feet long should be used. Tie the plant to the stake as it grows. Wire fencing/mesh cages should be about 18 to 25 inches in diameter and 3 1/2 to 5 feet tall. Use concrete reinforcing mesh, 10-gauge wire frame or other sturdy wire mesh that has openings of at least six inches. These larger openings allow you to reach in and harvest fruit more easily. Cut and bend the mesh into cylinders fastening the ends together. Snip off the bottom one or two rungs. By cutting off the bottom one or two rungs, the cage can be pushed into the ground at least six inches deep around each plant.
Feeding the Birds
David Hillock, Senior Extension Specialist, Consumer Horticulture
Supplying bird feeders in the landscape will create additional opportunities to watch birds feed. Place bird feeders where they can easily be seen from the house and enjoy the activities of the birds. Keep feeders stocked. Shrubs or trees should be no closer than 10 feet so birds can escape in case of danger.
Bird feeders should be cleaned regularly. Diseases can grow in wet and moldy seeds, in bird droppings, and in warm sugar water. To clean your feeders, soak them in warm soapy water and thoroughly scrub with a brush or rag. Thoroughly rinse all parts. To make sure they are thoroughly clean and free of any potential diseases you can soak your feeders for a few minutes in a bleach solution of nine (9) parts water to one (1) part bleach. Remove from bleach solution and thoroughly rinse all parts, let the feeder dry completely before refilling with fresh food. It is a good idea to move your feeders each season to give the ground underneath time to break down the seed debris and bird droppings or rake up the seed debris and place it in the compost pile.
Seed feeders are visited by cardinals, juncos, sparrows, chickadees, finches, mourning doves, blackbirds, squirrels, chipmunks, and others. Fruit feeders (wedges of oranges, apples, bananas) are favored by orioles, bluebirds, towhees, woodpeckers, tanagers, brown thrashers, catbirds, and robins. Nectar feeders attract hummingbirds, orioles, and occasionally a variety of other seemingly unlikely birds such as woodpeckers and chickadees.
Gardening Over Lateral Lines (Septic Drain Fields)
David Hillock, Senior Extension Specialist, Consumer Horticulture
On occasion someone wants to know if it is OK to plant vegetable crops or other plants over lateral (sewer) lines. The general recommendation from Water Quality Specialists is if the system is working properly and no water is coming to the surface, above ground crops should be safe to grow and harvest. If below ground crops (root crops) such as potato or carrots are desired, it is not recommended that they be planted over lateral lines. Risk of contamination of the crop is likely if the system fails, and contaminated water comes to the surface. Though contamination is likely to be only on the surface of the vegetable, it is not worth the risk!
Turfgrasses, native grasses, and annual and perennial plants including wildflowers are the best plants to maintain over lateral lines. Shrubs and trees, especially fast growing, with aggressive water-seeking roots such as willow, most maples, elms, birch, poplars, and ash trees could lead to root invasion into lateral lines causing problems with the system working properly. It is best to keep large shrubs and trees at least 30 to 50 feet away from lateral lines. Generally, it is recommended to stay as far away as the plant is tall at a minimum. So, a specimen 50 feet tall at maturity should be at least 50 feet away.
Remember that the drain field needs sun to perform optimally so avoid dense groundcovers and lots of tall plants that cast heavy shade.
Using Bedding Plants in the Landscape!
David Hillock, Senior Extension Specialist, Consumer Horticulture
Bedding plants or annuals continue to be a garden favorite because they provide a full season of color and interest. They also have many uses, to name a few – temporary ground covers, hanging baskets, containers, dried flowers, cutting gardens, wildflower gardens, mass plants, etc. The following tips will help to ensure a successful and stunning display.
Bed Preparation!
The key to successful planting is proper bed preparation. Remove all debris and gain control of weeds before planting. Choose a suitable site: i.e. – sun, shade; close to a water source; and away from shallow rooted trees and shrubs, which compete for water and nutrients. Soil tests are recommended to determine proper amounts of fertilizer to apply. Often gardens need only applications of nitrogen. Amend soil by incorporating 3 - 4” of composted organic matter into the area; this improves soil aeration, improves drainage, encourages healthier root systems, and is easier to plant and manage. Spade or till evenly in the organic matter at least 6” deep. After planting, apply a light mulch about 1 inch thick if necessary. Mulches can aid in shading out weed seed as well as moderating soil temperatures and moisture.
Timing
In Oklahoma, planting times will vary depending upon which part of the state you live in. In the north central portion of the state the middle to latter part of April is the time to begin planting many of the annuals available in your garden center or nursery. Southeast residents may be a week earlier, and northwest residents may be about a week later. Remember that these planting times are based on average last frost dates. The planting of warm-season species like Catharanthus roseus (Annual Vinca) should be delayed until warmer weather is sure to stick around, and the soil temperatures are at least 65o F or better.
Design - A Living Bouquet
While the following are not necessarily hard and fast rules and may create a bit of a challenge for some of us, it is certainly worth the time and effort when the right “combination” is achieved. Take time to plan the design properly. Take into consideration cultural requirements, principles of color, and placement of different species. Also, don’t be afraid to copy what others have already proven to be successful.
Avoid planting monocultures (beds with all the same species e.g. – all vinca or all marigold, etc.) or monochromatic gardens (all one color). Instead, try combining several annual species into one design. The benefits of mixing several species together are twofold: 1) it adds interest (height, color, and texture differences) to the garden and is pleasing to the eye. While the flowers and color in themselves are beautiful, using just one flower and/or color will not hold one’s interest for very long. 2) At the same time, you protect yourself from total failure due to a pest particular to one species that could wipe out the whole bed. Mixing species and/or cultivars provides genetic diversity, which reduces the chances of an insect or disease becoming well established in a bed.
Group plants that have the same cultural requirements to increase success; make sure you select those species best suited for the site i.e., sun, shade, wet, or dry (HLA-6425). Do not place plants that thrive in cool, moist shade into a bed in full sun and little water.
Working with colors can be tricky, but by using the following principles and tips, and some practice, you will soon be creating some wonderful bouquets.
- The color wheel is divided into cool and warm hues, using three primary colors – red, yellow, and blue. Cool colors such as blue, green, and violet are subdued. Warm colors such as red, yellow, and orange tend to catch the eye more easily.
- Color groupings can be harmonious or contrasting. Hues are shades of colors. Hues in any neighboring group on the color wheel are harmonious or analogous. Complimentary contrasts are formed by choosing colors opposite each other on the color wheel.
- A successful design will have a balance of analogous and complimentary contrasts.
- White, silver, or gray, and yellow should be used sparingly since they tend to drown out the rest of the design. These colors can be used as a “sparkle” and in general should not make up more than 10 percent of the composition.
In general, flowers need to be planted in drifts or clumps large enough to make a visual difference when viewed from the farthest vanishing point. Of course, this may not be practical as dictated by the pocketbook. But large masses of flowers are more dramatic and satisfying.
Color balancing and strategically placing the dominant colors in the composition or throughout the garden will lead the eye from one end of the bed or garden to the next.
Color balancing can be used to trick the eye into thinking that the garden is deeper or larger than it really is. By using bright strong colors close to the viewer, and then getting progressively bluer and grayer and lighter as you go further back, you can create the illusion of depth.
Height differences can also be used to exaggerate depth by emphasizing the height differential between the little plants in front and the tall ones in the back. The ever-increasing height allows more of each color to be seen enhancing the overall effect.
In general, small, or short plants are placed in the front and tall ones in the back. However, more interest can be created by bringing some of the tall plants closer to the front and pushing short ones toward the back. Some successful combinations for partial or light shade might include begonia, impatiens, wishbone flower and a touch of marigolds for sparkle; for sun you might use combinations of blue salvia, summer snapdragon, vinca, Joseph’s coat, and zinnia and use dusty miller for sparkle.
How Many Bedding Plants Do I Need?
Avoid overbuying or underbuying the number of bedding plants you need. All it takes is some simple arithmetic.
- Measure the area of your garden and calculate its square footage (width x length = square feet). If the area is irregularly shaped – oval, round or long and winding – a rough estimate is good enough.
- Use the chart below to estimate the number of plants you will need. You will probably want to get at least a few more than you will need, just in case some are damaged by weather, animals, or pests.
| Recommended Spacing | Number of Plants per Sq. Ft. |
|---|---|
| 6 inches | 4 |
| 8 inches | 2.25 |
| 10 inches | 1.44 |
| 12 inches | 1 |
| 18 inches | .44 |
| 24 inches | .25 |
Example: A 125 sq. ft. garden, using plants recommended to be spaced 10 inches apart would need approximately 180 plants.
The above information is only the tip of the iceberg. For more information and ideas look for books that discuss the principles of design and color and study them or visit your local public gardens or retail garden centers for their expertise. Oh, and don’t forget, Have Fun!
Hardy Ferns for Oklahoma
David Hillock, Senior Extension Specialist, Consumer Horticulture
Plants that grow well in the shade include ferns. There are several hardy ferns that can be grown in Oklahoma, in fact, there are over 40 species of hardy ferns that are native to the state. Ferns generally like a humid, shaded environment; however, some ferns can withstand more sun than usually thought.
Ferns naturally grow in rock crevices, in trees, or in very shallow, moist soil. Even though they like moist soil it must be well drained. Basically, ferns like to be moist – not wet. If you are planting a fern, amend the soil with plenty of organic matter and make sure they are planted in a spot that drains well. A good mulch can help the area stay moist.
Two ferns that are native to Oklahoma include the Lady fern (Athyrium filix-femina) and the Christmas fern (Polystichum acrostichoides). The Lady fern can grow to be 2 to 4 feet tall, has finely divided, lacy fronds, and is a vigorous grower. It likes intermittent to deep shade and likes to have a constantly moist soil. The Christmas fern grows 1 to 1 ½ feet tall with stiff fronds that grow upright until weighted down by rain. This fern likes light to heavy shade and likes to be planted at an angle with the roots under a rock.
Two easy ferns for beginners are in the genus Dryopteris. The robust Male fern (Dropteris filix-mas) is native to Europe, Asia, and North America and has erect growth that can reach 2 feet. This fern has seasonal color variations. The expanding fronds are copperish pink to yellow which then turn green in summer and then become a lovely bronze shade in the fall. Another bonus is that the spore cases of this plant are red and can be easily seen on the upright growing fronds. Both ferns are more forgiving of soil, light, and moisture conditions than some of the other hardy ferns. For a fern that has a nice dark green color, try growing the tassel fern (Polystichum setosum). This native of Asia has handsome, dense lacy fronds which are a dark, shiny green. The fern grows to 2 feet tall and is hardy to zone 5.
A most beautiful fern for its unusual color is the Japanese Painted fern (Athyrium nipponicum ‘Pictum’). This fern grows to 1 a/2 foot in a tight, slowly spreading clump. The leaflets of each frond are purplish at the base, changing to green then to a silvery gray tip. This fern likes medium to intermittent shade and rich, moist soil.
For more information about growing hardy ferns see our fact sheet HLA-6474 Hardy Ferns for Oklahoma.